(The following are the near-beta rules for Hermann Luttmann’s new Franco-Prussian War game: At Any Cost: Metz 1870. They lack an index, a table of contents and illustrations. Plus there are no Combat Results Tables or Scenario Instructions either. But if you find any other errors we would greatly appreciate it if you would drop us a note in the comment section.
AAC is on sale now as a GMT pre-order. Hopefully, it will be published in the summer of 2015.
But feel free to read and comment on these proposals as you see fit – after all the work we’ve put into At Any Costs: Metz 1870 we want to produce a perfect set of rules, but we’ll settle simply for an excellent set if that’s all we can get – Fred)
AT ANY COST:
METZ 1870
1.0 Introduction
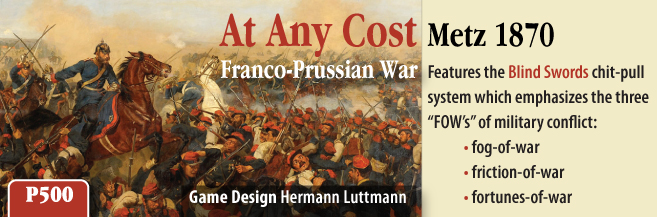
On the morning of August 16th, 1870 at the Gravelotte crossroads outside the fortress of Metz, Napoleon III, Emperor of the French Second Empire, turned over command of the Army of the Rhine to a reluctant Marshal Francois Achille Bazaine. The Army of the Rhine, the last intact field army and already the last hope for France during the two-week old Franco-Prussian War, was gathered around the protection of the Metz fortress complex. The Prussian First and Second Armies were sweeping forward, hot on the heels of the retiring French. But poor weather and a disorganized cavalry screen allowed the French army to break contact with the pursuing Prussians. Helmuth von Moltke, Chief of the Prussian General Staff, instructed his armies to wheel south of the fortress, cross the Moselle River and attempt to catch the French in flank. The only problem with this plan was – where were the French? The resulting two-day campaign produced some of the more remarkable battles in military history – the Battles of Mars-La-Tour and Gravelotte-St. Privat. These two battles produced over 60,000 casualties, with each army suffering equally. Both battles had significance not only for the Franco-Prussian War, but for the course of European history. In fact, Otto von Bismarck remarked at Versailles in January 1871: “What is certain beyond argument is that the war – and with it the future of Europe – was decided at Mars-la-Tour on 16 August 1870.” At Any Cost: Metz 1870 is a game simulating the situation west of the Metz fortress during those few days of August 1870. The game is designed to be a playable, two-player brigade-scale game that allows players to experience the unique tactical warfare matchups that characterized fighting during the Franco-Prussian War. This era, though generally overlooked in the gaming industry, is a fascinating study in Napoleonic tactics (and uniforms) slamming head-on into modern killing technology. The Prussian military juggernaut is armed with the new steel Krupp breach-loading artillery pieces that far outclassed the French guns. Prussian doctrine, adapted to the lessons learned during the Austro-Prussian War of 1866, allowed junior officers to exercise initiative and aggressiveness. The French army, meanwhile, was armed with the modern and deadly Chassepot rifle, a firearm so advanced that many argue its deployment alone should have won the war for the French. In addition, the French army was now equipped with their ultimate secret weapon – the Mitrailleuse, which was the first machinegun used en masse. Moreover, the game system makes clear that the French soldier, despite misconceptions to the contrary, fought valiantly during these battles. By all rights, they could have – and should have – won many of these engagements. But leadership, morale and tenacity won the day for the Prussians. All these factors are seamlessly embedded into the At Any Cost game system and players will be challenged to utilize their advantages and minimize their disadvantages throughout the game. Will YOU as the Prussian player be able to withstand an early severe numerical disadvantage and use the brave audacity of the Prussian soldier and artilleryman to win the day? Can YOU as the French player overcome the lethargic and uninspired command structure of the Army of the Rhine and allow your tough and well-equipped infantry to fight unhindered? At Any Cost: Metz 1870 also features the Blind Swords chit-pull system which emphasizes the three “FOW’s” of military conflict: fog-of-war, friction-of-war and fortunes-of-war. With each chit pull, players will be challenged to make tough decisions based on their assessment of the current situation. Unlike traditional chit-pull mechanisms, the Blind Swords system ensures that no combat units can be counted on, or conversely, counted out. This yields an environment of tense action and constant surprises – an environment that will challenge each player. “It will cost what it will!” – Adalbert von Bredow, immediately before he led the famous “Deathride” of the Prussian 12th Cavalry Brigade at Mars-La-Tour.
2.0 Game Scale and Map
2.1 Scale Each map hex is approximately 500 yards across. Regular infantry and cavalry units represent brigades. Infantry Detachments are groups of battalions or regiments operating independently. Artillery units represent groupings of batteries by weight of gun. Artillery Sections are smaller deployments of only a few batteries. Each HQ Unit represents the Corps or Division commander, his staff and logistical train. One Strength Point (SP) equals about 600 infantry, 450 cavalry, 3 “heavy” cannon or 4 “light” cannon. One turn is approximately 1 hour. 2.2 Map Details Elevations: There are four terrain elevation levels depicted on the map (from lowest to highest): Flat, Low, Raised and High. Flat terrain is white, Low is light green, Raised is brown and High is yellowish-brown. Roads: There are two types of Road hexes – Minor Roads and Major Roads. Minor Road hexes cost any moving unit only 1 MP, regardless of other terrain in the hexes or across hexsides. Major Roads function the same way as Minor Roads, but also allow the use of the Road March Bonus (12.10) to qualified units moving from one Major Road to a connected Major Road hex. 2.3 Rounding Convention During any required calculations, fractions are always dropped. If there are multiple calculations to be made, drop any fraction after each step before continuing on. For example, if a unit’s SP value of 7 has to be halved twice, it is halved the first time to 3 and the second time to 1.
3.0 Game Equipment
3.1 Combat Units Combat units represent the fighting troops of each side and do not include HQ units. Each counter displays game information as follows: Brigade / Division / Corps Tactical Cohesion Rating Strength Points / Firing Ranges (Effective/Extreme) / Movement Allowance The front of each counter shows the unit at its Fresh side (FR) and the reverse side shows the unit after it has taken significant combat losses and indicates it is Battleworn (BW). The Battleworn side is displayed with a different coloring scheme than the Fresh side for easy distinction. Note that some Small Units only have a Battleworn side.
- Unit Identification: Units are identified by Brigade / Division / Corps in the top bar of the counter. Units belonging to a particular Corps or independent Division have a color-coded band on their counters matching the corresponding HQ unit. When an HQ activates, all units marked with the identical color are activated along with it.
- Tactical Cohesion Rating: On the right side of the counter, the unit’s Tactical Cohesion Rating (TCR) is displayed in yellow. This is a measure of the unit’s training, morale and experience. The higher the TCR of a unit, the more dependable and effective it is in combat. When being modified for any reason, the TCR can go no higher than “10” and no lower than “0”.
Note therefore that a unit with a modified TCR of “10” cannot fail a Tactical Cohesion Test, etc. and by the same token, a unit with a modified TCR of “0” cannot pass such a test.
- Strength Points (SPs): A unit’s SP is its relative size is used in Fire and Assault Combat resolution. A unit’s effective SPs can be modified by game conditions, such as Fire Combat Range, Elan Hits, etc. A unit’s SP value can never be lower than “C”. Heavy Artillery units have their SP number highlighted in red and Mitrailleuse markers have their SP highlighted in green as a reminder of the Tactical Cohesion Test effects on their targets.
- Firing Ranges: Infantry and Artillery units have two ranges that are referenced during Fire Combat. The first number is the unit’s Effective Range in hexes (up to which it can fire normally). The second, parenthesized number is the maximum number of hexes over which a unit can fire and represents the unit’s Extreme Range. Fire issued at the Extended Range halves a unit’s SPs for the Fire Combat. Cavalry. HQ and Cavalry units do not have Firing Ranges as they are not able to issue fire.
- Movement Allowance: A unit’s movement ability is expressed in the number of total Movement Points (MPs) that can be spent in a turn. A unit’s Movement Allowance can be affected by certain game conditions (such as Orders).
- Cavalry units also have a “weight” class listed in the middle of their counters. This reflects the unit’s armament, protection, equipment and size of its horses and is referenced when making a Cavalry Charge. The classifications are:
Light / Medium / Heavy. 3.2 Unit Types There are three types of Combat Units – Infantry (soldier figure), Cavalry (horseman figure) and Artillery (cannon figure). Each type of Combat Unit has unique capabilities which are detailed in the relevant section of the rules. Cavalry units are sub-divided by weight into Light, Medium or Heavy. Artillery is sub-divided into Field, Heavy and Horse. 3.3 Unit Tiers Most units possess three Tiers (also called “steps” in some games). A unit’s current Tier is shown by the side of the counter that is face-up, by its location on the Game Turn Track or its presence in the Available for Rebuild Box. Each time a unit receives a successful Casualty Hit, it is reduced one Tier. A unit’s Tier level is one of the following: 1st Tier = Fresh (Fresh side of counter face-up) 2nd Tier = Battleworn (Battleworn side of counter side face-up) 3rd Tier = Broken (if the unit fails its Break Test, it is removed from the game and located either on the Game Turn Track – if not eligible to be Rebuilt yet – or in the Available For Rebuild Box – if it is eligible to be Rebuilt). Note that once a unit is on its BW side, it cannot be flipped back over to its FR side during a “Battle” scenario. It is possible to do so during a Night Turn of a “Campaign” scenario only. 3.4 Small Units Note that some Small Unit counters do not have a Fresh side and thus they have no 1st Tier (they are always either Battleworn or Broken). Otherwise, they function like a normal Combat unit. 3.5 Breakdown Units Infantry Detachment and Artillery Section units represent smaller groups of troops (regiments and battalions) and guns that are formed by breaking down the larger brigade and artillery group units. They are used when players elect to implement the optional Unit Breakdown rule (17.0). They function like normal Combat units of that type. Note, however, that because of their smaller size, Breakdown Units have a higher Movement Allowance than their parent units. 3.6 HQ Units These counters represent a Corps or Division general, his staff and the core of the logistical train of his formation. HQ units are not Combat units. The game information is displayed as follows: Corps orDivision General’s Name Command Rating – Orders – Movement Allowance
- Unit Identification: HQ Units are identified by the Corps or independent Division they command. The top of the HQ Unit counter has a color-coded band which matches the color of the Combat unit under their command. When an HQ activates, all units marked with the identical color are activated along with it.
- Command Rating: Each HQ unit has two Command Ratings, one on each side of its counter. This number represents the relative command efficiency of a headquarters, expressed as a range of hexes, for the two Orders listed adjacent to it on each side. The Command Rating is only in effect for the two Orders listed on the same side of the counter. An HQ unit that finds itself Overrun has a Command Rating of “0” and thus only units it is stacked with are considered to be In Command.
- Orders: Each side of the HQ counter has two possible Orders. Only those Orders can be used when that side of the HQ counter is face-up. Orders are Attack, Defend, March or Regroup. Each Order has various effects on play, as described in 11.0.
- Movement Allowance: This number represents a unit’s movement rate and is expressed in the number of total Movement Points (MPs) that it can spend in a phase.
3.7 Game Markers Various game markers are available to help players indentify certain game conditions and are placed as instructed by the relevant rules section. It is suggested, since there is minimal stacking in the game, that players place relevant markers under the affected unit to keep the identity of units clear to each side and to hide the condition of the unit from the opposing player. Players need not reveal game markers until the time that the condition they represent affects play.
- Elan Markers: These have “Shaken” on the front side and “Disrupted” on the reverse side.
A unit with a “Shaken” marker is said to be a Shaken Unit. It has its SPs and TCR reduced by one (-1). A unit with a “Disrupted” marker is said to be a Disrupted Unit. It has its SPs and TCR reduced by two (-2).
- Ammunition Problems Markers: These markers have “Low Ammo” on the front side and “Rationed Ammo” on the reverse side. A “Low Ammo” marker does not adversely affect the unit. A “Rationed Ammo” marker means the unit cannot conduct normal Fire Combat but may only issue Defensive Fire at half of its SPs.
- Mitrailleuse Markers: Each French Division Artillery unit has a “Mitrailleuse” marker assigned to it (the one with the same Corps ID coloring), reflecting deployment doctrine used by the French for these machineguns. This is a marker for stacking purposes and thus stacks for free with its Division Artillery unit. The “Mitrailleuse” marker suffers the same fate as its parent unit, applying the same Elan and Ammo Problems markers and flipping over to its BW side when the Artillery unit does. Whenever the Division Artillery unit elects to issue Fire Combat, the “Mitrailleuse” marker may also do so independently. Note the marker has its own SP value, different Fire Ranges and uses a different Fire Combat CRT than the Artillery does. It may select a different target than the parent unit or fire at the same one. In Assault Combat, add the “Mitrailleuse” marker’s SPs to the parent Artillery unit’s SPs.
Historical Note: The Mitrailleuse was a rapid fire, hand cranked machinegun-like weapon that had multiple gun tubes strapped in a circular arrangement on its chassis and was deadly efficient. The problem was that the French deployed the Mitrailleuse batteries with the regular artillery batteries, rather than with the infantry. In the rear-deployed artillery zones, the Mitrailleuse was too far from the enemy infantry to be very effective and was subject to counter-battery fire from the longer-ranged Prussian cannon. 3.8 Chits Chits are the counters that are drawn from an opaque container and tell the players which formation will be activated next or which event can be enacted. There are two types of chits: Activation Chits (showing the name of one of the French or Prussian HQ units – see 6.1) and Event Chits (displaying an Event on each side – see 6.2). 3.9 Player Aids Each player has his own player aid card displaying his army’s particular Fire Combat Results Tables (two types) along with common game play reminders and the Assault Combat Table. 3.10 Game Tracks The Game Tracks card displays all the game tracks that are necessary for play. This should be kept in an area where both players can easily reference the track information. 3.11 Draw Cup Players must provide an opaque container from which the game’s Chits are blindly drawn. 3.12 Dice The game includes four ten-sided dice – two colored and two white. The French player takes the red die and a white die while the Prussian player takes the blue die and a white die. The “0” result on the die is to be read as a “10”.
4.0 Stacking
4.1 Stacking Limits Normally, only one unit is allowed to occupy each hex, with a few exceptions:
- One Artillery unit, Artillery Section unitor Infantry Detachment unit may stack with any one other friendly unit.
- HQ units may freely stack with any friendly unit(s).
- Charging Cavalry muststack with the targeted enemy unit (see 9.5).
- A moving unit may Overrun an enemy HQ unit (see 10.) and therefore be temporarily stacked with it.
- Infantry Detachment and Artillery Section units may temporarily overstack when they are created or when they recombine (see 17.0).
For example, a hex could contain the following French units in a single stack: HQ unit, Infantry Brigade and Division Artillery unit (plus any number of applicable markers). Stacking is determined at the end of a unit’s movement, unless using the Road March bonus (see 4.2). Other moving units may temporarily over stack a hex with a friendly unit as long as they do not end their movement doing so. If a unit is halted by Defensive Fire while moving through afriendly-occupied hex, it must backtrack to the last legal hex passed through, unless it is retreating, in which case it simply continues to retreat. 4.2 Road March Units using the Road March movement bonus may not stack at any point of their movement. If they do move through another unit, they may not use the Road March rate and must instead use the MP cost of the other terrain in the hex. 4.3 Front Line and Rear Line Units If two Combat units are stacked together, the top unit in the stack is considered to be the Front Line unit and the bottom unit is the Rear Line unit. This status determines the unit’s eligibility as a target of enemy fire and also affects its level of participation in Fire and Close Combats.
5.0 Sequence of Play
Each Game Turn of At Any Cost: Metz 1870 is played in a series of Phases and Steps, each of which must be completed before proceeding to the next Phase or Step. When the last Step of the last Phase is concluded, a Game Turn is finished and play proceeds to the following Game Turn. If it is the last Game Turn of the scenario, players reference the Victory Determination procedures. Gameplay proceeds in the following sequence:
- PLANNING PHASE
- HELD EVENT CHIT PHASE
- CHIT DRAW PHASE
- ACTIVATION PHASE
- HQ Command Step
- Fire Combat Step
- Movement Step
- Assault Combat Step
- Rally Step
- END TURN PHASE
- French Activation Chit Step
- Prussian Reinforcements Step
- Housekeeping Step
5.1 Planning Phase Both players gather their ten Event chits together and then secretly select any one Event Chit to place in the Draw Cup. This can be any Event chit of their choosing. Players simultaneously drop this selected chit directly into the Draw Cup. Both players then flip all remaining Event Chits over to their Command Event side and mix them up. The opposing player randomly selects three of those Event Chits and places them directly into the Discarded/Used Chit Box. These chits are excluded and will not participate in the current Game Turn! They cannot be referenced for the remainder of the turn and remain unknown to the players until the end of the turn. Each player then simultaneously places the remaining six Event Chits into the Draw Cup (joining the pre-selected chits that were placed earlier). Next, both players determine which Activation Chits are available this Game Turn (per the Scenario instructions, French Activation Chits and Prussian Reinforcements procedures) and place all such Activation Chits into the Draw Cup as well. The player who is to draw chits this turn then shakes up the Draw Cup and places it near him for easy access. Finally, place any previously eliminated French units that are in the current Game Turn Track box into the Available for Rebuild Box. 5.2 Held Event Chit Phase If either player is holding an Event Chit (for example, Krupp’s Guns), the owning player may elect to play that chit now. If both players have such chits, the Prussian player decides who must go first. If either or both players are holding multiple eligible Event Chits, some or all of them can be played this phase. The played Event Chits are resolved in their entirety before moving on to the Chit Draw Phase. At this point, if there are no chits left in the Draw Cup, play proceeds to the End Turn Phase. 5.3 Chit Draw Phase One of the players(the Prussian player on even- numbered turns and the French player on odd-numbered turns) then randomly draws one chit from the Draw Cup. Gameplay proceeds as follows:
- If the drawn chit is an Activation Chit, all units belonging to the indicated HQ formation on the chit are activated. Proceed to the Activation Phase. After all activated units have completed the Rally Step of the phase, the drawn Activation Chit is placed in the Discarded/Used Chit Box and play reverts to the Held Event Phase.
- If the drawn chit is an Event Chit, the player who owns that chit enacts that Event per 6.3. The drawn Event chit is either held, immediately applied, placed in the Command Event area or placed in the Discarded/Used Chit Box depending on how it is enacted. Play then reverts to the Held Event Phase.
5.4 Activation Phase If the drawn chit is an Activation Chit, all units belonging to the indicated HQ on the chit are activated. All activated units then conduct the following five Steps in the order shown. Activated units must complete each Step before continuing to the next one:
- HQ Command Step
- Fire Combat Step
- Movement Step
- Assault Combat Step
- Rally Step
After all activated units have completed the Rally Step, the drawn Activation Chit is placed in the Discarded/Used Chit Box and the players return to the Held Event Chit Phase. 5.5 End Turn Phase After all chits have been drawn from the cup and acted upon, both players conduct the following four Steps:
- Final Held Event Chit Step
- French Activation Chit Step
- Prussian Reinforcements Step
- Housekeeping Step
6.0 Activation and Event Chits
6.1 Activation Chits Activation Chits are each labeled with one of the Prussian or French HQ units. All eligible Activation chits are placed in the Draw Cup at the beginning of each turn during the Planning Phase. Those Activation Chits representing formations that are not yet in the game are left in their current locations (either on the Army of the Rhine Activation Track or the Prussian Reinforcements Track). When drawn, the HQ unit that matches the drawn Activation Chit is activated, along with all its subordinate units. After activation is completed, place the Activation Chit in the Discarded/Used Chit Box. 6.2 Special Activation Chits There are two chits that provide a special Activation opportunity for each side. The Prussians have a Prussian Officer chit and the French have a Marshal Bazaine chit. These are implemented as follows when drawn:
- Prussian Officers Chit – The Prussian player may select any one Prussian Infantry or Cavalry Division (which includes all units of that Division) to activate, even if it has already activated this turn or has yet to be activated later this turn. This includes any unit of the selected Division that is in the Available to Rebuild Box and any Division that is due to arrive this turn as a Reinforcement. The units of the selected Division conduct a normal Activation Phase including having the associated HQ unit select an Order. All normal procedures follow thereafter under the limits of the chosen Order. For purposes of this rule, all Infantry Detachment units from the same Corps are considered to be one Division (and all such units may activate with this chit).
Historical Note: This chit represents the overall superior staff officer corps of the Prussian army, as well as the contributions of certain individual outstanding Prussian officers. One such officer was Georg Leo von Caprivi. As Chief of Staff of the Prussian Xth Corps, he distinguished himself not only at the Battle of Mars-la-Tour, but throughout the war. He showed great initiative by taking charge of the battlefield early on and directing the deployment of Prussian forces. It was his foresight and quick assessment of the situation that allowed the Prussians to catch the French Army of the Rhine off guard. Colonel Caprivi eventually succeeded Bismarck as Chancellor of the German Empire in 1890.
- Marshal Bazaine – The French player may select any one French Infantry or Cavalry unit to activate, even if it has already activated this turn or has yet to be activated normally later this turn. The chosen unit then proceeds in the same manner as with the Prussian Officers chit (above).
Historical Note: Marshal Francois Achille Bazaine was the reluctant Commander-in-Chief of the French Army of the Rhine. Assigned the position by Emperor Napoleon III – because Canrobert first refused it – Bazaine took the reins of France’s last intact army and was its last hope for victory. For the most part, Bazaine neglected his army command duties during the campaign. But no one could doubt his personal bravery as he insisted on involving himself in tactical matters on the front lines, often sighting individual artillery pieces! After this special activation is finished, the Special Activation chit is discarded for the turn. Note again that units that are activated by these special chits and have not yet activated this turn can still be activated normally later without penalty. 6.3 Event Chits Event Chits have game events listed on them which can be used by the owning player at an eligible time. When drawn, the Event Chit applies only to the player who owns it (Red = French, Blue = Prussian). The owning player immediately decides which side of the chit he will use – either the one on the front of the chit (the Unique Event) or the one on the back (the Command Event). He then follows the instructions to implement that event (which may include holding it for use in a future Held Event Chit Phase). Once an event is chosen, the player must stay with that choice. Whenever the Event Chit is resolved, the chit is placed in the Discarded/Used Chit Box.
- Unique Event Chits: The front side of the Event Chit contains a Unique Event. Each Unique Event is used differently by the owning player. Exactly how and when such an event can be used is detailed in the Unique Event Description section of the rules (see 20.0).
- Command Event Chits: The back side of the Event Chit represents the Command Event. When an Event Chit is drawn, the owning player may opt to use the chit for its Command Event instead of its Unique Event. If he chooses to do so, he places the chit on the appropriate track, depending on which of the two Command Events he wishes to influence. Each Command Event is used differently by the owning player and is detailed in the Command Event Description section of the rules (see 19.0).
- Fortunes of War Chit: This is a special Event Chit. When drawn, the non-drawing player rolls a die and checks the following table to determine how the chit is implemented:
1 – 3 = No Effect 4 – 6= Degrade the Next Chit 7 – 9 = Enhance the Next Chit 10 = Leader Casualty
- No Effect: Discard the chit with no further effect.
- Degrade the Next Chit: Place the Fortunes of War chit on its “Degrade Next Chit” side next to the draw cup. If the next chit drawn is an Event chit, it is discarded with no effect. If the next chit drawn is an Activation chit, all units of the activated formation are automatically Out of Command – regardless of their actual distance from the HQ unit. Apply Out of Command effects normally (7.4).
- Enhance the Next Chit: Place the Fortunes of War chit on its “Enhance Next Chit” side next to the draw cup. If the next chit drawn is an Event chit, it can be freely used as a Unique Event and a Command Event. Place the Fortunes of War chit on the Command Event Track as if it is a Command Event chit. Apply the actual Event chit normally – including the possibility of using it as another Command Event as well. If the next chit is an Activation chit, the owning player can apply one of three bonuses to all units of that activated formation: increase all unit Movement Allowances by +1 MP; apply a one column shift right on all Fire Combats; apply a one column shift right on all Assault Combats. Only one bonus can be chosen and the chosen bonus applies to all eligible units of the activated formation.
- Leader Casualty: Place the “Leader Casualty” reminder marker next to the draw cup. When the next Activation chit is drawn (if any), the corresponding HQ unit is immediately given a “Shaken” marker. This marker remains with the HQ unit for the remainder of the game and signifies that the HQ unit’s Command Range is reduced by one (-1).
7.0 HQ Orders and Command
The Order that is selected by the active HQ sets the parameters for what its units can do this turn. Orders are in effect only during the activation is question – they are ignored at all other times during the turn. 7.1 Orders HQ units are responsible for issuing Orders to their subordinate units (those with the same color-coded band on their counters). When activated, the HQ unit counter is displayed on the map with either its front side or reverse side showing. Each side of the counter lists two of the four available Orders and a Command Range (in hexes) that applies to those two Orders (only). During the HQ Command Phase, the owning player may change the activeHQ’s Order by simply flipping the unit to show the desired side. After orienting the HQ counter, the owning player announces which of the two displayed Orders he wishes to invoke and places the “Order” marker in the appropriate box on the Order Track as a reminder. 7.2 Type of Orders There are four possible Orders that an HQ can issue, detailed as follows:
- Attack Order: Units may move their full Movement Allowance. They may Engage (12.5) the enemy at will and execute any type of combat. However, HQ units may not Rally. Cavalry units may conduct a Cavalry Charge (12.7).
- Defend Order: Units may only use half of their normal Movement Allowance (drop fraction) but may Engage enemy units. In addition, Infantry units may not conduct Assault Combat. Cavalry units may still assault an enemy unit but only if they begin the turn already adjacent to that same enemy and don’t move at all. Fire Combat may be issued normally. HQ units may also conduct limited Rally activities. Units may build Fieldworks.
- March Order: Units may move their full Movement Allowance plus one additional MP and additionally may qualify for the Road March movement rate. Units may not Engage an enemy unit. In addition, no combat of any kind is permitted and no Rally is allowed.
- Regroup Order: Units may only move one hex (regardless of movement cost). No units may Engage or conduct Combat of any kind. HQ units may conduct normal Rally activities.
7.3 Command Range An HQ unit’s Command Range is equal to its current face-up Command Rating in hexes.If tracing the Command Range from any Road hex into any Road hex(Minor or Major Road), each such hex counts as only ½ hex for Command Range purposes (only). However, a Woods hex counts as two hexesfor Command Range purposes (only). The Command Range can be traced through any terrain, but not through hexes occupied by enemy units. If an HQ’s Command Rating is not sufficient to pay the cost to enter a hex, the Command Range does not extend into that hex. Note that there is no minimum range (as with Movement). An Overrun HQ unit can only place a unit currently stacked with it In Command. For example, an HQ with a Command Rating of “1” cannot trace its Command Range into a Woods hex. During the HQ Command Step, every unit of the active formation (only) must check if it is within Command Range of its HQ unit. If within range, the unit is In Command and abides by the HQ’s announced Order normally. If outside the Command Range, the unit is considered to be Out of Command Range. 7.4 Out of Command Range Effects At the moment that a unit is determined to be Out of Command Range, the active player must roll a die on the Out of Command Range Table (below)to determine the effect on the Out of Command Range unit or group. One die roll is made for each unit or Group of Out of Command Range units. A Group is defined as all Out of Command Range units that are adjacent to one another. The Group can be of any size and each unit of a Group must abide by the result of the one Out of Command Range die roll made for that Group. The Out of Command Range Table die roll results are as follows: 1 – 2= A courier gets through to the unit! Treat the unit/Group as being In Command normally. 3 – 8 = Unit is Cautious. The unit/Group is Out of Command but may move ½ of its normal Movement Allowance. It may use the Road March Bonus (12.8) if otherwise qualified. 9 – 10 = Unit Hesitates. The unit/Group is Out of Command and may not activate at all. A unit or Group that is deemed to be In Command abides by all conditions of the given Order. A unit or Group that is Out of Command is not under the assigned Order and may not Engage the enemy, conduct any Combat, Rally orbuild Fieldworks. Place a marker that corresponds with the rolled result as a reminder of the Out of Command Range effect for that unit/Group during the upcoming four Steps. For example, an active Corps is given March Orders. One of its units is Out of Command Range and rolls on the Out of Command Range Table. It gets a “Unit is Cautious” result, which means that the unit may move at ½ of its printed Movement Allowance. It does not get the “+1 MP” bonus for the March Order, but may use the Road March bonus movement rate if it otherwise qualifies to do so.
8.0 Fire Combat
8.1 Eligibility Fire Combat is voluntary and can only be conducted by active units during the Fire Combat Step, as Defensive Fire during the enemy’s Movement Step or due to an Event allowing such fire. Cavalry and HQ units may not conduct Fire Combat. Units issue fire individually and each fire is resolved completely before moving to the next unit. A unit can only fire once in the Fire Combat Step or due to an Event, but numerous times when conducting Defensive Fire. Enemy units can be targeted a multiple number of times by different firers.
- Artillery: MostArtillery units that fire in the Fire Combat Step may not move in the subsequent Movement Step (place an “Artillery Fired” marker on them as a reminder). Horse Artillery units (only) have the option to fire with ½ of their SPs and still move the following Step with ½ of their Movement Allowance (place a “Horse Artillery ½ Fire, ½ Move” marker on the unit if they choose that option).
- Front Line and Second Line Firing Units: If the firing hex is a stack of two units, both eligible to fire, the Front Line unit fires normally. The Second Line unit fires separately, but uses only ½ of its SPs.
- Front Line and Second Line Targets: If the targeted hex contains a stack of two units, only the Front Line unit is affected by the Fire Combat result unless the Fire Combat result has two results listed (separated by a “+” symbol). The first listed result applies to the Front Line unit and the second result to the Second Line unit. Apply such results independently.
8.2 Procedure The owner of the firing unit declares an eligible enemy target hex. HQ units cannot be targeted separately. The firing player determines the total number of SPs in the firing unit and then adjusts that total by any of the applicable SP modifiers as listed on the table (Extreme Range, Low Ammo, Second Line Unit and Canister). He then finds the column on the Fire Combat Results Table (FCRT) that contains the adjusted SP total. The firer then checks for any applicable Column Shifts as listed on the FCRT. These shifts can be to the left or right of the starting column and are cumulative. After determining the final Firing SPs column that applies, the firing player rolls two dice (one colored and one white) and cross-references the colored die roll (only) with the final column (don’t pick up the dice yet – you may need the white die result for a Tactical Cohesion Test). Apply the result indicated. 8.3 Line of Sight (LOS) When a unit issues Fire Combat at a target two or more hexes away, it must be able to “see” the target unit. To determine LOS, draw an imaginary line from the center of the firing unit’s hex to the center of the target unit’s hex.
- The LOS is Blocked, which prohibits the Fire Combat, if either of the following is the case:
- Any portion of any intervening hex or hex side is of a higher level than boththe firing and target unit’s hexes. The LOS is Blocked upon entering the first such intervening hex;
- Any portion of an intervening hex, including a hex edge, is Woods, Town or contains any Combat unit (enemy or friendly) and that intervening hex is at the same level as both the firing unit and the target unit’s hex. The LOS is Blocked upon entering the first such intervening hex.
- The LOS may be Obscured if the firing unit is firing over Blocking terrain. If the firing hex is at a higher elevation than the targeted hex –or- the targeted hex is at a higher elevation than the firing hex and the LOS passes through (technically over) normally Blocking terrain/units, the LOS is deemed to be Obscured and a column shift penalty applies to that fire.
- In all other cases, the LOS is Clear and the firing unit may conduct its Fire Combat without obstruction.
Note that there are no “blind zones” and such as used in some other games. 8.4 Fire Ranges Range is measured from the firing unit hex to the targeted hex in number of hexes. A unit’s Range is divided into two categories: Effective Range and Extended Range. Effective Range is the first (lower) number on the unit counter. This is the normal engagement range for the unit and has no additional effect on its fire. Extended Range is the parenthesized (higher) number on the unit counter. A unit that fires at more than its Effective Range and up to its Extended Range does so with only ½ of its normal SPs. Artillery units (but not Mitrailleuse units) firing at a target unit in an adjacent hex are at Canister Range and increase their firing SPs by an additional 50%. 8.5 Firing Unit SP Adjustments
- Unit is firing at Extreme Range = decrease SPs by 50%
- Unit is a Second Line Unit = decrease SPs by 50%
- Non-Mitrailleuse Artillery Unit Firing at Canister Range = increase SPs by 50%
8.6 Firing SPs Column Shifts
- Target Unit in Woods or Quarry terrain hex = One column shift left
- Target Unit in Farm terrain hex = Two column shift left
- Target Unit in Town terrain hex = Three column shifts left
- Target Unit in Fieldworks hex = One column shifts left
- Target Unit in Entrenchments hex = Two column shifts left
- Target in Ravine terrain hex = Two column shifts right
- Target in Stream terrain hex = One column shift right
- Firing Unit has an Obscured LOS = Two column shifts left
- Firing Unit on higher elevation is firing at target on lower elevation (Plunging Fire) = One column shift right
- Target Unit is Front Line Cavalry = Three column shifts right
- For each additional Defensive Fire issued by a unit (after the first such fire) in a single Phase = Two column shifts left
- Firing Unit with a Feu de Bataillon Event Chit = One column shift right
- Target Unit has a Battlefield Conditions Event Chit played = Two column shifts left
- Firing Unit has a Battlefield Conditions Event Chit played = Two column shifts right
In the case of multiple terrain types, all indicated columns shifts apply and are accumulated. 8.7 Fire Combat Results There are two distinct Fire Combat Results Tables (FCRTs) used in At Any Cost when resolving Fire Combat. One table is used when the firing unit is a Prussian Artillery, French Infantry or French Mitrailleuse unit and is the more effective of the two. The second is used when the firing unit is a Prussian Infantry or French Artillery unit. Each player has both FCRTs on his Player Aid Card, labeled for his respective units only. The firing player then rolls two dice and cross references the colored die (only) with the final SP column (after any shifts are applied) and the indicated result is applied on the targeted unit. Historical Note: The French artillery of this era was antiquated by every measure. Little was done to improve this arm of the military since the 1859 war against Austria. The breech-loading Prussian Krupp artillery guns were superior in all categories to the French smoothbore muzzle-loaders. As far as small arms are concerned, the Dreyse Needlegun was the standard issue breech-loading rifle of the Prussian army and gave the infantry a decided advantage over its Austrian opponents in the 1866 war. However, by the time the Franco-Prussian War broke out, the rifle was significantly outclassed by the French Chassepot rifle. The French Mitrailleuse was an early version of the machinegun and packed a murderous punch. Its rate of fire and hitting power were devastating and the Prussians feared their effective deployment. These factors have been incorporated into the assignment of which FCRT is used for each unit category. Fire Combat Results are applied as follows:
- — = no effect on the targeted unit.
- Routine Test (RT) = the targeted unit(s) must immediately take a Tactical Cohesion Test (see 9.0).
- Tough Test (TT) = the targeted unit(s) must immediately take a Tactical Cohesion Test and has its TCR reduced by one (-1).
- Severe Test (ST) = the targeted unit(s) must immediately take a Tactical Cohesion Test and has its TCR reduced by two (-2).
- Critical Test (CT) = the targeted unit(s) must immediately take a Tactical Cohesion Test and has its TCR reduced by three (-3).
- 1 Casualty Hit = inflict one Casualty Hit on the targeted unit(s).
- 2 Casualty Hits = inflict two Casualty Hits on the targeted unit(s).
- Penetrating Fire Result = if the box contains two results and the targeted hex is a stack of two units, the result to the left of the “+” sign is applied to the Front Line and the result to the right of the “+” sign is applied to the Second Line unit. Resolve each separately, starting with the Front Line unit.
8.8 Casualty Hits When one or more Casualty Hits are inflicted on a targeted unit, the unit is reduced one Tier for each hit. This means for each Casualty Hit, a Freshunit is flipped to its Battleworn side or a unit on its Battleworn side must take a Break Test (10.0). Note, therefore, that a Battleworn unit that suffers a “2 Casualty Hits” result must take two Break Tests. 8.9 Ammunition Problems If a unit issuing Fire Combat for any reason rolls “doubles” on the two dice (for example, a colored “4” and a white “4”), the firing unit experiences ammo problems (a shortage of ammo or other issues). Apply the Fire Combat result normally and at the conclusion of its fire, the firing unit is given a “Low Ammo” marker. A “Low Ammo” marker by itself has no direct effect on the unit (other than to serve as a warning that the ammo situation is deteriorating). However, should a unit receive a second Ammo Problems result, it is then almost totally out of ammunition. Flip the “Low Ammo” marker over to its “Rationed Ammo” side. A unit with a “Rationed Ammo” marker may only issue Defensive Fire and only at ½ SPs. However, such a unit may still conduct Assault Combat normally.
9.0Tactical Cohesion Tests
If a unit receives any Fire Combat result that indicates that it must take a Tactical Cohesion Test (TCT), the owning player refers to the white die roll (from the original two-dice roll made during the Fire Combat resolution step) and compares it to the modified TCR of the targeted unit(s). 9.1 TCR Modifications The testing unit’s TCR can be modified for the test. Applicable modifiers are as follows:
- Tough Test result = reduce testing unit’s TCR by one
- Severe Test result = reduce testing unit’s TCR by two
- Critical Test result = reduce testing unit’s TCR by three
- Testing unit is Shaken = reduce testing unit’s TCR by one
- Testing unit is Disordered = reduce testing unit’s TCR by two
- Mitrailleuse-type unit causedthe test = reduce testing unit’s TCR by one
- Heavy Artillery unit caused the test = reduce testing unit’s TCR by one.
- A “Moulin a Café” Event caused the test = reduce testing unit’s TCR by one.
- Testing unit in Earthworks = increase testing unit’s TCR by one.
- Testing unit in Entrenchments = increase testing unit’s TCR by two.
These modifiers are cumulative where applicable. 9.2 TCT Procedure (Die Roll less TCR) Reference the white die roll and subtract the modified TCR of the testing unit from that die roll. The net result is the TCT Differential. Find the TCT Differential on the TCT Result Table to get the result that is applied to the testing unit, as follows:
- -1 & less = No Effect
- 0 to +3 = 1 Elan Hit
- +4 & more = 2 Elan Hits
9.3 TCT Results Results received from the TCT ResultTable are applied as follows: No Effect: The testing unit is unaffected. 1 Elan Hit: If the testing unitcurrentlyhas no Elan Hits, place a “Shaken” marker under the unit. If the unit is already Shaken, flip the marker over to its “Disrupted” side. If the unit is Disrupted, it must take a Rout Test (see 11.0). 2 Elan Hits: If the affected unitcurrentlyhas no Elan Hits, place a “Disrupted” marker under the unit. If the unit is Shaken, flip the marker over to it “Disrupted” side and then the unit must take a Rout Test. If the unit is already Disrupted, it must take two separate Rout Tests.
10.0 Break Test
Fresh units that receive two Casualty Hits must take a Break Test. Battleworn units that receive one Casualty Hitmust take a Break Test and if they receive two Casualty Hitsmust take two, separate Break Tests (applying the effects of each independently). For each test, the owning player rolls one die (of either color) for the affected unit and compares the die roll number to the printed TCR (i.e., as shown on the unit counter and not modified for any reason) of the testing unit to get the test result. Note that this means that units are never automatically Broken by simply receiving Casualty Hits – they must fail the resulting Break Test in order to become Broken. 10.1 Break Test Procedure The owning player will roll one die and compares the number to the unmodified TCR of the testing unit and apply as follows:
- If the die roll is less than the TCR of the unit, it simply remains on its Battleworn side with no additional effect of the Casualty Hits.
- If the die roll is equal to the TCR of the unit, it remains on its Battleworn side and is given a “Disrupted” marker (if it doesn’t have one already).
- If the die roll is greater than the TCR of the unit, the unit is Broken and removed from the game(see below).
10.2 Broken Units Units in this game are never permanently eliminated. They are instead Broken and rendered “combat ineffective” until brought back into the game with the Rebuild activity during the Rally Step. Broken units are always placed on the Broken Track on their Battleworn sides. Broken units are handled differently depending on their nationality:
- Prussian Unit: Place the eliminated unit directly into the Available for Rebuild Box on the Player Aid Card.
- French Unit: Place the eliminated unit on the Turn Record Track in the Game Turn box that is two turns ahead of the current Game Turn. This unit can be placed in the Available for Rebuild Box during the Planning Phase of that turn.
Historical Note: The general state of morale in the Army of the Rhine was low and deteriorating quickly. This rule reflects that fact by delaying the return of the French troops once their morale is broken. 11.0 Rout Test Shaken units that receive two Elan Hitsmust take a Rout Test. Disrupted unitsthat receiveone Elan Hitmust take a Rout Test and if they receive two Elan Hits must take two, separate Rout Tests (applying the effects of each independently). The owning player rolls one die (of either color) for the affected unit and compares the die roll number to the printed TCR (i.e., as shown on the unit counter and not modified for any reason)of the testing unit to get the test result. 11.1 Rout Test Procedure The owning player will roll one die and compares its number to the unmodified TCR of the testing unit and apply as follows:
- If the die roll is less than the TCR of the unit, it simply remains in its current condition. There is no additional effect of the Elan Hit.
- If the die roll is equal to the TCR of the unit, it is given a “Disrupted” marker (if it doesn’t already have one) and Retreated one hex from the nearest enemy unit.
- If the die roll is greater than the TCR of the unit, it is given a “Disrupted” marker (if it doesn’t have one already), Retreated two hexes from the nearest enemy unit and flipped to its Battleworn side (if currently on its Fresh side).
12.0 Movement
12.1 Procedure Only units that are currently active can move during the Movement Step. Foot Artillery units that issued any fire and Horse Artillery units that fired at full effect in the previous Fire Combat Step may not move this Step. Each unit may spend Movement Points up to its given Movement Allowance, within the restrictions of terrain costs and Orders. A friendly unit may not move into or through an enemy unit unless it is Charging Cavalry (10.6) or when overrunning an enemy HQ unit (13.9). 12.2 Terrain Movement Costs Each unit has a number of Movement Points (MPs) available to use each turn, as indicated by the Movement Allowance printed on its counter, modified by its Order. Each hex has a dominant terrain feature and costs one or more MPs to enter depending on the type of unit moving. Active units move from hex to adjacent hex, paying the MP cost of the hex being entered, and may continue to move until they’ve spent a number of MPs equal to their Movement Allowance. If a unit does not have sufficient MPs left over to pay the cost to enter a hex, it must halt its movement at that point. However, a unit may always move at least one hex during its Movement Step, regardless of terrain costs. Refer to the Terrain Effects Chart for terrain costs. Hexes that contain multiple terrain types apply the cumulative MP cost of all those terrain features. Hexside terrain (ex: Slopes) inflict an additional MP cost on the moving unit that is added to the terrain cost for the entered hex. Note that Roads – both Minor and Major – cancel the terrain costs of other terrain in the hex and for any hexside terrain crossed. Road hex entry cost is always 1 MP (however, see Road March Bonus – 12.10). 12.3 Orders and Movement Allowance A unit’sMovement Allowance can be modified by the Order under which it is operating (see 7.2). In summary:
- Attack = full Movement Allowance
- Defend = half Movement Allowance (drop any fraction)
- March = full Movement Allowance plus one
- Regroup = one hex
12.4 Zones of Control There are no Zones of Control as found in other wargames! Units exert their influence with Defensive Fire (see 12.6). 12.5 Engagement A unit is said to Engage an enemy unit anytime it voluntarily moves adjacent to that unit. This is important under some Orders as Engagement movement may be disallowed by those Orders (see 7.2). Note that Engagement is not the same as Assault Combat! Just because a unit may Engage an enemy unit – move next to it – does not necessarily mean it can also conduct an Assault Combat. 12.6 Defensive Fire At the instant an enemy unit moves into a hex adjacent to a friendly Infantry or Artillery unit during normal movement, Event Chit movement or Retreat, that friendly unit may immediately issue Fire Combat at that moving unit (only). Should the moving unit move adjacent to two or more friendly units, each unit may fire separately. Temporarily halt the enemy unit’s movement and resolve the fire normally. If the fire results in any “Elan Hit(s)” or “Casualty Hit(s)” on the moving unit, the unit may not move any further this phase, unless it was already Retreating (in which case it continues to retreat). If the result is “No Effect”, the moving unit may continue to move (and be subject to more Defensive Fire further along – even from the same unit). Note that there is no limit to the number of Defensive Fires that may be issued by a given unit, but each Defensive Fire after the first one issued in this phase applies a “<- 2” column shift penalty for each such additional Defensive Fire. Defensive Fire may not be issued if the moving enemy unit is: * Conducting Breakthrough Movement (13.8); * Charging Cavalry moving into the targeted hex (12.7); * Temporarily stacked with a stationery enemy unit during its move (it is assumed that the non-moving unit is screening the moving unit). Also, if a unit has been successfully Charged by Cavalry (i.e. there is an enemy Cavalry unit stacked with it), it may no longer issue any Defensive Fire until that Assault Combat is resolved. 12.7 Cavalry Charges Active Cavalry units (not Horse Artillery) may conduct a special Charge move during the Movement Step, which increases the Cavalry unit’sSPs in the subsequent Assault Combat by an amount depending on their “weight”. The player must announce the charge before the unit moves. The selected Cavalry unit must first qualify as follows:
- It cannot be a Shaken or Disrupted unit;
- It must be under an Attack Order;
- It may not be adjacent to the intended target;
- It must have an LOS to the intended target before it starts its Charge Move;
- It cannot be adjacent to an enemy Combat unit at the start of the Charge move;
- It may not pass through hexes containing any friendly Combat units;
- It may only enter Clear and/or Road terrainhexes. It may cross a Slope hexside;
- It must have enough movement to enter the target unit’s hex and thus end the move stacked with the enemy unit.
Only one Cavalry unit can successfully charge the same enemy unit. An Assault Combat must then be fought in that charged hex after any other eligible moving (but not Charging) units join the combat. Note that a Cavalry unit may conduct a normal Assault Combat without charging.
- Cavalry Charge Bonus: A Cavalry unit that conducts a successful Charge or Countercharge move into Assault Combat will increase its SPs in that combat depending on its “weight”, as follows: / /.
- Light Cavalry = + 1 SP
- Medium Cavalry = x 1½ SPs
- Heavy Cavalry = x 2 SPs
- Charge Disorganization: A Cavalry unit that has conducted a Charge Move (including a Countercharge or Opportunity Charge – see 12.8 and 12.9) is always made a Disrupted unit at the conclusion of the Assault Combat Step (and after any Breakthrough Move).
No Franco-Prussian War game would be complete without allowing for the possibility of recreating von Bredow’s famous “Deathride”. This near-suicidal charge against the French VIth Corp’s artillery line was actually quite successful, resulting in the overrunning of the guns and massive confusion in the French ranks. But it came at a high price – the brigade suffered 50% casualties (400 men). 12.8 Cavalry Countercharges There are two cases where a non-active friendly Front Line Cavalry unit may attempt to Countercharge a Charging enemy Cavalry unit:
- If the friendly Cavalry unit is itself designated to be the target of an enemy Cavalry Charge (not just stacked in the same hex as the target);
- If another friendly unit is the target of the enemy charge and the friendly Cavalry unit is adjacent to the last hex the Charging enemy cavalry unit would enter before contacting the target of its charge.
The Countercharging Cavalry unit may not be a Shaken or Disrupted unit. After any eligible Defensive Fire is issued, the Countercharging Cavalry unit rolls one die and compares the die roll total to the unit’s TCR. If the die roll total is greater than the modified TCR, the Countercharge fails and cannot be conducted. If less or equal to the modified TCR, the Countercharging Cavalry unit is moved one hex (only) into the last hex the Charging enemy Cavalry unit will enter before contacting its intended target unit. The two opposing Cavalry units will then share that hex and conduct an Assault Combat at the end of the enemy’s Movement Step. Both Cavalry units are considered to be conducting a Charge Move and normal rules apply. The enemy (initially Charging) player (only) may bring up supporting units to join in the Assault Combat attack normally. If there are multiple friendly Cavalry units that are eligible to Countercharge, each may be rolled for separately but only one may actually conduct a Countercharge. 12.9 Opportunity Charges If a friendly Front Line Cavalry unit has an enemy unitcomplete its movementin an adjacent hex during the enemy’s Movement Step, the friendly Cavalry unit may attempt an immediate Opportunity Charge. The enemy unit must be in a Clear and/or Road hex and the Opportunity Charging unit cannot be a Shaken or Disrupted unit. If eligible, the friendly Cavalry unit must roll a die in the same manner as a Cavalry Countercharge (12.8). If unsuccessful, nothing happens. If successful, the friendly Cavalry unit is immediately moved into the enemy’s hex and a Cavalry Charge Assault Combat is resolved. The targeted enemy unit may not Countercharge the Opportunity Charge. After resolving the Assault Combat normally, the enemy player may continue his Movement Step normally. 12.10 Road March Bonus Units under a March Order (only) that move from one Major Road terrain hex to a connected Major Road terrain hex pay only ½ MP to enter that hex. Units under Orders other than March still only pay 1 MP per connected Road hex (of either type), regardless of other terrain in the hex. Units using the Road March movement bonus may not stack at any point of their movement. If they do move through another unit, they may not use the Road March rate and must instead use the MP cost of the other terrain in the hex. 12.11 Movement of Reinforcements Reinforcements should be placed on the Turn Record Track on their appropriate turn of entry. Reinforcing units actually enter the game only when their Unit Activation chit is drawn. They are automatically considered to be In Command for the turn of entry only (regardless of where the HQ unit is)and units of the same formation can all be under any one Order they wish. Thereafter, normal Command rules apply. Reinforcing units enter the game on their Freshsides unless otherwise indicated by the scenario or if they are Small Units. HQ units of reinforcing Corps enter alone or stacked with any unit of their formation and on the appropriate Orders side. If two or more Reinforcing units enter the map on the same entry hex, they are assumed to be lined up off the map one behind the other, using the same terrain as the entry hex. Therefore, units entering on any Road hex can use those movement costs. The first unit pays normally to enter the map edge hex, the second unit pays double that cost to enter, the third unit triple the cost and so on. If an enemy unit is in the entry hex, the reinforcing units are delayed one turn and then enter on the map edge hex closest to the original entry hex. 12.12 Front Line and Rear Line Unit Positions If a stack of units is formed at the conclusion of conducting any movement, or if a stack of units exists in the active formation but does not move, the positions of those units in that stack can be changed. Only active units that are eligible to conduct movement during the Movement Step (even if they do not actually move) may adjust their stacking order. Retreating units and Breakthrough units may also adjust their stacking order at the conclusion of such a move.
13.0 Assault Combat
13.1 Assault Combat Eligibility Assault Combat is completely voluntary and can be conducted by all eligible units in hexes adjacent to a single enemy target hex. Only units under an Attack Order or as allowed by a specific Event Chit may conduct an Assault Combat. Artillery units may never Assault. Lone HQ units may not conduct or be the target of an Assault Combat. Cavalry Charges result in a mandatory Assault Combat and are conducted in the targeted unit’s hex. Note that Cavalry units may Assault normally – they are not required to Charge. If a unit is the target of a successful Cavalry Charge, other non-Charging attacking units can alsojoin the same Assault Combat. 13.2 Assault Combat Procedure The active player announces which units are assaulting a particular adjacent enemy hex. He sums the SPs of theassaulting unit(s) attacking the same defending unit and then subtracts the total SPs of the defending unit(s) in the targeted hex (remember that a Charging Cavalry unit increasesits SPs). This will give you the Assault Differential (which can be negative). Locate that column of the Assault Combat Results Table (ACRT) and then check the listed column shift adjustments to see if any of the situations apply. If so, shift the Assault Differential Column to the left and/or right as indicated. Then roll one die (of any color) and cross reference the die roll with the net Assault Differential column to get the combat’s result. 13.3 Assault Combat SP Adjustment Any Second Line unit involved in an Assault Combat – whether attacking or defending – contributes only 50% of its SPs to the combat. 13.4 Assault Differential Column Shifts
- Odds Adjustments = compare the total modified attacking SPs to the total modified Defending SPs. If the ratio of attacking SPs to defending SPs is:
Triple or more = Two column shifts right; At least Double = One column shift right; Half = One column shift left; One-Third or less = Two column shifts left
- Attacking Unit conducts Flank Attack (see 13.5) = Two column shifts right
- Attacking Unit attacks from Ravine terrain hex = Three column shifts left
- Attacking Unit attacks from Stream terrain hex = Two column shifts left
- Attacking Unit attacks through a Slope hexside from a lower to a higher elevation = Two column shifts left
- Attacking Unit has an Auftragstaktik Event chit played = Two column shifts right
- Attacking Unit has a Furia Francese Event chit played = One column shift right
- Attacking Unit has a Battlefield Conditions Event chit played = Two column shift right
- If any Attacking Front Line Unit has a higher TCR than the Defending Front Line Unit = One column shift right
- Defending Unit in Entrenchments = Two additional column shifts left
- Defending Unit in Fieldworks hex = One additional column shift left
- Defending Unit in Town terrain hex = Three column shifts left
- Defending Unit in Farm terrain hex = Two column shifts left
- Defending Unit in Forest or Quarry terrain hex = One column shift left
- Defending unit is Artillery not stacked with a non-Artillery unit = Four column shifts right
- Defending Unit is Front Line Artillery stacked with a non-Artillery unit = Two column shifts right
- Defending Unit has a Battlefield Conditions Event chit played = Two column shift left
- The Defending Front Line Unit has a higher TCR than the best Attacking Front Line Unit = One column shift left
13.5 Flank Attack If two Assaulting units attack from hexes not adjacentto each other, or if three or more Assaulting units attack the same target, the attacking units receive the Flank Attack column shift modifier. 13.6 Assault Combat Results After cross referencing the die roll with the net Assault Differential column, apply the result indicated in the box immediately to the affected unit(s). The letter indicates the Loser of the combat (A = Attacker Loses; D = Defender Loses). The number following the letter indicates the amount of Loss Points that must be applied to the Loser (exception, see Special Results).
- Loss Points: For each Loss Point in the given result, the affected player must apply one of the following effects to one of the Losing units:
- Retreat the unit two hexes. This can be applied no more than twice to the affected Losing unit. Therefore the maximum distance that can be retreated by a unit through Loss Points is four hexes.
- Apply one Elan Hit. This can be applied more than once to a single Losing unit. If a Disrupted unit is assigned an Elan Hit as a Loss Point, it must take a Rout Test (11.0) with each such hit.
- Apply one Casualty Hit. This can be applied more than once to a single Losing unit. If a Battleworn unit is assigned a Casualty Hit as a Loss Point, it must take a Break Test (10.0) with each such hit.
All Loss Points must be applied if at all possible. If there are two or more units in an affected Losing hex(s), the Front Line units must receive at least one Loss Point each and before any Second Line units get Loss Points. Each Front Line unit can never have fewer Loss Points inflicted on it than any Second Line unit.
- Special Results: Some results require a special procedure to be followed:
- x* = If the result is asterisked, one of the Losing units must take at least one Casualty Hit as part of their Loss Points application.
- (x) x = The first listed letter (A or D) is the Loser of the combat. The owning player applies the Loss Point normally. If the Loser does not Retreat, however, then the Winner must apply one Loss Point as well.
- Cavalry Charge = If the Assault Combat was instigated by a Cavalry Charge, the Losing side must retreat all its units at leasttwo hexes, even if this would exceed the number of Loss Points inflicted.
- Tough Fight = All units in the combat (attacking and defending) take a special Cohesion Test. Each player rolls one die. This single die roll applies to all units in the combat for his side and is compared to each unit’s modified TCR (modified for an Elan marker). If the die roll is less than or equal to a unit’s modified TCR, the unit Passes. If it is greater than the TCR, the unit Fails. If any friendly unit on a given side Passes, then one enemy unit (only) must take a Casualty Hit (of the passing player’s choice).Each unit that Fails must apply an Elan Hit on itself. These effects are cumulative. No Breakthrough Movement (13.8) is allowed by either side. If a Tough Fight results from a Cavalry Charge, the Charging Cavalry unit must apply any result as above and it must also retreat one hex.
- Cavalry Retreat Before Combat:A defending Cavalry unit, assaulted by only Infantry units or by Cavalry units that are all of a heavier “weight” than it, may opt to declare and apply an automatic “D1” result and Retreat the Cavalry unit two hexes (only) – no die roll is made. This option is available even if the Cavalry unit is part of a mixed-type stack. All other rules apply normally.
13.7 Retreat Movement Retreat movement is mandated by Loss Point selections or a failed Rout Test. Retreats are conducted in number of hexes – not Movement Points. The terrain MP cost of hexes retreated through is ignored. Retreats are conducted by the owning player and follow this order of priority:
- The unit must increase the distance between the Retreating unit and the victorious/nearest enemy unit(s);
- The unit should avoid moving through a hex containing another friendly unit, if possible;
- The unit should move closer to its HQ unit, if possible;
- The unit may reduce its remaining Retreat distance by one hex (maximum) after it enters a Town, Woods, Farm, Quarry, Fieldworks or Entrenchment hex. This can only be applied one time during a given Retreat and does not apply if the Retreating unit started in one of the relevant terrain hexes.
Note that if the Retreating unit moves adjacent to any enemy unit(s), that enemy unit(s) may issue Defensive Fire (12.6). If the Retreating unit is forced to end its Retreat on a hex that causes over stacking, it must keep Retreating further until it reaches an eligible hex. If the Retreat move forces the unit to move off the map or move through an enemy-occupied hex, it is immediately Broken (regardless of its condition). 13.8 Breakthrough Movement An attacking unit (only) that wins an Assault Combat (i.e., its opponent is the Loser) and is not Shaken or Disrupted may advance into the losing defender’s hex if it has been vacated. Infantry and non-Charging Cavalry units can only advance into the vacated hex itself. Charging Cavalry units may remain in the vacated hex or advance into any adjacent vacant hex (regardless of MP cost), but the new hex must maintain or reduce the distance to the recently defeated enemy unit or, if that unit was eliminated in the Assault Combat, to the nearest enemy unit. Units conducting a Breakthrough Move are not subject to Defensive Fire. Note that Charging Cavalry is only made “Disrupted” at the conclusion of its Breakthrough Move. There is no Breakthrough Movement allowed after a “Tough Fight” result. 13.9 HQ Units and Combat AnHQ unit stacked with another friendly unit does not take part in any combat. The HQ unit may Retreat and Breakthrough with that unit, but it cannot take Elan or Casualty Hits. Should a lone HQ unit find itself in the same hex with an enemy unit at any time, the HQ is Overrun. Simply pick up the HQ and stack it with the nearest friendly unit. An HQ unit so displaced has a “0” Command Rating for the remainder of this turn (place an “HQ Overrun” marker on the unit as a reminder). The HQ unit returns to normal at the end of the turn – remove the marker during the Housekeeping Step. The Assault Table is constructed so that normally only the losing side is adversely affected by the result. This is intentional – during a charge to contact, more often than not one side or the other would lose its nerve before melee was joined. Therefore, actual hand-to-hand fighting rarely occurs and is reflected in the “Tough Fight” result. One side or the other would normally give way, thus suffering the consequences of morale loss, unanswered enemy close-range fire and pursuit.
14.0 Rally 14.1 Rally Procedure During the Rally Step, the active player may perform Recovery and Rebuilding actions if the active formation is under a Defend or Regroup Order only. 14.2 Recovery The Recovery action represents officers attempting to get their units back into fighting shape and reorganized. In game terms, this means units reducing their Elan Hits and/or Ammo Problems by removing and/or flipping “Shaken”, “Disrupted”, “Low Ammo” and “Rationed Ammo” markers. The number of Elan Hits and/or Ammo Problems that can be removed is determined by the actual Order the formation is under, as follows:
- Regroup Order: the active player may remove up to three Elan Hits and/or Ammo Problems (total) from an eligible unit(s). An eligible unit is a unit belonging to the active HQ’s formation, within the current Command Range of its HQ unit and not adjacent to an enemy Combat unit. If qualified, the player simply removes the marker from the unit or flips a “Disrupted” marker to its “Shaken” side or a “No Ammo” marker over to its “Low Ammo” side. An Overrun HQ unit can only remove/flip markers from units stacked with it. Note that multiple removals/flips can be made on the same unit.
For example, a unit with a “Disrupted” marker under a Regroup Order can have the marker totally removed by using two Recovery actions. Likewise, a “Rationed Ammo” marker could be removed with the use of two Recovery actions.
- Defend Order: the same rules apply as with the Regroup Order but only one qualified Elan Hit/Ammo Problem removal can be made.
14.3 French Artillery Caisson Doctrine and Supply Problems Most French Artillery units can only have their Ammo Problems markers reduced through Recovery if they are stacked with their respective HQ unit. French “Heavy” Artillery units may not have their Ammo Problems markers reduced through Recovery during any “Battle” scenario (they may have them Recovered during the “Campaign” scenarios only, as instructed in that specific scenario). 14.4 Rebuilding The Rebuilding action represents the rallying and reforming of units that have morally and/or physically collapsed and become totally ineffective. In game terms, this is represented by allowing players the chance to bring back Broken units from the Available for Rebuild Box. The active player may attempt to bring back into play any type of unit from the Available for Rebuild Box as long as theunit belongs to the active HQ’s formation and the HQ unit doing the Rebuild attempt is not adjacent to an enemy Combat unit. The number of attempts that can be made depends on the Order the formation is under, as follows:
- Regroup Order: the active player may attempt to Rebuild all eligible units in the Available for Rebuild Box. In addition, the first Rebuild attempt (only) is automatically successful. The owning player attempts to Rebuild other eligible units by rolling one die separately for each such unit. If the die roll result is less than or equal to the sum of the HQ unit’s current Command Rating plus the Rebuilding unit’s Battleworn TCR, the Broken unit may be placed back on the map on its Battlewornside. The Rebuilt unit is stacked with or placed adjacent to the HQ unit, but not adjacent to an enemy Combat unit nor can it be over stacked. If there are no eligible hexes to place a Rebuilt unit, no Rebuild attempt can be made. If the roll is greater than the Battleworn TCR, the unit attempting the Rebuild must remain in the Available for Rebuild Box.
- Defend Order: use the same procedures as above but only one eligible unit can attempt to Rebuild. In addition, there is no automatically successful first Rebuild.
Note that eliminated French units are not eligible for Rebuilding until two turns afterthey are Broken. Prussian units that are Broken are eligible to be Rebuilt immediately. 15.0 The Turn End Phase After all chits have been drawn from the cup, proceed with the last three Steps of the Game Turn. 15.1 French Reinforcing Activation Chits During the “Battle” scenarios, the French player may attempt to move the turn of activation up for his formations that are not yet in the game. However, he may only do so if he has committed one or more Command Event Chits to the Army of the Rhine Activation Chits Track. If he has done so, follow the appropriate procedures as indicated for the scenario being played. 15.2 Prussian Reinforcements The Prussian player may choose to accelerate one of his Reinforcement Groups by one turn or change its Entry Location. However, he may only do so if he has committed one or more Command Event Chits to the Prussian Reinforcements Track. If he has done so, follow the appropriate procedures as indicated for the scenario being played. 15.3 Housekeeping All Activation and Event Chits that were placed on the map, still held by a player or in the Discarded/Used Chit Box are given to the owning player. Remove all “HQ Overrun” markers and any remaining “Artillery Fired” and “Out of Command” markers. Then advance the “Game Turn” marker one space. If the last Game Turn of the scenario was just completed, the game is over – proceed to Victory Determination. 16.0 Earthworks 16.1 Types of Earthworks There are two types of Earthworks represented in the game. Fieldworks are hastily–built structuresand can be constructed during any scenario except as noted. All units in a hex with a “Fieldworks” marker have their SP value and TCR increased by one (+1). Entrenchments are more complex and tougher structures and can only be built during Night Game Turns of the Campaign scenarios. All units in a hex with an “Entrenchment” marker have their SP value and TCR increased by two (+2). Only one Earthworks marker may exist in a given hex. 16.2 Fieldworks An Infantry unit (only) may attempt to build a “Fieldworks” marker in the hex it occupies if it meets the following conditions:
- It has not been a target of any enemy Fire Combat during the preceding Fire Combat Step;
- It did not conduct movement during the preceding Movement Step;
- It did not participate in any Assault Combat during the preceding Assault Combat Step;
- It did not participate in a Recovery or Rebuilding action during the preceding Rally Step;
- It is not an Infantry Detachment;
- It must be under a Defend Order and be In Command.
If the units meets all those conditions, it may roll one die at the end of the Rally Step. If the roll is less than or equal to the modified TCR (modified by an Elan marker and increased by one [+1] if in a Forest, Farm, Quarry or Town hex), the owning player may place a “Fieldworks” marker in the hex. If the die roll is greater than the modified TCR, the unit does not build the “Fieldworks” marker and must wait for the next Game Turn to make another attempt. 16.3 Entrenchments An existing “Fieldworks” marker may be improved to an “Entrenchments” marker by following the same procedure as for building the Fieldworks (above), except that this can only be attempted during an Overnight Game Turn during a “Campaign” scenario and as detailed in that scenario. 16.4 Earthworks Marker Duration Both types of Earthworks markers remain in the hex in which they are built and cannot be destroyed. They are used by any occupying unit, regardless of which side built the marker in the first place. 17.0 Unit Breakdown (Optional) If players wish to allow the breakdown of Infantry and Divisional Artillery (those with the word “Division” in the Unit ID) units into smaller detachments and sections, they may agree to include this procedure. Each individual Corps (for both sides) can breakdown its Infantry brigades into smaller Infantry Detachment units and its Division Artillery groups (only) into smaller Artillery Sections. Infantry Detachment and Artillery Section units are identified by their Corps affiliation and may only be used by units of that same Corps. If a player wishes to breakdown a unit, he is restricted to the number and denomination of Infantry Detachment and Artillery Section units available for that particular Corps. Unit Breakdown occurs at the start of a unit’s Movement Step (before any movement occurs) but does not cost any additional MPs. 17.1 Infantry Unit Breakdown Procedure A player may breakdown any Infantry unit (termed the parent unit) into smaller Infantry Detachment units beforeit conducts any Movement during the Movement Step. The size and/or number of Infantry Detachment units are limited by the current SPs of the parent unit. The player may not exceed the parent unit’s starting SP total, but he may breakdown into Infantry Detachments whose total SPs equal less than the Parent unit’s SPs. A player is limited by the counter mix of available Infantry Detachment units but otherwise may break a parent unit into as many individual Infantry Detachment units he wishes. If the parent unit is on its FR side, then the Infantry Detachment units it creates can be either on their FR or BW side, as the player sees fit. If the parent unit is on its BW side however, all Infantry Detachment units it creates must also be on their BW side. Remove the parent unit from the game and replace it with a number of Infantry Detachment units whose total combined SPs do not exceed the parent unit’s available SPs. These Infantry Detachment units may temporarily over stack in the hex. The player must move one or more of the units immediately after breakdown to alleviate any over stacking. 17.2 Parent Unit Markers If the parent unit is Shaken or Disrupted when breaking down, the allowed breakdown SPs is modified by the Elan Hit Marker effect. In addition, any Infantry Detachment unit created by this parent unit must also each have the relevant Elan Hit markers assigned to them (which also then would affect the number of Infantry Detachment SPs). For example, if the parent unit is Disrupted, then each Breakdown unit must also be Disrupted. If the parent unit is Low Ammo or Rationed Ammo, such markers get transferred to each Infantry Detachment unit in the same manner. 17.3 Recombining Infantry Detachments Infantry Detachment units from the same Corps that are stacked together at the conclusion of the Movement Step may be recombined back into a brigade-sized unit, within the following constraints:
- The new recombined brigade unit must be from the same Corps as the Infantry Detachment units and must have been a unit that was previously used to create Breakdown units (though not necessarily the same ones which are now recombining).
- The new unit may not have an SP total greater than the sum of the recombining Infantry Detachment units;
- If any of the Infantry Detachment units have an Elan and/or Ammo Problems marker, then the new brigade unit must also have those same markers. If more than one marker of any type is present, then apply only the worst one (for example, if both a “Shaken” and a “Disrupted” marker is available; the new unit is given the “Disrupted” marker);
- The new brigade unit can be created on its Battleworn side if necessary.
Note that Infantry Detachment units may temporarily overstack if they are going to recombine at the end of their movement. When recombined, remove the Infantry Detachment units from the map and place the new brigade unit in that hex. The new unit may not move this Step. 17.4 Artillery Section Breakdown/Recombine Procedure The procedure to breakdown and recombine Divisional Artillery units is exactly the same as for Infantry units. However, be aware that only those Artillery units labeled as “Division” Artillery are qualified to breakdown. All other types cannot do so. In the case of French Division Artillery units, the associated “Mitrailleuse” marker must be placed with one of the Artillery Section units. 18.0 Overnight Game Turns During the two Campaign scenarios, gameplay can continue throughout the nighttime hours and then continue the next day. There are four different types of Overnight Game Turns and each has special rules that pertain to play. 18.1 Dusk Dusk occurs during the 9:00 pm Game Turn. Line of Sight is reduced to a maximum of one hex. Unit’s Movement Allowances are halved when not on any Road hex. All units TCR’s are reduced by -1. 18.2 Evening Evening occurs during the 10 – 11 pm Game Turn. No combat of any kind is allowed and unit’s Movement Allowances are halved when not on any Road hex. All units TCR’s are reduced by -1. French Heavy Artillery units may remove Ammo Problem markers, units may attempt to build Entrenchments and units on their BW side may attempt to Rally successfully to flip back over to their FR sides. 18.3 Deep Night Deep Night occurs during the 12 am – 4 am Game Turn. No combat of any kind is allowed and unit’s Movement Allowances are halved and only allowed along Road hexes. Any units that do move are given Disrupted markers. All units TCR’s are reduced by -2. French Heavy Artillery units may remove Ammo Problem markers, units may attempt to build Entrenchments and units on their BW side may attempt to Rally successfully to flip back over to their FR sides. 18.4 Dawn Dawn occurs during the 5:00 am Game Turn. Line of Sight is reduced to a maximum of one hex. Unit’s Movement Allowances are halved when not on any Road hex. All units TCR’s are reduced by -1. French HQ units must be activated per the scenario instructions before they can move or build Fieldworks. 19.0 Victory Determination
Each of the game’s scenarios has its own victory conditions as detailed in that section.
20.0 Command Event Descriptions 20.1 Day of Battle Scenario French Command Events – Mars La Tour Scenario
- Army of the Rhine Activation Chits
At the start of the scenario, all of the French player’s Activation Chits are laid out along the Army of the Rhine Activation Chit Track as indicated. During the End Turn Phase, the French player may choose to roll on the Army of the Rhine Activation Chit Table to attempt to move one of the Activation Chits located on the track. Each Command Event Chit that the French player places on that track will grant him a “+1” die roll modifier for that roll.
- Bazaine’s Leadership
The French player may place up to three Command Event Chits on the Bazaine’s Leadership Track. If no Command Event Chits are placed on this track and the Bazaine’s Malaise Prussian Event Chit is played, it automatically takes effect. If one French Command Event Chit is played on the track, the Prussian Event chit will be cancelled and discarded on a die roll of 1. If two Command Chits are played, it is cancelled on a roll of 1 – 3 and if three chits are played, the Prussian chit is cancelled on a roll of 1 – 5. The die roll, if any, is made immediately when the Bazaine’s Malaise chit is drawn. Prussian Command Events – Mars La Tour Scenario
- Prussian Reinforcements
At the start of the scenario, each Group of Prussian Reinforcements is placed on its indicated box on the Prussian Reinforcements Track. They will come into the game on the indicated turn per the Reinforcement procedure. During the End Turn Phase, the Prussian player may opt to roll on the Prussian Reinforcement Chart to try and move up the turn of entry or entry location for any one Group (only). Each Command Event Chit that the Prussian player places on that track will grant him a “+1” die roll modifier for that roll. If allowed by the rolled result, the player may elect to either move up the Group’s turn of entry or its Entry Location.
- Prussian Aggressiveness
The Prussian player may place up to three Command Event Chits on the Prussian Aggressiveness Track. If no Command Event Chits are placed on this track and the Prussian Aggressive Tactics French Event Chit is played, it automatically takes effect. If one Prussian Command Event Chit is played on the track, the French Event chit will be cancelled and discarded on a die roll of 1 – 2. If two Command Chits are played, it is cancelled on a roll of 1 – 4 and if three chits are played, the Prussian chit is cancelled on a roll of 1 – 6. The die roll, if any, is made immediately when the Prussian Aggressive Tactics chit is drawn. 21.0 Event Chit Descriptions FRENCH EVENT CHITS Beaten Zone:the French player may play or hold this chit. Play Chit: select any one French Infantry or Mitrailleuse marker and resolve an immediateFire Combat following all normal procedures. Hold Chit: put chit aside and play during an upcoming Held Event Chit Phase or Prussian Movement Step. Held Event Phase: resolve as with the “Play Chit” option above. Prussian Movement Step: play before a Prussian unit moves into next hex. Immediately resolve a Fire Combat using normal procedures. If the result is an Elan Hit or Casualty Hit, the Prussian unit cannot move any further this Step. Moulin a Café Option:with any Beaten Zone chit application above, the French player may apply an automatic Ammunition Problems result on the firing unit, but it will then be able to fire at Extreme Range with its full SPs and reduce the targeted unit’s TCR by one. Feu de Bataillon: The French player must immediately place this chitonto any French Infantry Corps HQ unit (not a Cavalry Division HQ or Artillery Reserve HQ) on the map that has not yet been activated this turn and has a Unit Activation Chit still in the cup. When this HQ activates, it must be placed undera Defend Order, units may only move one hex total and all units that issue Fire Combat apply a “1 ->” column shift. If no qualifying HQ is available, then this chit can be used as a Command Event. Furia Francese: The French player may immediately play this chit on one French Infantry unit that is within two hexes of any Prussian unit. He rolls a die and if he rolls less than or equal to the unit’s modified TCR, he moves it one hex adjacent to a Prussian unit (and receiving the usual Defensive Fire). The French unit must then conduct an Assault Combat, if possible. The Assault Combat applies a “1->” column shift and is resolved normally. Marshal Bazaine:The French player may immediately select any one French unit to activate, even if the unit is in the Available to Rebuild Box and even if it has already activated this turn. The unit selected conducts a normal Activation Phase, is In Command and under any Order. All normal procedures follow thereafter under the limits of the chosen Order. Prussian Aggressive Tactics: The French player may immediatelyselect any one Prussian Infantry unit that is within two hexes of any French Combat unit. The players consult the Prussian Aggressiveness Track and if any Prussian Command Event chits have been played onto that track, the Prussian player rolls a die. If the die roll falls within the track’s range, this Event chit is cancelled. If the necessary die roll is not made, or if no Command Event chits were placed on the track, the selected Prussian unit is immediately moved (if not already adjacent), by the French player, adjacent to any French unit(s). The selected Prussian unit must then conduct an immediate Assault Combat against a French-occupied hex chosen by the French player, and is resolved normally. PRUSSIAN EVENT CHITS Auftragstaktik::The Prussian player may immediately select up to two Prussian Infantry units from the same Division. The Division selected can be Reinforcements scheduled to enter this turn. All Infantry Detachment units from the same Corps are considered to be members of the same Division for purposes of this chit. Eachof these two unitscan bemoved up to ½ of its Movement Allowance (rounded up). If either or both are then adjacent to any enemy unit(s), they may conduct an immediate Assault Combat with an additional “2 ->” column shift. Resolve the combat normally. Bazaine’s Malaise:The Prussian player may immediately place this Event chit on any French HQ unit on the map that has not yet been activated this turn, if any. When the selected HQ is activated, the players consult the Bazaine’s Leadership Track. If any French Command Event chits have been played onto that track, the French player rolls a die. If the die roll falls within the range given by the track, this Event chit is cancelled. If the necessary die roll is not made, or if no Command Event chits were placed on the track, the selected French HQ’s formation cannot activate this turn. Discard its Unit Activation chit without further effect. Krupp’s Guns:the Prussian player may play or hold this chit. Play Chit: select any one Prussian Artillery unit and resolve an immediateFire Combat following all normal procedures. Hold Chit: put chit aside and play during an upcoming Held Event Chit Phase or French Movement Step. Held Event Phase: resolve as with the “Play Chit” option above. French Movement Step: play before a French unit moves into next hex. Immediately resolve a Fire Combat using normal procedures. If the result is an Elan Hit or Casualty Hit, the French unit cannot move any further this step. Artillery Charge Option:with any Krupp’s Guns chit application above, the Prussian player may first move the selected Artillery unit up to ½ it Movement Allowance and then issue Fire Combat with ½ its SPs. Prussian Officers:The Prussian player may immediately select any one Prussian Division (all of its component units)to activate, even if the unit(s) is in the Available to Rebuild Box and even if it has already activated this turn. The units of the selected Division conduct a normal Activation Phase, are In Command and under any Order. All normal procedures follow thereafter under the limits of the chosen Order. COMMON EVENT CHITS A Cloud of Skirmishers:the player may play or hold this chit. Play Chit (Harassing Fire): select any one enemy Front Line unit within 5 hexes of any friendly Infantry unit from which a path can be traced through any terrain, but not through a hex containing another enemy unit nor adjacent to another enemy unit. If such a path exists, the selected enemy unit is immediately given an Elan Hit, applied normally. Hold Chit: put chit aside and play during an upcoming Held Event Chit Phase or enemy Fire Combat Step. Held Event Phase (Harassing Fire): resolve as with the “Play Chit” option above. Enemy Fire Combat Step (Screening): play this chit before the Fire Combat resolution. The enemy’s colored die roll is halved (drop fraction). Any rolled Ammo Problems result still applies. In any case, the A Cloud of Skirmishers chit can be cancelled by the opponent playing his own A Cloud of Skirmishers chit. Both chits are immediately discarded with no effect. Battlefield Conditions: the player holds this chit. He may play it before any one Fire or Assault Combat (friendly or enemy initiated) combat is resolved. This chit applies a “2 ->” column shift to the combat resolution when firing or assaulting or a “<- 2” column shift to the combat resolution when the target of enemy fire or defending against an assault. Fortunes of War: the non-chit-pulling player rolls one die and players apply as follows: 1 – 3 = No Effect 4 – 6 = Degrade the Next Chit 7 – 9 = Enhance the Next Chit 0 = Leader Casualty See 6.3c for details Misinterpreted Orders:the player holds this chit. He may play it at the start of any enemy’s HQ Command Step (before the opponent assigns an Order to the activated HQ unit). The player then rolls a die and applies the following results: 1 – 2 = Active HQ unit is given any Order by the chit-playing player 3 = Active HQ unit must be given a March Order 4 – 5 = Active HQ unit must be given a Defend Order 6 – 7 = Active HQ unit must be given a Regroup Order 8 = Active HQ unit must be given an Attack Order 9 – 10 = National Doctrine: Activating French HQ must be given a Defend Order; Activating Prussian HQ must be given an Attack Order. REFERENCES Ascoli, David. A Day of Battle Howard, Michael The Franco-Prussian War Barry, Quintin The Franco-Prussian War 1870-71: Volume 1 German General Staff The Franco-German War 1870-71; Volumes I and II Osprey Campaign Series Gravelotte-St. Privat 1870 Clash of Arms 1870 Miniatures Rules Vasey, Charles. Deathride (ATO Magazine) Wawro, Geoffrey. The Franco-Prussian War Waxtel, David. They Died For Glory (Miniatures Rules) Showalter, Dennis The Wars of German Unification Henderson G.F.R. The Battle of Spicheren August 6th 1870 CREDITS Game Research and Design: Hermann Luttmann Game Development: Fred Manzo Anxiety of Command Strategic System Design: Fred Manzo Game Art: Play Test: Bryan Armor, Harvey Mossman, Langston Jones