


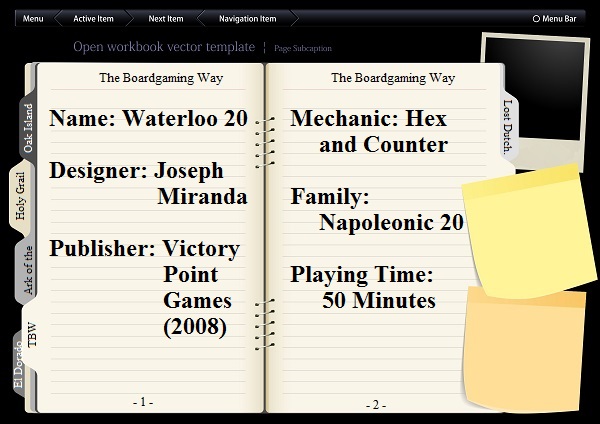
By Paul Comben
![]()
Some Personal Reflections on Waterloo 20
I am probably not the only wargamer who has arrived a little late to the Napoleonic 20 series, but as the saying goes, better late than never. Of course, when it comes to the story of the Waterloo campaign, the merits of being late as opposed to being a total no-show were pushed to the limits, and frankly, being late was repeatedly about as much good as last week’s weather forecast. But nothing in war is ever an absolute, and Waterloo 20 has some interesting perspectives to offer regarding the attributes of speed as opposed to method, and brute force as opposed to having a good dig and a poke in the right place.
The main lesson I feel I have learnt by plays of Waterloo 20 is that simply seeking to annihilate anything whenever and wherever it places itself is not the surest path to victory. The key is not so much reduction of units as reduction of the army’s morale levels – morale in the series’ context surely meaning more than simply whether you have joyous and ardent soldiers or a whole gaggle of Cumberland Hussars. As I see it, winning in this game means wearing out the fibre of the opposing forces by bullying, blasting, conning and cajoling your opponent into spending that operational currency of morale points faster than you are getting through yours. Creating emergencies for that opposing army, indeed crises and contingencies of all types, is the better way to go, and in those Belgian fields in June 1815 you will have ample opportunity to pull your opponent apart…unless, of course, he or she goes and does it to you first.
One last thing to note before I progress is that this analysis is based on an assumption of reasonably competent play by both sides (well, as near as I can get), and, in the main, use of the historical weather. And with that out of the way, let us meet the armies of Waterloo 20.
L’Armée du Nord
As befits the limited counter mix of the series,  Napoleon’s last campaign army is represented by counters for its five regular army corps, the four reserve cavalry corps, the Grand Battery and the Imperial Guard. Also present are leader counters for Napoleon himself, as well as Ney – Grouchy appears by player choice if you are really intent on splitting things up.
The I and II Corps, which historically were the largest of the regular corps, have combat strengths of three instead of two. In a game that stresses the efficient use of force, this sort of stuff really does matter. Likewise, although the novice player might not appreciate the advantages four apparently nondescript cavalry corps can afford, within the context of the game’s functions, these are major assets – not so much because of their combat number, but through the number of such corps the French player has at their disposal. With cavalry usage extending across functions in both your own and your opponent’s player turn, the French have a major plus in possessing four of the little wonders to get up to all kinds of mischief on the map.
Here are some of the possibilities:
Fast Fly Paper – catch up with and fix the enemy’s forces in place.
Mobile Roadblock – get in the way/and if needs be, out of the way of enemy forces seeking to go where you do not want them to be.
Countercharge – something unfriendly sticks its neck out is likely to get stampeded over.
Penetration – Upset the best-laid plans of your opponent by getting in the way and forcing a change in combat assignments.
Deep Raid – Go after the enemy’s Lines of Communication and deny them rallying points for the return of previously broken units.
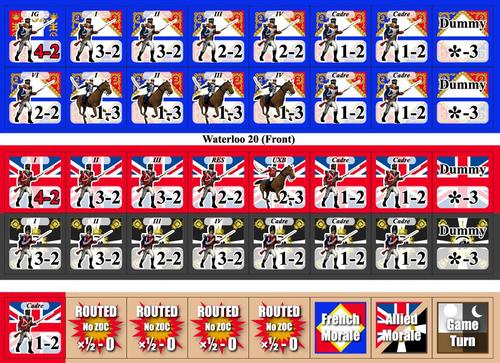
The “Waterloo 20” countersheet
With four corps possessing these abilities, the French can get far more benefit from considered use of their cavalry than any other army in the field. In fact, with four corps, the French can be on several cavalry assignments at the same time – e.g. two screening your main body by being in position to countercharge; one raiding towards an army’s rear, and one holding an isolated enemy corps in place whilst certain destruction is prepared..
Trundling onto the board on turn one is the Grand Battery – actually termed “Reserve.” Once in place and battering, it does so with double its printed strength, and is both a major asset on the attack as well as possibly bestowing a bit of extra defence to adjacent units – that is, if it is not being attacked itself. The one notable problem with the French artillery concerns its inability to advance after combat. This means you have to be a bit careful about where you set it up for an attack, as advances after combat as very important to the game, and you really do not want your artillery crowding out the optimum hex to be advancing from.
And finally there is the Guard, about which I am very tempted to say: “more trouble than it is worth.” That might sound daft, but the Guard’s combat value of four has to be set alongside the morale point cost of it going in…and possibly coming out again. Unless the situation is already desperate, sending the Guard forward puts a fair bit of nervous tension into the French army (-1 Morale), and if there is any hint of it getting stuck or someone in a bearskin crying “sauve qui peut,” the cost in morale for a commitment doubles to two points. Thus, unless the situation is utterly desperate, or you have morale points in plenty, the Guard is only for those near dead cert situations where the worst that can happen is that you drop your die in your coffee.

The Prussians
Wrong place, wrong time and with bits missing is one way of putting it. The Prussians have four infantry corps, three of which have that extra point of strength like the French I and II Corps – but one of those corps, Bülow’s IV, is not present at campaign start. The Prussians do have a one strength cavalry unit…only it is somewhat doubtful it will ever get to the game, given that it is a broken unit at the commencement of the game (abstractly representing reverses on June 15th), and there is a fair amount of chance and hazard of competing priorities regarding it coming back. And there is no dedicated artillery unit.
Something that is interesting about the presentation of the Prussian army is that, historically, it was close to the size of L’Armée du Nord, but with the game’s presentation, it looks little the little boy lost. It cannot shield itself with its cavalry already hors de combat, and in anything like a field battle presentation, for reasons we shall see presently, it needs better ground than it had at Ligny.
The Anglo-Allied Army
 We all know what Wellington said about his army in Belgium – “infamous” came into it, as did “very weak” and “ill-equipped.” What some of us might not know is when he said those things, which was actually some period of weeks before active campaign got going. When open hostilities began, things had markedly improved as the army built up strength and Wellington got a staff together.
Of course, like the Prussian army, Wellington’s force is short on units. Part of this can seem like plain commonsense – the game essentially represents your army as corps, so those are the units you get, and nothing more. I however, see it a tad differently, with the depiction of the armies also representing their tactical ability. That is why you get the Grand Battery as the French (hardly an administrative corps in the strict sense), and Wellington gets the single best cavalry unit in the game, though that is his limit as far as a mounted arm goes. Administratively, you could make a case for Wellington getting a second, weaker cavalry unit representing the Dutch-Belgian brigades under Colleart. They certainly had enough strength for a unit, but in quality terms, any sense of them doing anything as a force in themselves is pushing things too far.
As for what the Anglo-Allied army does possess, it has two strong regular corps, I and II, two weaker corps (two strength) III (if it arrives) and the Reserve, and the cavalry under Uxbridge. Undoubtedly the two eye-catchers here are I Corps and the cavalry. I Corps has elite status (that is where the British Guards were), with that four strength combat factor, all the rallying ability of the French Guard, but none of the emotional hullaballoo about going in or running out again. In game terms, it is hard not to see it as the better unit, and of course historically, we all know which Guards won the final shooting match.
The III Corps is a doubtful participant in events. Wellington kept it well out of the way as the campaign progressed, partly to give him a watch on French flanking maneuvers to the west, but also, as one or two authors have suggested, that he had precious little faith in its fighting capacity.
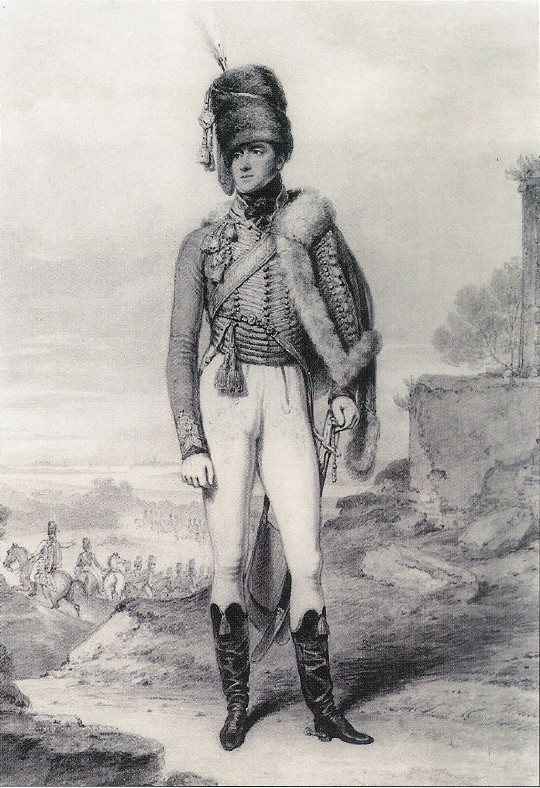
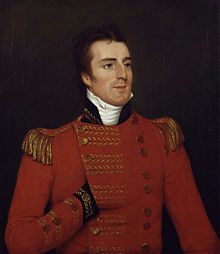
Lord Uxbridge (Henry William Paget)
As for the Duke’s cavalry, with it being just the one unit, and with numbers short on the Anglo-Allied side anyway, it is probably best to see Uxbridge’s force primarily as a potent countercharge threat, and little else. Wellington simply lacks enough power to have his cavalry heading off on a raid. He needs it placed appropriately among his other units, ready to dish it out to anything that comes diving in.
Intangibles – Your Fate In The Cards
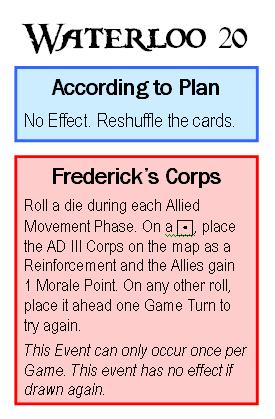
An example of a “Waterloo 20” card.
The small but very important event deck makes it difficult to be certain as to how any of the armies will perform under all circumstances. Among the cards’ contents are weaknesses pertaining to each, as well as strokes of luck and a bit of Old Nosey/Boney/Vorwarts thrown in. All three armies can be bolstered by the right card at the right time, but you never know precisely when you will get it.
On Campaign
I have played many games covering the 1815 campaign, and this one does something I have never seen in any of the others. What I am referring to is a certain clarity pertaining to the situation, which is no doubt assisted by the fact that so few units are ever on the map. By contrast, in many other 1815 games, the Prussians look like a load of hunkered down trouble at campaign start; but was that how Napoleon saw things on June 16th or how it really looks in this design? No is the simple answer. Once he understood better what he had in front of him, and what was missing from it, the Emperor saw a target for attack that was hanging out to dry, with one flank totally vulnerable to an enveloping attack. On the game map for Waterloo 20, this bad situation is made the worse by the fact that the Prussians are so far forward of their only feasible LOC hex and other candidate rallying hexes (if you are using the optional rules), that lost units can only be reformed miles away from where you first fight – leaving the army with a serious challenge of retreat and recovery on its hands. If the cards go nicely for the Allies, or if the French attacks become stalled (not too likely) you may be able to use Mont Saint Guibert as a nearer rallying point, but you can hardly count on that in most games.
For the French, it may seem enough simply to wipe a couple of Prussian corps off the map; but in actual fact, the way you do this matters a great deal to winning the game. There are two things you really need to avoid as Napoleon fighting the Ligny battle: exchange results from higher odds attacks, and Prussian routs that send their units out of range of follow-up attacks. Keeping contact with the Prussians, using lower odds attacks, and getting some cavalry involved (giving you a better chance of following and fixing routing Prussians), will provide you with several factors working in your favour, including the risk-free chance of destroying Prussians by hazardous retreat failures, and compelling Prussian corps to attack at destructive odds. This sort of situation may put your opponent into a mindset where they start spending morale points to try and improve the odds, whereas their better option might be to accept the loss, spare a point or two trying to save doomed units, and look to other opportunities later in the campaign.
A good beginning for the French is thus any combination of “locking up” and unit creep which keeps the Prussians fighting a losing battle whilst any chance of using Mont Saint Guibert for rally purposes is taken from them.
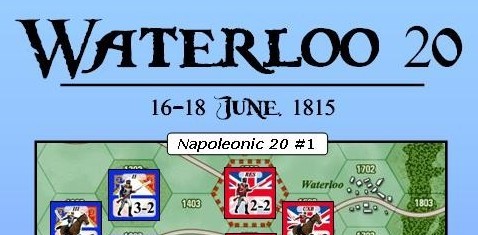
“Waterloo 20” front cover. “Waterloo 20” is the first game in the “Napoleonic 20” series.
My preferred move for the French at campaign start involves a more direct interpretation of what Napoleon was aiming to do. As such, employing forced marches, the II Corps falls on the flank of the Prussians, the IV Cavalry Corps cuts the Namur Road, I Corps moves to where II Corps was, and everything else slams into the Prussian front. Just watch your commitments and your chosen odds ratios, as all you really need to do here is fix the Prussians in place and let their own required attacks polish them off. If all goes as it should, there will be no need to employ the Guard, so no cost for that, and the Prussians should be gratifyingly wrecked before the end of the day.
As for the Prussian options, if you are sent spinning back in a rout of retreated units, it might still be best to try and keep your distance as recovery kicks in, since you really do need all four of your corps together, and, if possible, with the cavalry present as well. At this stage, the coming torrential weather and the lack of any roads north of you until you are near Wavre can be an asset. Your IV Corps should arrive without hindrance, and the French will find it very difficult if not impossible to catch up with you.
But what about Quatre Bras? In the actual campaign, Napoleon wanted to have his gateau and eat it by both taking the crossroads and beating the Prussians. However, considering that a demolished Prussian host will compel Wellington’s army to relinquish the Quatre Bras crossroads anyway, trying to do the two jobs with not quite enough army is probably a not particularly good idea – potentially, you are wasting morale points for something you are going to get anyway. I French Corps and a “borrowed” cavalry corps should be enough to hold an observing position whilst you get on with the first key campaign job of hurting Blücher’s army as much as possible and robbing the Coalition of as much morale as possible. Wellington might take the offensive against you, but if your assigned cavalry is where it should be, the Duke’s chances for mischief should be limited, given where he is, which bigger army is nearby, and that his own cavalry is not going to be riding in until after dark.
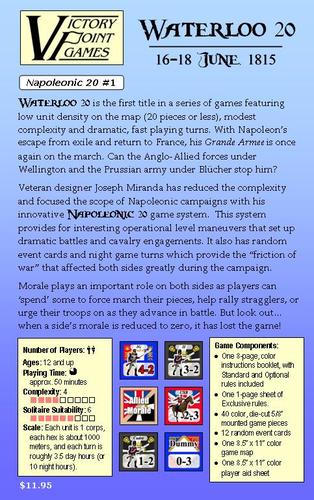
The back cover of the “Waterloo 20” game.
As the first day of the game comes to an end, it is tempting to say that the Duke has no better option than to begin that major shift to the Waterloo position. As we are assuming competent play and no massive flukes of fortune, as was the case with the Prussians on the 16th, it will be the Anglo-Allies who face being the army hanging out to dry with crushing French force ready to bear down on them. At this point the Duke has two things in his favour – the roads and the weather. Although it can seem unwise to get to the Waterloo position too early, you need the lead that packing up early and leaving can give you, and if the French want to force-march after you, let them burn the morale points. Besides, nestling in those hexes full of beneficial terrain will keep your combat strength up even as the weather is playing up with your pursuers if battle does indeed come early.
As for the French, I must admit I am struggling in what I might call orthodox play to see any vastly important reason to keep L’Armée du Nord split after the 16th. In the historical campaign, Grouchy and thirty thousand men were meant to go chasing after the Prussians, then were meant to be cutting the Prussians off from Wellington, and then were supposed to join with the main army and fight the Prussians from there – all of which beggars the question as to why they were ever detached in the first place? So, unless you are really breathing down the neck of the men in black, trudging through the most difficult terrain on the map to get the long way to somewhere you should never have strayed from in the first place makes no sense at all. In fact, unless I have missed something, providing you just have some cavalry fairly near to Mont Saint Guibert, the Prussians are still going to have to fall back to the Wavre area in order to piece themselves back together, and you will have some very helpful terrain to clog them up in as they try and unite with the Anglo-Dutch forces.
As the Coalition player, you might consider it worth trying to “bend” the Prussian retreat and rally efforts to the northwest (say, in the region of Chapelle Saint Lambert), but with the bad weather and the minor rivers turned major for a turn, you then could find yourself somewhat stuck and vulnerable to being picked off – and the whole effort can be undermined by just one French cavalry corps hovering too close for rallying comfort. At this moment, my priority for the Prussians is not to play it fancy, but just get as much of the army as possible rallied and then move it off in one cohesive force.
One other thing destined to occur on the 17th is the first and probably main occurrence of lulls. Keep out of fighting and forced-marching and you should recover at least some of the morale points you spent on the 16th. If one side enters the final campaign day with a clear morale point advantage, it will be an important factor. However, even if the Coalition is a point or two lower at this stage, the defensible terrain around Mont Saint Jean should mean that you can get away with holding the line without spending morale points to throw in reserves. Within this context it is important to bear in mind that the victory conditions for the Coalition player are a bit less demanding than for the French – just get any form of morale lead by the last turn and you have won.
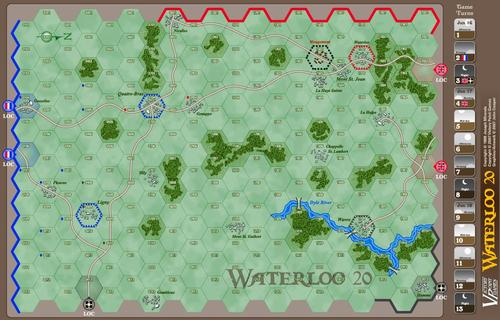
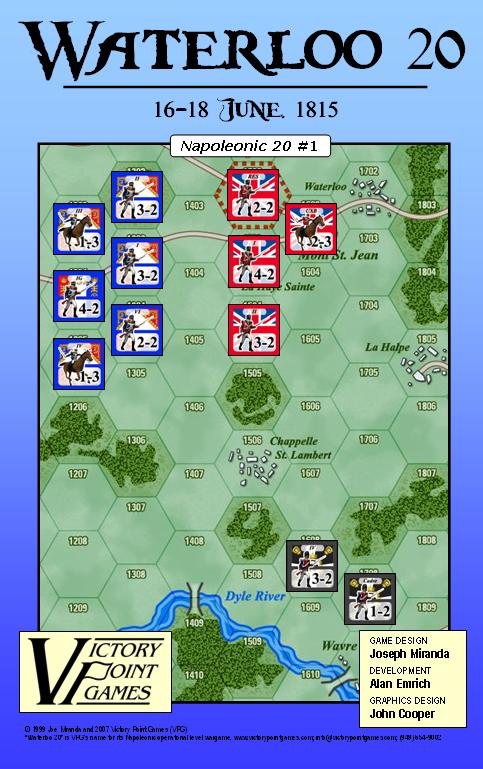
The “Waterloo 20” mapsheet
What should have worked for the French at Ligny (well, if it did not, you would not be at Waterloo), is still the way I would seek to go with L’Armée du Nord on the 18th. The aim is to compel the Anglo-Allied army to make disadvantageous attacks and face hazardous retreats in their own turn, but given the terrain, this will take some consideration. Coalition forces in Hougoumont, because of enemy ZOC negation, will not have to attack, and neither will forces opposing each other in the hexes La Haye Sainte/Mont Saint Jean/Hougoumont or Mont Saint Jean/Waterloo. Gaining the hex east of La Haye Sainte can compromise Wellington’s line, forcing his army into difficult attacks with all the accompanying morale costs. On the other hand, the same hex can be a good place to locate Uxbridge’s cavalry (it broadly equates with where it was launched from historically), and it will be some help to the Coalition player if it does the like again. What you do not want is your British cavalry coming into “first contact” with the French via a French advance after combat in the French player turn, as that will rob your unit of its countercharge possibilities.
And whither the Prussians? On the day, the Duke had been expecting a direct and early intervention on the eastern part of his line – which is largely why that portion of his front was pretty close to undermanned. As it was, Prussian troops moving to support his left was the very last thing the Prussians got round to doing, and that with the last of their three corps to arrive on the field. Seeking to unite the two Coalition armies is obviously tricky, though it is tempting to say that a slightly more northern passage of advance, aiming for the clear ground between Chapelle Saint Lambert and La Halpe might inconvenience the French more than trying to cross the lengths of river and woodland further south – good defensive terrain for a small French force to hold you up in.
By The Numbers
So, this game world and the historical world, where do they touch? Within the context of this large scale approach, units do start where they did in real life, move and fight on a faithful recreation of the essence of the campaign area…and the rain comes down in buckets during the 17th. As for the event cards, allowing for the few that can be called neutral in effect, the Coalition does have, at least potentially, more beneficial events than the French. Perhaps this is just as well, given that whilst the two Coalition armies, combined, had a near two-to-one advantage in manpower over L’Armée du Nord, their game equivalents have no superiority whatsoever in count of units or count of combat factors. To illustrate this, the count of Waterloo factors for the third day scenario (units of all sides that were historically present somewhere around Mont Saint Jean or Plancenoit) actually puts the Coalition at a disadvantage, and not that much better if you factor the terrain bonuses into your calculations. Count everything that can or does appear on the map from June 16th onwards (I take the Grand Battery as booming away at its established strength of four), and the Coalition has a raw superiority so slender it is not worth mentioning, and it still has one less combat unit.
What does this mean? Well, I for one find it intriguing, which is different to saying I think there is a problem with the design balance of the game. I think it is more a case of the designer giving…and then taking away again. The French have the better army, and that is reflected in its combat strength and the number of units it has on the field. But then you have the stuff that is not readily shown in a combat strength point – Napoleon being ill, Ney being…Ney, commanders having little faith in each other, Soult’s lack of talent for order writing etc. When you really look at it, Napoleon lost this final campaign not because, in game terms, of bad die rolls, but bad events. Without taking things too far, you could at least make the case that the French were winning this campaign right up to the last hour or so of it…and then the sum total of events finally told against them, and it was they who spent up the fibre and function of their army first – conned, coerced, bullied and fooled into doing so.
My study of this wonderful game continues.
Game Resources:
 Waterloo 20 version 2.0 rules
Waterloo 20 rules summary
Fading Glory (“Napoleonic 20” quad pack) page on BGG


Your comments about the OOB are interesting in light of the upcoming release of the 3rd edition of this game. In addition to expanding the map to allow the game to begin a day earlier (with the French crossing of the Sambre), the OOB also gets some significant adjustments. The British get Collaert’s cavalry as a separate 1-3, the Prussians also get another 1-3 cavalry (von Hobe, commanding an amalgamation of II and III corps’ cavalry), and a number of the French formations have their strengths adjusted (amongst other changes, Reille’s 2e gets bumped up to a 4-2, and the Guard drops to a 3-2).
I must admit I did feel a tad uneasy when I counted up the units and factors in the respective OOB’s, but as I had seen both sides win, had had a marvellous experience with the game all told, and thought the event cards were the balancing factor against the French, I did not want to make too much of an issue of it.
Having said that, the OOB changes sound really interesting and apposite, and enlarging the campaign’s scope is a great idea. So, despite having the Fading Glory version of the game, I will be looking out for the new version as a must-buy.
The glorious new 3rd edition of WATERLOO 20, combined with a new game, TOLENTINO 20, are available in a twin pack here:
http://www.victorypointgames.com/hundred-days-20.html