By Mitch Freedman
6th Panzer Army
When I open a new game, the first thing I do is to look at the map and the neat rows of playing pieces not yet punched out and try to figure out what to do with them. Then I read the rules and try to figure out how to do it.
It rarely works.
While I like to think that all I have to do is read the rules to understand a game, I am usually amazed to find out that it doesn’t work for me. Its like being surprised that the New York Jets have a quarterback controversy. Really? That team? This year?

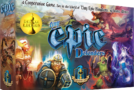
Paul Koenig’s The Bulge: 6th Panzer Army cover
True be told, I have to actually punch out the pieces and put everything in its starting place before I can even start to figure out a game.
Then I double-check the victory conditions to find out what each side has to do to win. And after that, I play it solitaire once or twice, to make sure I know what the game’s creator wanted to happen, and how to do it.
With some luck, all of that work means I will finally start understanding how to play it. What works, what doesn’t, and whether the obvious choices for my side are really the right ones.
But with this game, even before I got through my first solitaire effort, my routine was broken. A big question got in the way. And, with almost every turn – there are only seven of them – it became harder to answer.
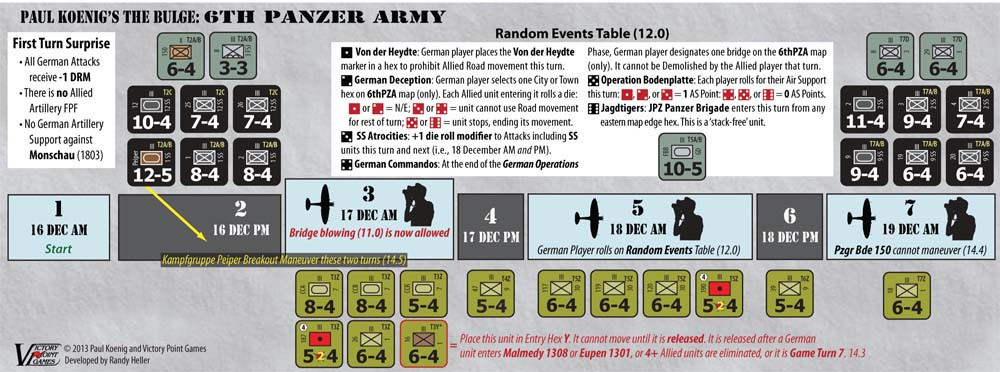
“Paul Koenig’s The Bulge: 6th Panzer Army” Turn Track
How did they manage to put such a big game in such a little box?
6th Panzer Army – the full title is “Paul Koenig’s The Bulge – 6th Panzer Army” – doesn’t reveal itself at first glance. The rules lay out the game mechanics nicely, but its hard to appreciate all the interactions until you actually play it once or twice. Or thrice.
Some things do start showing up right away. Others will be there in plain sight, but their real impact won’t be clear until you begin moving the troops. And you can only appreciate some of the subtle points – like the inability to stack units at any time – when the reinforcements come in later and you find key road hexes are blocked by your own troops.
To be fair, the game also makes a lot of things easy.
Kudos to the graphic design. A tip of the hat to the bright red line on the map that shows where the Germans will start picking up victory points. And credit to a really good rules layout that takes a complicated battle resolution and breaks it down, step by step, into something that lets you go through the dense process in a relatively painless way.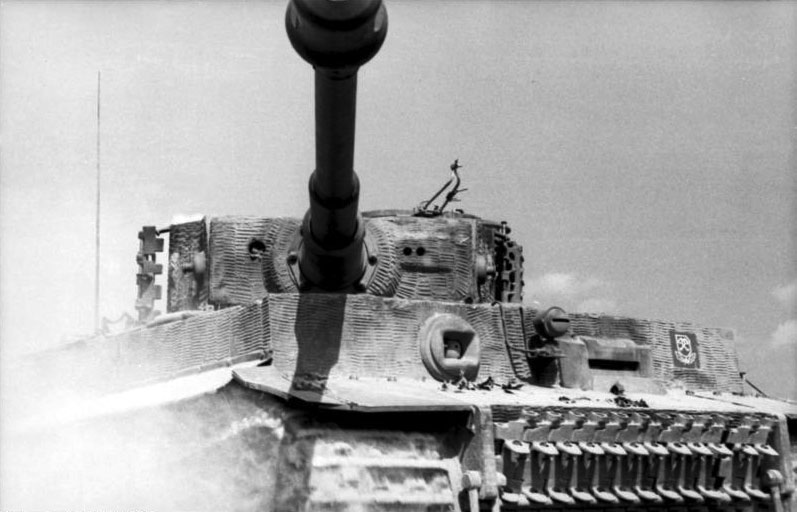
OK, maybe not painless for the people being attacked. But, painless for the people trying to figure out what’s going on in that hex you are battling over.
But the system only works as long as the players are paying attention. You can’t drift off for a bit, or you will find yourself saying things like “Why didn’t I call in my air support?” or “You mean I could have had artillery change the odds?
You may have to decide which battle to give artillery support, and where the aircraft will be assigned each turn.
That’s why I think the solitaire rating on this game really depends on the individual player, not the mechanics. There is enough random about the die roll – after all that planning and plotting – to make the result of combat across a wide front really uncertain, which gets high solitaire ratings from me. But, I also found myself matching every supported German ground attack with Allied artillery support to change the odds back again. And, once I decided to try and interdict a hex to slow the enemy advance, it just opened the door to find another way to move troops on the other side.
As long as we’ve drifted away from a discussion of game mechanics for just a bit, let me repeat – its a very dense rules set. It takes only a few pages to go through the combat procedures, but a lot is packed into each of the seven turns.
Not only that, but there is something counter-intuitive to these rules. No matter how strong the enemy is, you don’t calculate battle odds on their unit. You do it based on the defensive value of the terrain.
Sounds odd, but it works. What you are really doing is reducing the likelihood that enemy troops can turn around and attack you. And, a victory in an attack may not cause much damage, but could make the enemy retreat, which is really important when you are trying to advance, and you can only do it on a road.
 When you unpack 6th Panzer, you will find all the combat units and battle markers on a single card – actually half a card. There are 60 units to start the game or bring on as reinforcements – the other half of the card is filled with markers that are used to change the attack odds, to let infantry dig in, to blow up bridges or repair them, and to do a lot of the other things you would expect in the Battle of the Bulge.
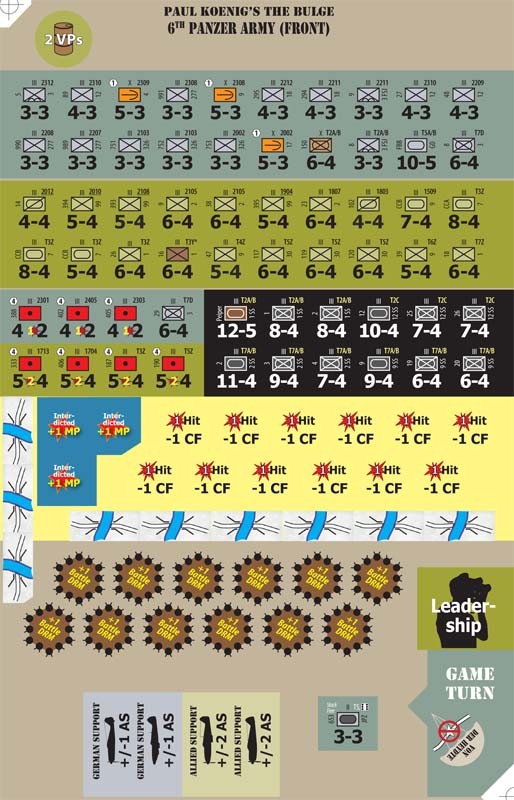
Pay close attention to the little circles marked “=1”. They show a unit has lost one step. So the 60 units you start with become 120. And, since they are back-printed, they actually become 240 before they are eliminated.
Small box. Big game.
The set-up hexes are clearly marked on the back of the player aid card, and for a second you could almost think the Germans are outnumbered. But, its just an illusion.
There are more German units, although many of them aren’t as strong as the defending Americans. And while the 3-3 German units may seem puny compared to the 5-4 and 6-4 American infantry, you quickly figure out that those red boxes marking German artillery and the orange boxes marking units with rockets will be a real problem for the American defenders.
Then, go to the battle sequence on the other side of the player aid card, and take a look at combat resolution. And watch the German army get bigger before your very eyes.
The Americans can take heart because the odds are not what they seem at first. Attacks are calculated based on the defensive value of the hex, not on the strength of the unit being attacked. So, those half-strength units can stand up to attacks just as well as their big brothers.
One problem is shared by both sides. There are turns when massive reinforcements come in. But stacking limits are strictly observed at all times, and the active player will quickly learn that just one misplaced unit can really cause more damage than a whole batch of enemy attacks.
And, both sides will soon learn that the roads don’t exactly go where you want to support an attack or a counter-attack.
One cunningly evil problem is set out for just the German player. In a game where he has to accomplish a break-out – move fast, strike hard, move even faster – the German gets a choice every turn. They can use full movement and attack at half strength, or use half movement and attack at full strength.
Its not a unit-by-unit choice. The whole German side has to do the same thing. Move fast and fight weak, or move slow and fight strong. And the German gets to decide which of those things to do every single turn.
The Americans don’t have that particular problem, but on game turn five, something interesting will happen. There is one chance in six that it will happen to the Germans. The other things are bad for the Americans.
How to play, and how to win, are explained in the slim 18-page rulebook. It also contains some optional rules and the exclusive rules that make the initial German attack very powerful. Both sides should discuss using those optional rules before the game starts. They can have a powerful impact.
Victory points are given to each side for enemy units they have eliminated, city and town hexes they occupy, and towns and villages they occupy.
But the points aren’t the same. Germans get one victory point for each Allied unit eliminated (and a half point for each Allied unit reduced to half strength), but the Allies get points ranging from one victory point for eliminating German infantry to four victory points for eliminating a Panzer unit.
And while both sides get one victory point for each city and town they occupy, the Germans lose 10 victory points for any turn in which they fail to garrison a city hex. And no, the German does not have to garrison a city that the American player has re-taken.
If all that sounds like fun – and it is – start working on your strategy and bold counter strategy, figure out how to move fast or stop the enemy from moving at all, and engage in battle.
But remember that before you start playing, you really should read the rules. Heck, read them through twice.
It will be worth it.
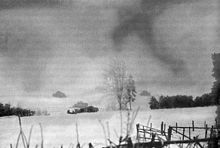
U.S. 6th Armored Division tanks moving near Wardin, Belgium, January 1945 – Wiki

6th Panzer Army game map
Paul Koenig’s The Bulge: 6th Panzer Army Front Cover

Paul Koenig’s The Bulge: 6th Panzer Army Back Cover
Game resources:
Victory Point Games page