
Watching Sam Hood Going Nowhere Fast or Somewhere Slowly
By Paul Comben:
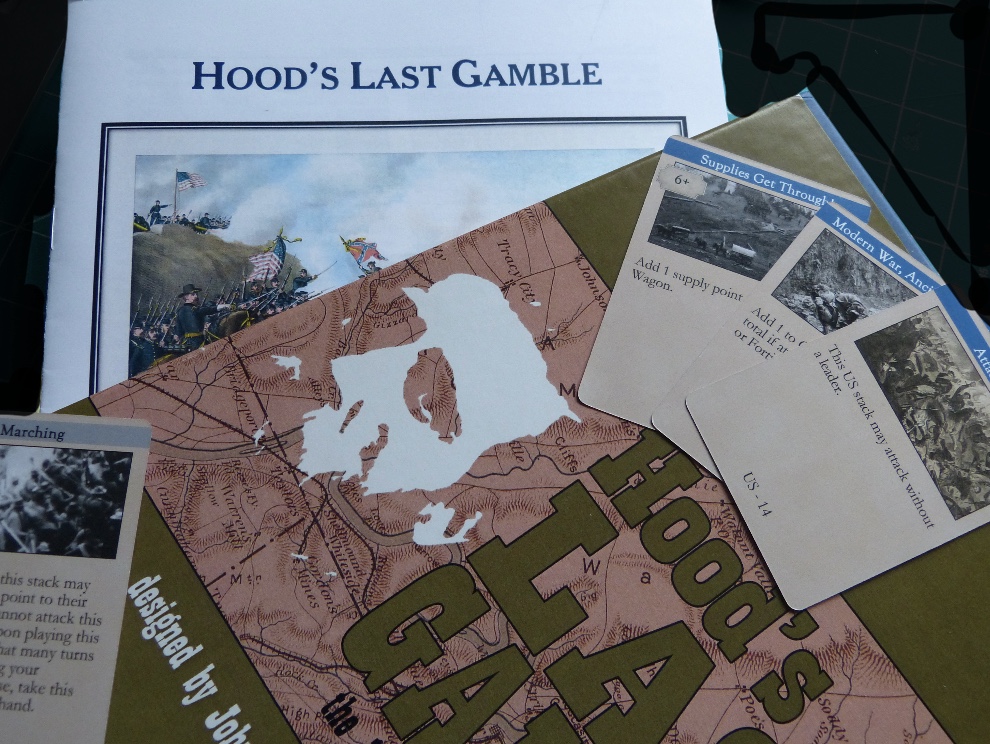
Game Details:
Corps and division level for most infantry units, plus garrisons and major cavalry commands.
7.5 miles per hex; terrain limited to clear, mountain, pikes, rail, rivers, and towns and cities.
Supply is carried by wagon units that are each two points strong when full. One point can combat supply up to thirteen infantry strength points (each strength point is approximately one thousand men).
Both sides have an event deck, which can benefit their army directly or impose problems on their foe. All cards are in the players’ hand at
Whichever side has the most VPs wins.
Designer: John Theissen
Publisher: Hollandspiele
———————————————————————————————————-
Over the years the hobby has not done a lot with this campaign – Hood’s faltering foray into Tennessee in late 1864. There is plenty you can read, but really not a lot you can play – The Gamers’ Embrace an Angry Wind being the only other treatment I know of, but that design is purely and simply about events around what never did happen at Spring Hill and what actually did happen at Franklin. This new design offers far more
You will not encounter a “hippy trippy” Sam Hood here à la the CWB title, but I rather suspect you will find something of a hippy trippy situation facing the CSA player. Let me explain why:
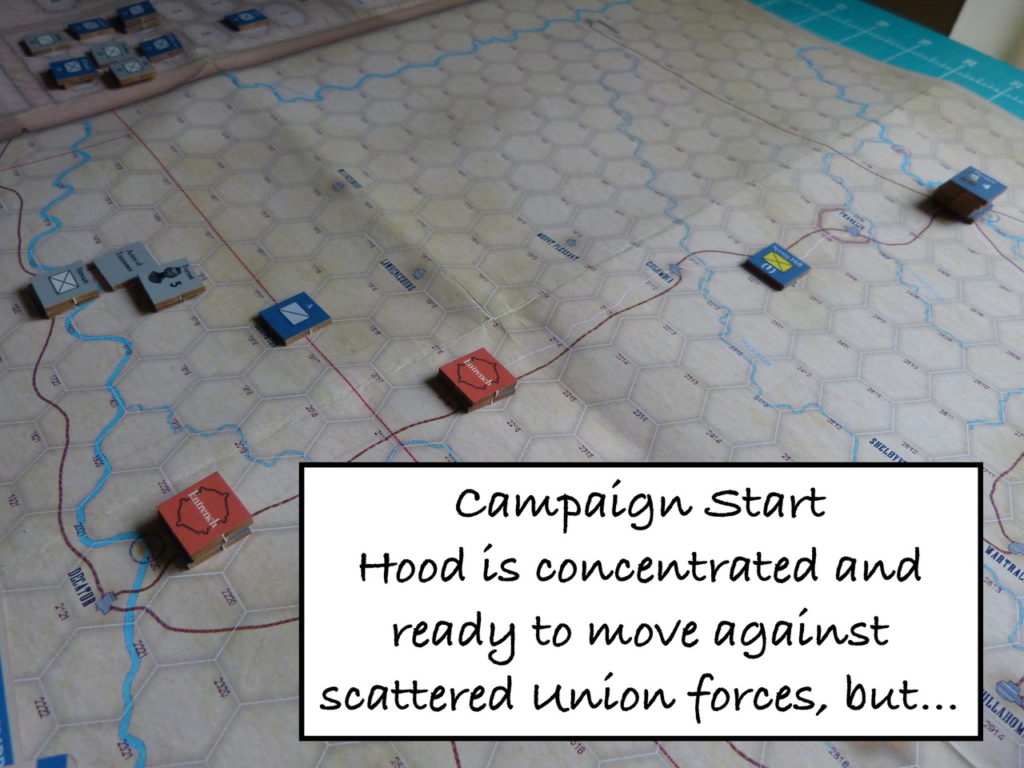
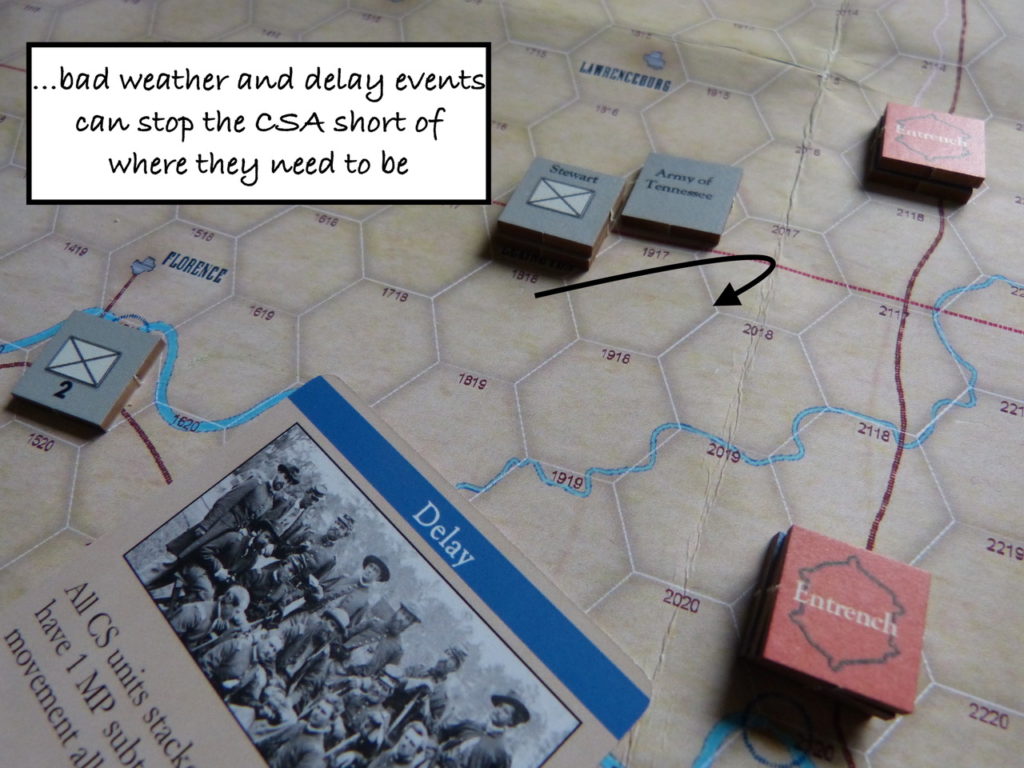
- Hood needs to move fast to catch and destroy the Union forces in detail; the problem is the vehicle has stalled on the starting grid – his entire army is penalized 1MP on the first turn, and to make matters worse, the weather is not cooperating either.
- Hood ideally needs to hit hard when he does catch up with something significant (there are victory point enticements for hurting larger Union forces), but overall his army is not that much better supplied than something or someone with a French accent walking back from Moscow in 1812. As a consequence, unless he can get some extra supply from somewhere (play of cards and judicious combat choices can offer limited help), he only has enough resources for a couple of army-level engagements.
- Certain vulnerable locations can yield victory points, but they are all over the place, and going for some could mean giving up on others.
I will concentrate somewhat on the challenge facing the player commanding the Army of Tennessee, as their actions will largely drive the game. Thus, while both players have their own deck of event cards with a certain degree of symmetry about them, certainly in the early running the CSA player will be looking to speed his advance while the USA player will often be seeking to throw as many speed bumps in his way as possible. And as in many other “race against time” designs, there will inevitably come a time for the CSA player to decide whether it is a race they have any chance of winning, or if it might be better to look for victory by other means. What your John Bell doesn’t want to be doing is what happened in real life – fight a battle (Franklin) that, in game terms, offers no advantage at all, and follow that by hanging around Nashville while the waxing power of the Union forces prepares to ruin his Christmas.
In its own way the game makes it painfully clear that odds are stacked against Hood’s army – what he starts with force-wise is all he is going to get; Nashville is right at the other end of the map; his supply is sparse,
When you do come to engagements it is best to have a very clear idea of what your winning potential is. The design follows in the tradition of numerous other quality Civil War titles that stress the difficulty of achieving smashing odds leading to smashing victories. In fact, potentially rather more important than actual casualties is doing the opposing force harm in terms of inflicting disruption. For forces above a certain size that suffer such a result you get victory points; but, it all comes at a wearing cost in actual losses and supply, and for the Army of Tennessee the margins are narrow.
Interestingly, combat works through a process involving three different combat results tables – the first produces a
Artillery is invisible in this process, although one imagines that the various tables have it subtly built in – and the very fact that attacking or defending anything has a habit of burning through supply with gusto rather infers that the guns are thundering even if you can’t actually see them.
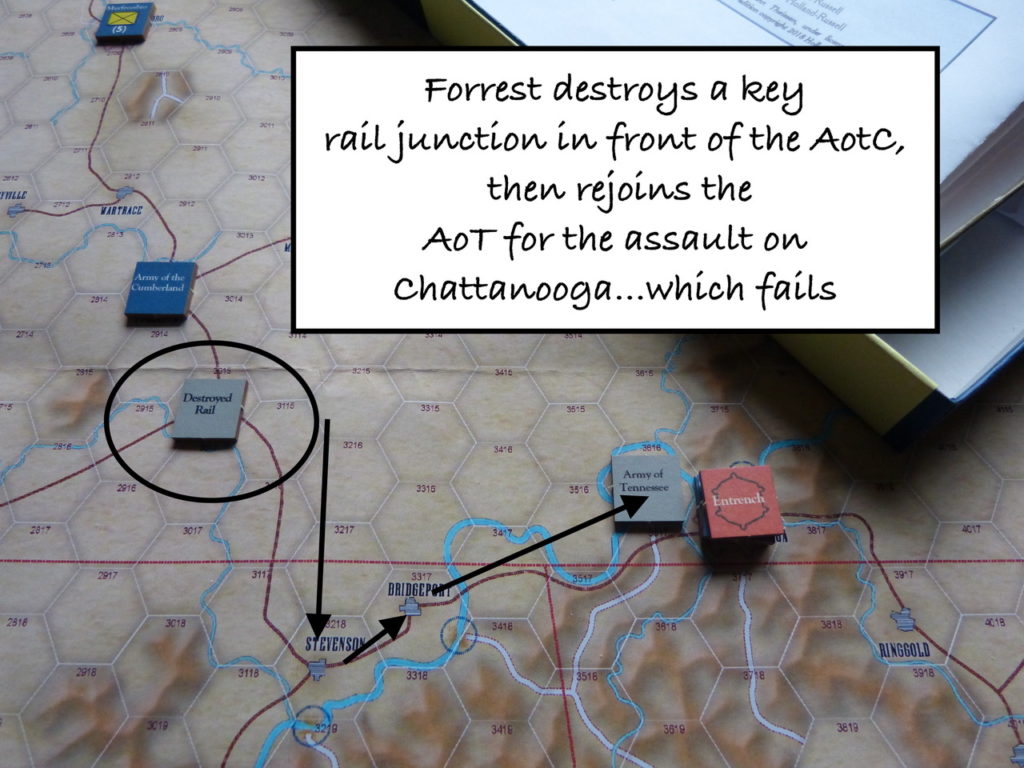
Cavalry, by contrast, is very visible though hardly (as one would expect) that abundant. But be that as it may, my experiences of this design began to suggest rather strongly that decent CSA play leading to decent CSA chances does depend on getting production from “that devil Forrest.” Giving Forrest the right sort of assignment at the right time is important. Here are the choices:
- If Forrest and his boys are with the main body, Hood’s command rating goes up by one. This makes Hood’s army superior in leadership to any Union force led by near anyone – the exception being the highly professional Thomas. The engagement also has to be a field battle, not an assault against works. Nevertheless, if the CSA gets a field battle without Thomas present (definitely a possibility in the early running) the CSA will have an edge (odds shift).
2. Forrest, when present with only his cavalry for
3. Cavalry is the optimum tool for destroying rail lines. This is an important job and one that should not be neglected if you are commanding the AoT. Rail movement is a powerful tool for the Union, as it gives the Union the ability to move Thomas and the forces gathering in Nashville (over several turns as only 5 SPs can be entrained at any time) the ability to move at close to five times the normal movement rate. This is especially relevant if the CSA player is trying to fashion a victory by avoiding an advance on Nashville in
4. Risky but worth considering is simply having Forrest get in the way and slow Union forces seeking to close with the CSA main body or retake a captured VP location. This is simply a matter of being along the direct path the Union player would ideally want to use, allowing the Union to attempt battle only then to ride away. In most cases, you can ride off on a 1d6 result of 3-6. To be honest, this is not quite as nuanced as I would like; the possibility of any infantry force pinning Forrest should be nonexistent, and leadership should also play a role but doesn’t. But as a ploy, it is still worth considering.
5.
None of these ideas will produce a surefire win – there simply isn’t that much CSA force around and numerous things can go wrong. Destroying rail lines, however, is one of the few beneficial certainties, as destroyed lines cannot be repaired in the time context of the game. Cut a line ahead of where the Union locomotive marker presently is will prevent Union forces speeding towards you; cutting lines behind the marker may give you a chance to wreck the locos and they will not be coming back any time soon.
Historically, Hood was aiming for big things. His intention was to capture Nashville, gather new levies in a liberated Tennessee, and thus unhinge the entire Union position in the west. If all went well, he would end up marching to join Lee at Richmond and change the course of the war…as well as possibly discovering the lost city of Atlantis. As one German commander (Rundstedt) said of Hitler’s last piece of iffy logistical pipe dreaming just eighty years later, “Antwerp! We should go down on our knees and thank god if we get to the Meuse!”
The game certainly gives the CSA player more hindrance than help – and rightly so. It is all a very big ask, and that is why an ahistorical Plan B might just be a better idea – destroy enough small forces and garrisons further south to score a point; add to that the value of Chattanooga; see if you can prevent Thomas making the attack the politicians want him to make…or make him attack you in the best position you can find close to Chattanooga and beat him off. If that works, you will win; I tried it…and lost – but not by too much. Such a strategy will not win you the war, but by this stage next to nothing will; you are just trying to prevail in the situation the game presents you with.
So, by and large, this is a neat little system with a fair number of plusses in its
Some of those issues pertain to key events being totally fixed – the weather is always bad in the opening turns of the game, and then even worse weather comes along at always exactly the same time later on. This doesn’t make sense to me. If you want to open up the permutations of a situation, you cannot shut down the chances of certain things happening at different times, or not at all. As things stand, the inevitability (and predictability) of the occurrence of key events combined with the players having view/access to all their event cards at game start (note: some are turn restricted to as actual use) leads to the distinct possibility of the same range of cards being played early on as the CSA player tries to speed his advance and the Union player tries to slow that army down.
There is also a problem, arguably, with one of the most eye-catching cards in the game – the card(s) that transform an attack by either army into a Franklin-style assault. Why the CSA has a card that can do this to the Union is a bit of a mystery, especially if Thomas is present. But the main problem is that both sides will be holding onto this card in order to wreak as much damage on a set piece attack as possible. And the other side will be aware of that – gather your army for that big battle, and out the card will come. To be honest, I thought the Hood Addiction Table in Embrace an Angry Wind was somewhat de trop, and this, in its own way seems a little less than ideally nuanced.
Finally, there is the one VP penalty if Thomas does not make a successful attack on something in grey. The concept is fine, but if the Union already has any sort of lead/game-winning position by the time this provision kicks in, Thomas might as well stay where he is and not take unnecessary risks. And if, by some chance, the CSA is within touching distance of victory, why should they help Thomas avoid his penalty by hanging around waiting to be hit? I am tempted to think that a simple 1d6 roll, halving the result (rounding down probably) if the attack is not made or is not successful would take away all the unwanted certainty of the present rule and add a bit of uncertainty that players cannot be certain they can fully cater for.
Of course, no one is going to stop you tinkering with the game if you happen to agree with my feeling that a few things could be better realized. But that does not make it a bad game as is. The combat method used for this design (and I presume for partner titles) is very well thought out; most of the events (bar my caveat about the Union’s Franklin-style rush of blood) are also well considered; and you essentially have a valid treatment of a campaign that the rather tragic John Bell Hood had such hopes for, not because he was a bit high but because he was simply that sort of fellow.
Game Resources:

Hood’s Last Gamble BGG page
Hood’s Last Gamble: Home Page


Hello Paul. A thoughtful and well written review.
Just a note about about cavalry retreating before combat. If a pure cavalry force is attacked by a pure infantry force, the cavalry may retreat before combat automatically, without needing to roll the die. So, Mr. Forrest cannot be pinned by infantry. If he decides not to fight an infantry force that day, he may order his troops to ride away, and no combat will occur.
(This is in section 9.1 of the rules)
John
You’re most welcome John. My apologies regarding the faux pas with the cavalry rules – I think I must have been a bit lost in the moment.
It’s a very nice system overall, and I really am appreciating designs that can get this much done with just a few pages of rules. I imagine GCACW will eventually cover the campaign, but I just don’t have that kind of space or time.
Warm regards, Paul.