


By Colby Duerk:
My copy of Space Vermin arrived a few days ago. Having playtested the game numerous times in various stages during the development, it was time to play the Campaign Scenario with the final version of the game and the real game components.
Scenario 1: The Family Jewels

A typical mid-game position in Scenario #1.
During playtesting most players chose to hang tough in the city as long as possible to protect the Jewels and take advantage of the buildings for defense. Generally, I choose to only stay for a few turns to get the almost guaranteed first Crown Jewel out and then move to the NW road area, bringing in reinforcements to punch a hole during the middle game and allow the other Recovery Vehicles to snatch some Jewels. Unfortunately, right from the start of the battle I was in trouble due to the location of the 2 initial Tunnel Exits and poor troop placement, forcing me to abandon the center and move to the SE corner. The Sister Queen was in nest #1 (SW corner) and High Queen in nest #2 (NE corner)
For the first half of the game almost everything went against me. Every move I made the next Event would punish me. All my dice were bad, both in combat, particularly with PANTS gun (rolling 1’s over and over) and reinforcement rolls. The topper was finally getting a reinforcement roll, grabbing the second Spec Ops, calling for a Jump Pack move, and having him land in the NAT Infestation area, eliminating him immediately. There are 6 chances out of 216 of this happening (2.77%, exactly the same probability as Snake Eyes)! I lost 5 Marines by around turn 7 and one of the Jewels was taken to the High Queen giving her 5 spawns per turn. At that point things looked pretty hopeless.
 However, in the long run, having the High Queen take most or all of the spawns each turn meant the SW part of the map had very few Vermites. The first breakthrough came when I took down 6 Vermites in one turn, 5 of which returned via Nest 2 in the NE corner and would not come back into play in time to be a threat. I captured a second Jewel and started an end run around the south using the extra Recovery Vehicles to block the few opponents from getting to the combat units, something I had never tried before. It was a bit risky but it worked by always keeping them in the lead in Bamboo or Swamp hexes, allowing the slower Marines to follow behind and pick some Vermites off.
Still the real work was in the last four turns. As always, some Vermites end up milling north and south of the exit area and road. It was nip and tuck all the way to the last turn. I had two RV’s with Jewels but one RV was disrupted and only moved at speed 3. Around turn 10, I got desperate and started Recon’s helping me direct Vermite traffic. On the last turn, I managed to get both remaining Jewels off the map, with almost every other unit in trouble, salvaging the game. It was a bitch and could have been a blow out for the bugs with some bad attack rolls. But the last two chits were Molts, which helped weaken them just in time.
Scoring: Based on the non-Campaign Scenario 1 rules this would have been a Minor Victory. Major Victory for 3 jewels exited, reduced to a Minor Victory since there were more than 6 Marines KO’d. If I had not exited the final 2 jewels on the last turn it would have been a huge LOSS! Since it was a Campaign the score was 30 points for 3 jewels exited, minus 7 Marines KO’d. Points Scored 23. Without those final 2 jewels my score would have been THREE! Yikes!
Scenario 2: The Great Migration
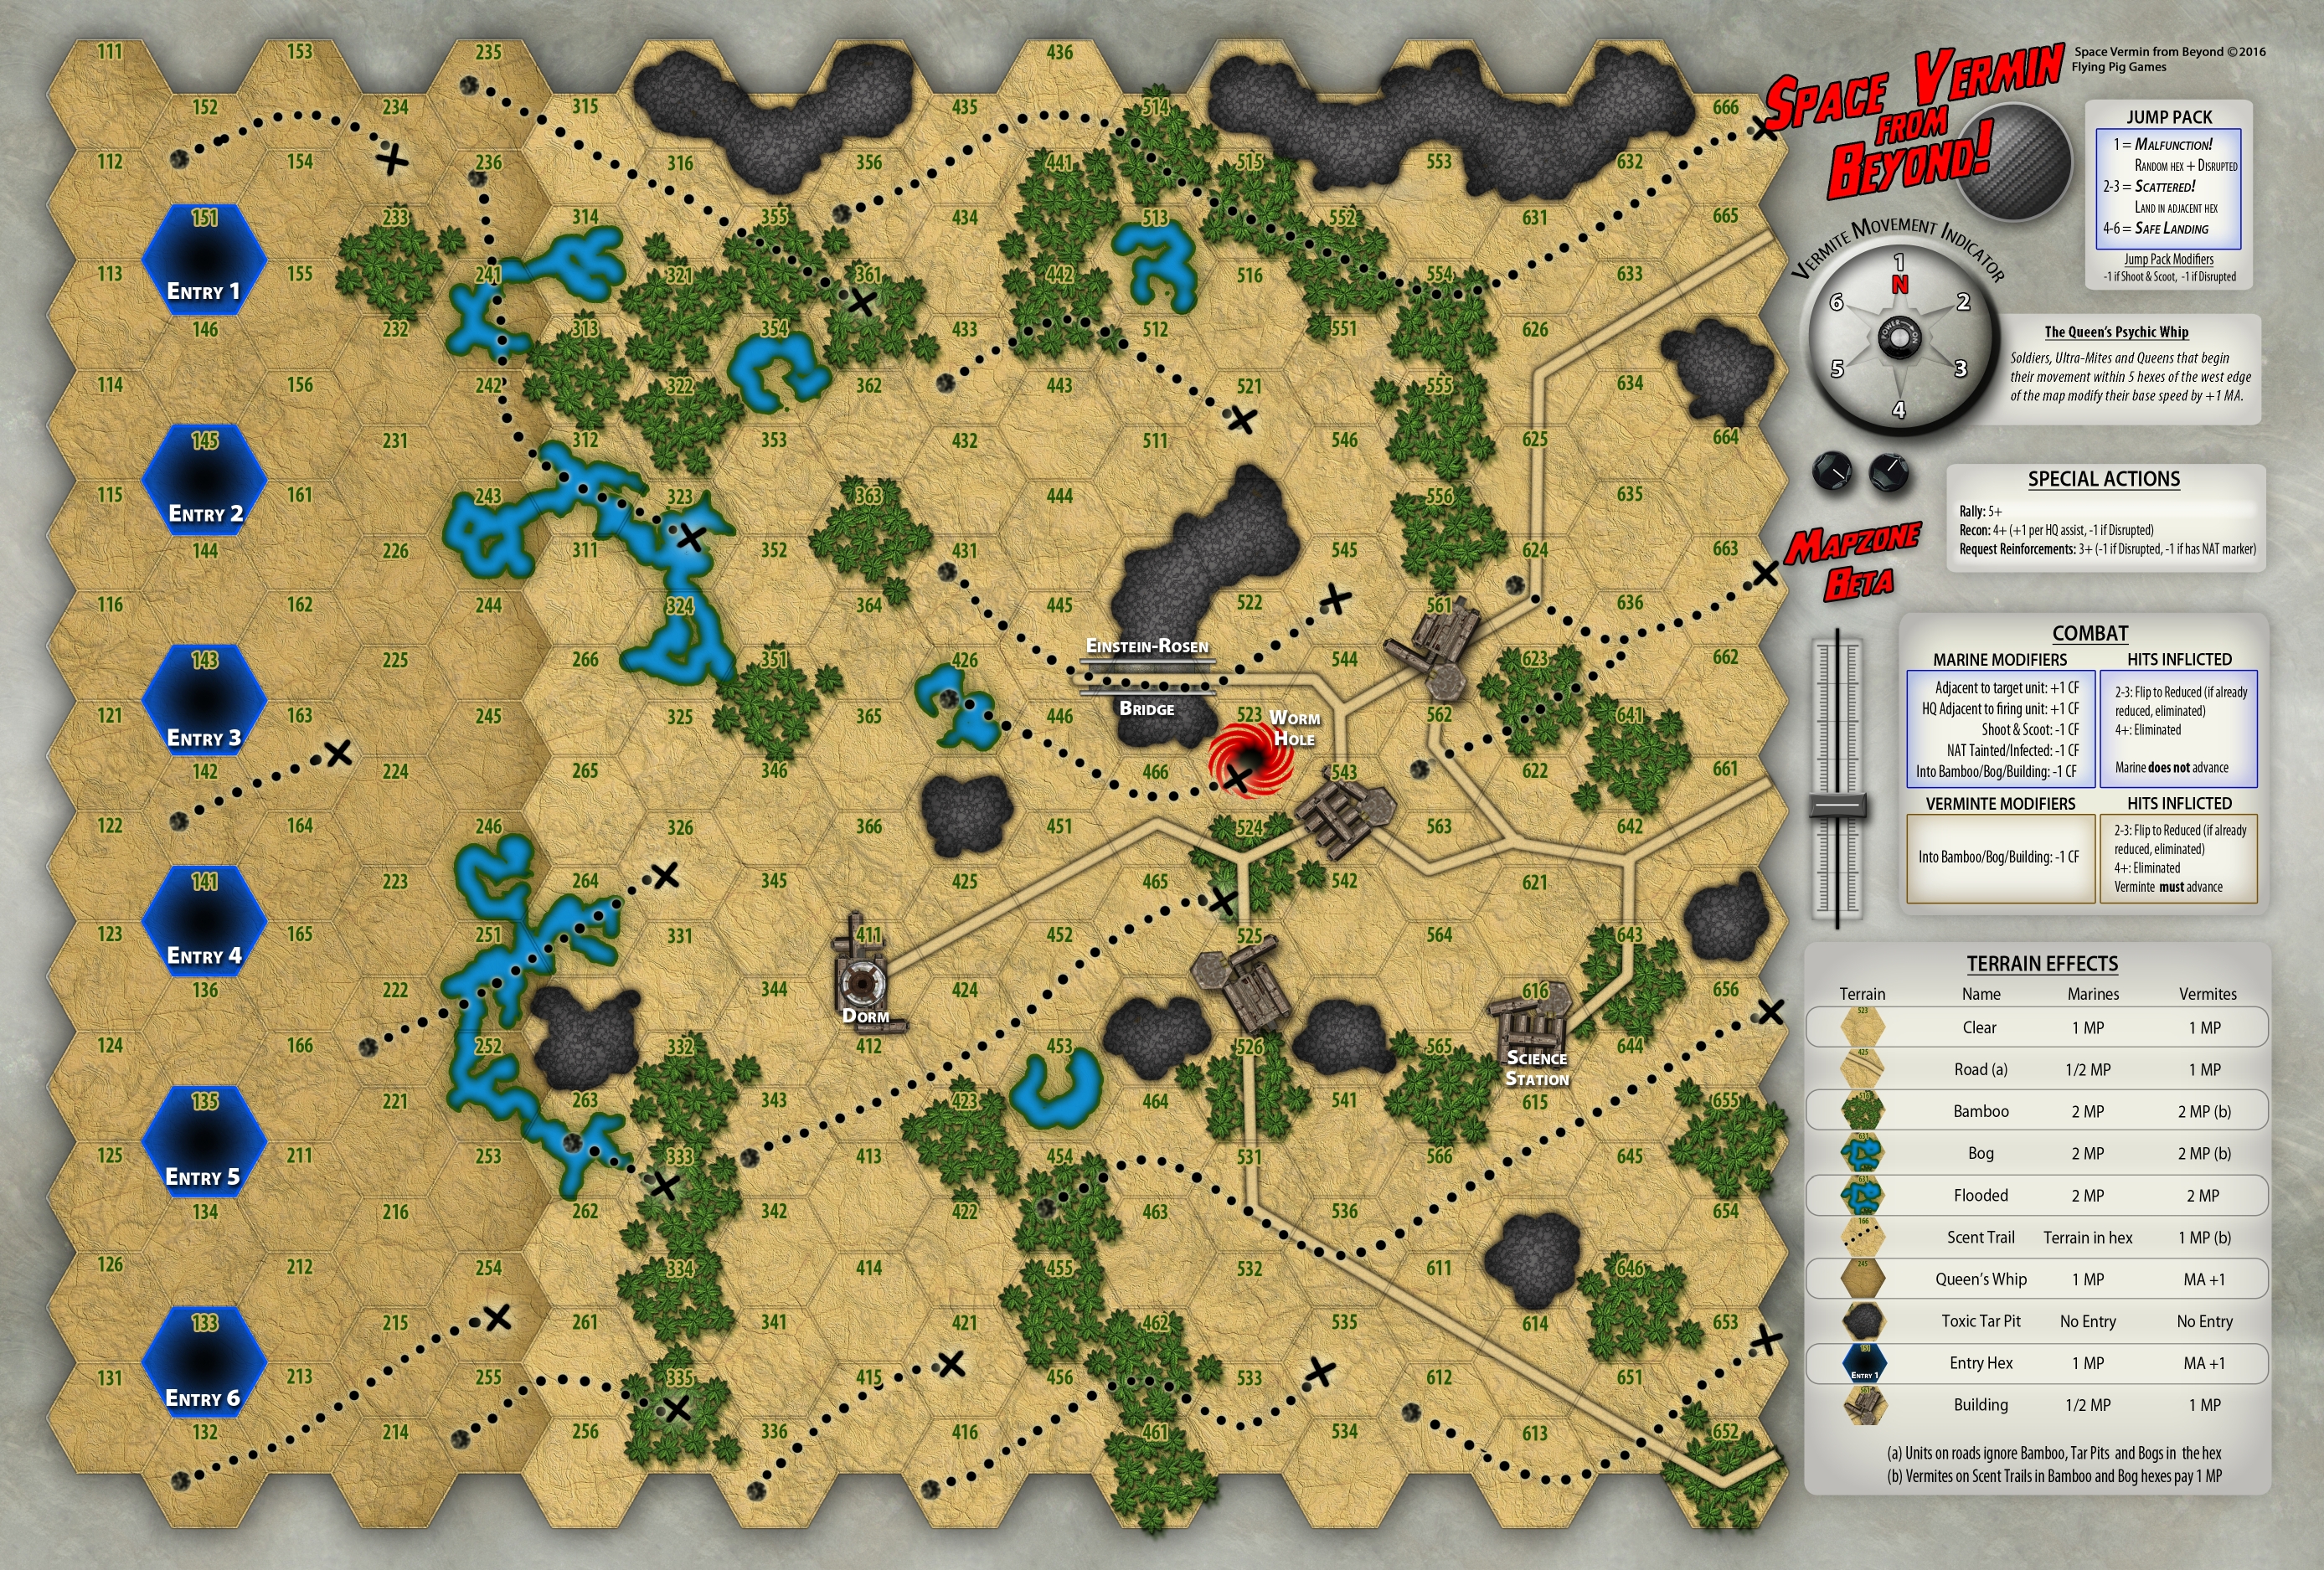
The scenario #2 map
This scenario is a bit deceptive. At first glance there appears to be a great deal of time to get your forces setup. Sometimes that does happen but most of the time it does not. Winning this scenario is dependent on three key factors. First, is the entry hexes of the three Queens, are they spread out (area 1, 3 and 5) or clumped (e.g. area 4, 5 and 6); second, will your HQ Reinforcement rolls be successful in the first few turns; lastly, in determining the order in which Marine reinforcements are selected.
This game began with the High Queen carrying a Crown Jewel, making her particularly deadly. She got the Jewel because of the four (above ground) jewels in Scenario 1 only three were successfully exited. If I had failed to get those last two off, both the Sister and Child Queen’s would also be carrying one.
Luckily, this battle went quite well early on, except for the High Queen starting in Entry #6, who – with enhanced speed – rapidly approached the east edge in an attempt to escape. I had almost resigned myself to having her escape, but I was able to pick off a handful of the first wave, get some reinforcements, got the ANT Gun in place early and on average rolled pretty good dice.
 Things started to heat up, as they always do in this scenario, mostly due to having drawn all of the Direction 3 (SE) chits in the first half of the game. This had both the Sister & Child Queen’s and their minions running down the middle. When this happens multiple stacks of Vermites become bogged down at the Bridge and the road to the Wormhole. These large stacks are all sitting on Scent Trails, so regardless of how many you KO or the Event Chits “direction of travel” they stay on the Scent Trail and continue to move forward into your Marines if a space opens up. Two Marine Squads went down and the bugs advanced towards the Wormhole. This is where things can collapse fast. Luckily, I was saved but pulling the one Event Chit that would help. The Bogs Flood – Magnetic Storm came up confusing all the Vermites making them run in random directions, ignoring the Scent Trails. My dice were hot and more than half of them, including the most troublesome Queen stack, moved backwards or north – off the Scent Trails. This bought me several turns because it would take them some time to find the Scent Trails again.
I regrouped in the center and managed to hold off the High Queen + Mite + Crystal on the second to last column from the east edge with a single Heavy Weapon in Bamboo terrain and a Spec Ops using a PANTS Gun to weaken the Escort. It took me about 4 turns, but down she went saving me a possible loss of 4 or 5 VP. With three turns left, I had only lost two Marines and only two Vermites (not counting the Drones) were on the map alive. Knocking out those last two would end the game two turns early. There were three Event Chits left — 2 Vermite Molts and 1 Vermite Frenzy. I pulled the Frenzy and both remaining units activated getting in two boosted attacks killing 2 more Marines. I took the last two Vermites down to end the game. I needed a decisive victory for the campaign to be a success and got it.
Scoring: Based on the non-Campaign Scenario 2 rules this was a Decisive Victory. 22 Vermites KO’d = 44 points, minus 4 Marines lost. Final Score 40 points.
Campaign Scoring: Scenario 1 = 23 points + Scenario 2 = 40 points. Final Score 63 points = Major Victory. Again without those 2 last minute Jewels the final score would be 43 points = DRAW.
Great fun and a great game. Gotta love those bugs.
Game Resources:
 Tiny Battle Publishing “Space Vermin from Beyond!” Page
Space Vermin from Beyond! BGG page
Tiny Battle Publishing Facebook Page