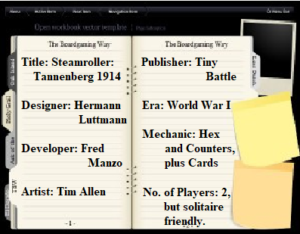
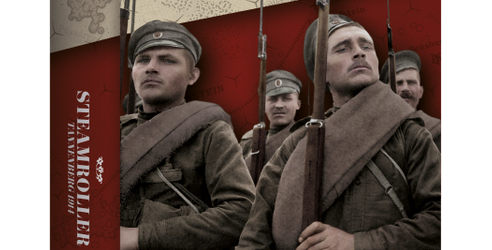
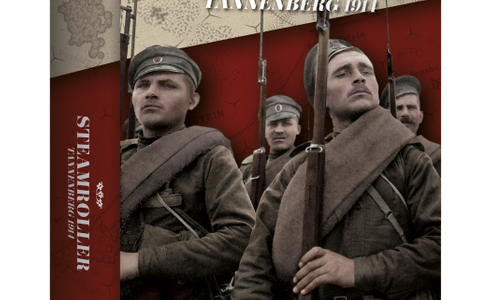
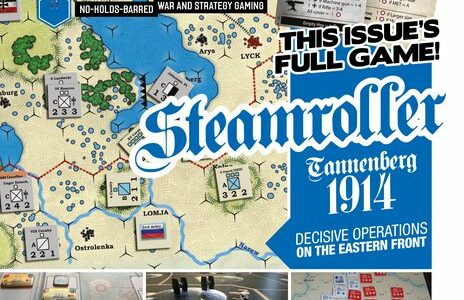
Steamroller- Tannenberg 1914 was published both in a magazine version by Yaah! and in a boxes version by Tiny Battle.
I have been working through my backlog of magazine games recently, and having just played Ty Bomba’s ‘Schlieffen’s War’ from S&T, this one seemed to be the natural sequel (and if any good, would lead me into trying more Yaah! Games).
As soon as I started to read the rules, I was struck by how clear and straightforward they were, compared to many of the recent rule-sets I had been playing ( See Charles Vasey’s review of ‘Verdun – Steel Inferno’ for the most recent, where there were vital rules we simply couldn’t find).
I remember when reading these rules for the first time saying to myself “I understand this!”, and now looking at my notebook, where I write down important rule-points and references as a sort of player-aid when I start playing the game, I see that I have written down precisely one item – “Stacking = 8 size points”.
That is not to say that I didn’t have to keep looking for stuff in the rules as I played – when doing solitaire games I tend to do a quick read-through, make my notes, decide on a historical plan for the two sides, and then move counters and refer to the rules as I go along. Here, when I needed to refer to something, it was always in the right place, and so easily understood that I didn’t have to look at it a second time! [Which didn’t stop me misreading things – see Fog of War notes below!]
The one thing that I had trouble grasping was the combat system, and I had to read it twice before I got past my own preconceptions and realised that what was written meant exactly what it said, and said it very clearly once I slowed down and read it properly (and laid the cards and units out).
The last three games that I have played solitaire were ‘Second Bull Run’ from Vae Victis magazine, “Solferino” from Battles magazine (1st edition was also from Vae Victis), and ‘Schlieffen’s War’ from S&T. Each used a different combat system and command system, and each was chosen by the designer to best represent the battle/campaign being simulated.
In Bull Run’s command system, you (the player) selected a Corps commander, rolled a dice against a table, and were told how many of that Corps’ divisions you could activate.
In ‘Solferino’, you rolled a dice to activate a Corps commander and his units.
In ‘Schlieffen’s War’ you could move all your units, but they suffered certain penalties for being out of supply range or of command range of Army HQ units. “Combined Attacks” – attacks from multiple hexes required the units to be within command range of the HQs, though stacks in single hexes could still make attacks. In Bull Run, only divisions of a single corps were active at any one time, so multi-division corps were better able to manage their attacks.
In this game, you activate single units/counters to move OR make attacks (or other equally important activities), though the initiative system will sometimes allow you to make simultaneous/multiple attacks – but the combat system then steps in to level the battlefield to make sure there’s no bullying – at this game-scale, two corps attacking one does not physically work the same way as two battalions attacking one would.
There is, however a “Planned Operations” chit that does let the Germans perform a ‘proper’ offensive, but it only comes into play as a recurring event – as you will see in my unscripted playthrough of the first turn below. You deploy the chit at the end of a turn ready for use in a subsequent Action Round (or hold on to it and hope the event doesn’t take it away from you), so there won’t be planned offensives every turn – you will have to make do with muddling through, just like in the real campaign. Also – the chit can be captured by the Russians (though not used by them), so think of it as a depot marker for assembling supplies for the offensive. The rules also remind you – in the Forced March section – that it works best if you prepare the ground for it.
Combat resolution also caught me out, as you will see below – the hazard of not reading the rules exhaustively, but also the best way of getting surprise and chaos in your game – particularly if you are a solitaire player who wants to see if the game gives good history.
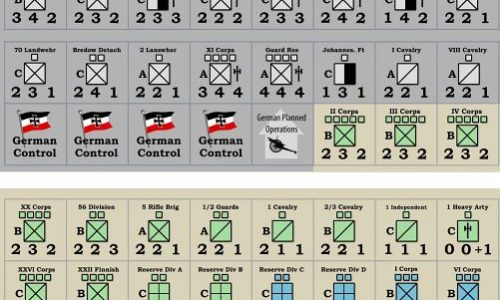
You will see from the counter sheet that the Germans have some beefy 4-4-4 counters, compared to the best Russian ones at 3-2-2 or 2-3-2. Look more closely, though, and you will see that the German counters (half-corps) have two ‘strength’ points, while the Russians have from three to five (and both sides have weaker ones too).
The Germans might give the Russians a good thumping, but the Russians will be able to take it, and outlast the Germans. Units can be repaired, even in Zones of Control (ZoCs, though called NMLs here – No Man’s Land), by 1 point in a ZoC and 2 out of it, and ‘eliminated’ units can be rebuilt in the following turn, though starting from a single strength point. The Germans can be back in play and at full-strength during a subsequent game turn (well, one unit can).
Those numbers on the unit counters also have different meanings to most conventional ones:
Underneath the name at the top of the counter are some little boxes which represent the ‘strength’ of the counter, ranging from one to five.
The three numbers at the bottom of the counter represent the strengths for Rifles – Machine Guns – Artillery (the latter a separate value to Heavy Artillery).There are also a number of “False Report” units – dummy units which pretend to be Infantry, and which exert a ZoC and so have to be shifted, either by Cavalry Probes or by attacks.
Infantry and artillery counters have a hidden side and operate incognito until revealed. Cavalry have a ‘scouting’ side instead of a hidden one, when they can do cavalry stuff; once revealed, they operate as infantry until the end of turn phase when units are flipped over again.
Winning the Game
It is the Russians’ job to win the game. There is a victory point (VP) chart ranging from 20 VP (Decisive Russian Victory) to -10 (Decisive German Victory).
Konigsberg – automatic victory for the Russians if they occupy Konigsberg, OR have 5 strength-points and a Heavy Artillery unit adjacent to it.
+4 VP if the Germans have called for the Western Front reinforcements.
+2 VP for every Russian strength-point of Infantry/Heavy Artillery, or +1 for cavalry, that exit the western edge of the map.
+2 for each captured German city hex, and +1 for each captured German town hex (occupied or last unit to pass through it)
-2 for each captured Russian city hex, and +1 for each captured Russian town hex (occupied or last unit to pass through it)
Playing the Game
The game consists of eight turns (each representing four days), with five Action Rounds during each turn.
Each player has six Initiative cards and twelve Combat Results cards. One Initiative card is randomly discarded at the start of each turn (for the duration of that turn!).
The Russians have the following values – 4, 4, 3, 2, 2, 2.At the start of an Action Round each player chooses an Initiative card, and then they are revealed and compared.If the cards are equal in points, it is a ‘Lull’ turn. The player with Strategic Momentum (shown on the Game-Turn marker) gets one activation, and then the Round ends.If the cards are mismatched in points, deduct the smaller number from the larger, and the player with the larger number (Initiative Player) conducts a number of actions equal to the difference, then the non-Initiative player conducts one action, and then the Initiative player conducts one, and so on until all the actions have been completed. Note that whoever has the biggest number goes first and last.The Strategic Momentum is with the Russian player at the beginning of the game, and then switches to the Germans when Ludendorff and Hindenburg arrive during the course of the game.
There are four “Activated” markers for each player, with the Russians’ double-sided for 1st/2nd armies. The Russians must announce which army will be activated before revealing the Initiative cards. One marker is placed with the activated unit when chosen.
The Actions available are –
Move –5 movement points (MP) for “Scouting” cavalry, 3 for all other units. Movement costs are 1 MP for a clear hex, 2 for hexes containing terrain, OR for crossing a river. 2 MP is the maximum cost for entering any (legal) hex.
Firepower Combat – conduct Firepower Combat on an adjacent unit.
Assault Combat – move into an adjacent enemy-occupied hex and conduct Assault Combat.
Planned Operations – if the marker is deployed then activate it and ALL units (not already activated!) in that hex AND one adjacent hex are activated and each may conduct any action, and in any order. Assaults get bonuses. The chit is removed after play until the next event brings it back. All activated units get an Activated marker (you may need extra markers for this).
Regroup – remove a casualty marker (terms & conditions apply).
Rebuild – one eliminated unit per Game Turn may be returned to play (terms & conditions). No cavalry and no 1-stength German units need apply.
Cavalry Recon – a cavalry unit on its ‘Scouting’ side may reveal any one adjacent enemy unit. Russian cavalry have to make a test in order to do this.
Note that the ‘activated’ markers are removed at the end of each Action Round, so that a single unit could be activated five times in the turn.
The Sequence of Play
There are a number of activities carried out before and after the Action Rounds.
1. Reinforcements Phase – units listed in the Set-Up arrive now.
2. Initiative Deck Phase – shuffle & randomly discard 1 card.
3. German Railroad Movement Phase – 4 strength-points of units may move station to station (plus any number of “False Report” units), but not into uncontested enemy ZoCs.
Five rounds of Actions:
4. Bid Initiative Card Phase – when you reveal your chosen Initiative card for an Action Round.
5. Action Round Phase – when you perform one of the five Action Rounds (with the number of Actions in each Round determined by the Initiative Cards chosen).
6. Remove ‘Activated’ markers and repeat 4 & 5 above until the end of Round Five.
7. End Turn Phase
a. Special Reinforcements step – both sides have optional reinforcements they can try to call in.
b. The H-L Team Take Command step – the Germans test to see if Hindenburg & Ludendorff arrive.
c. Forced March Movement step – both sides, in turn, check to see if they can make extra free moves.
d. Fog of War step – flip revealed units back to their hidden sides; they MAY redistribute some, none or all of their ‘false Report’ units, from on or off the map.
e. Planned Operations Deployment step – if the Germans have the Planned Operations chit, he may place it now, if he so chooses.
Much of the Sequence has been described above. I have not gone into the details of combat, since that emerges neatly out of my first-turn playthrough below, and there is obviously some small-print for many of the steps in the sequence that I have not gone into either.
Playing the Game
Since this is a solitaire game, hidden movement is problematical, but fortunately, I seldom remember what is in a stack even in a game without hidden movement anyway. Also, I have used the accompanying short article to determine what the historical behaviour for the participants will be for my game, and circumstances usually begin to dictate behaviour once we get rolling.
The Germans will ‘have a go’ at the Russian 1st Army and see what develops from that. The German commander, von Prittwitz appears to be erratic and volatile.
The Russian 1st Army will probe carefully at the Germans but will engage if pushed – and as it is ‘cornered’ on the map, will have to fight just to get a bit of recovery room.
The Russian 2nd Army when it appears will make a bee-line for Konigsberg, as that is its VP objective, but I might dice on the off-chance it decides to push deeper into Prussia, as the ultimate objective is to take pressure off the French.
GS SR 001a – Initial Set-Up and playing area
/pic5477857.jpg)
You will see the Initiative and Combat Card decks shuffled and awaiting use, and various counters and markers set conveniently to hand. The Turn Track is on the left with various reinforcements stacked next to it in turn order.
GS SR 001b – Initial Set-Up – the map & counters
/pic5477858.jpg)
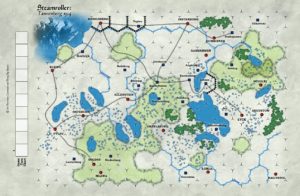
The Germans are holding “internal lines”, literally as they thoughtfully built a railway network ready for the war. The Russian 1st Army is advancing from the right, with its weight in the top right corner.
The Russian 2nd Army is mostly off-map, with just two cavalry units on the southern edge. The 2nd Army will enter from the southern edge, between the towns of Lomja and Mlawa. You will see the border marked with a red line running from the hex to the left of Mlawa along the first hex row to the right and then heading north in front of the 1st Army units.
TURN ONE (August 15-18)
GS SR 001c – Initial Set-Up (with the Russians incognito)
/pic5477859.jpg)
German Railroad Movement Phase – 2 units from Gerdauen to Gumbinnen.
Action Rounds:
Action Round 1: Bid Initiative Card Phase – Russians 2 – Germans 3 = Action Round sequence of G, R, G, R, G.
G1: 1st Cavalry – ‘Cavalry Recon’ against adjacent Russian stack, revealing the 2/3 Cavalry.
R1: Russian 2/3 Cavalry – Assault Combat against German 1st Cavalry: Germans in ‘scouting mode’ retreat, Russians advance (after drawing a Combat Card to check for “Empty Hex” casualties – this is also done when ‘Assaulting’ an empty hex in an enemy ZoC you want to move into; there may be patrols and the like to annoy you).
G2: Move 1/1 Corps forward from Gumbinnen to Stalluponen.
R2: Russian ‘Scouting’ Cavalry on hillside – ‘Cavalry Recon’ against above, reveals 1/1 Corps.
G3: Move 2/1 Corps forward from Gumbinnen to Stalluponen.
Remove ‘Activated’ Markers.
Action Round 2: Bid Initiative Card Phase – Russians 4 – Germans 4 = A ‘Lull’ Round, Russians get 1 action:
R1 – XX Corps forward to join scouting cavalry on hillside.
Remove ‘Activated’ Markers.
Action Round 3: Bid Initiative Card Phase – Russians 2 – Germans 4 = Action Round sequence of G, G, R, G, R, G.
Germans have a ‘double move’ to begin:
G1: 1/1 Corps Assault Combat against adjacent Russian stack – Scouting Cavalry
G2: 2/1 Corps Assault Combat against adjacent Russian stack – XX Corps
GS SR 002a – German I Corps attacks Russian XX Corps & cavalry screen in front of Stalluponen
/pic5478639.jpg)
G1: 1/1 Corps Assault Combat against adjacent Russian stack – Scouting Cavalry – cavalry retreats, Germans draw Combat Card to check for “Empty Hex” casualties (See photo 002c for example of this).
GS SR 002b – German I Corps attack – cavalry screen retires
/pic5478640.jpg)
G2: 2/1 Corps Assault Combat against adjacent Russian stack – XX Corps
Both sides draw a Combat Card.
GS SR 002c – German I Corps attack – both sides draw Combat Cards
/pic5477862.jpg)
The two sides then match the Assault Attack section to the Assault Defence section and compare results
GS SR 002d – German I Corps attack – both sides compare attack-defence results
/pic5477863.jpg)
A Teutonic Cross icon represents the Germans, a Roundel represents the Russians (both taken from aircraft recognition markings for some reason).
1 hit is inflicted if the German’s MET value = A or B – YES
1 hit is inflicted if the German’s Rifle value is 1-4 – YES
1 hit is inflicted if the German’s Machine Gun value = 3-4 – YES
1 hit is inflicted if the German’s Artillery = 1-4 – YES
(Note – the German unit has a Heavy Artillery icon – this affects Firepower Attacks – see this section on the card.)Therefore 4 hits are inflicted on the Russian unit.Russian Card – Assault Defence:
1 hit is inflicted if the Russian unit is larger in size (4 strength points to 2) – YES
1 hit is inflicted if the Russian unit is in Heavy Cover – NO (were in the open)
-1 on the German score if Russian unit is in Heavy or Medium Cover – NoTherefore 1 hit is inflicted on the German unit.
GS SR 002e – German I Corps attack – both sides apply casualties
/pic5478641.jpg)
Hits are indicated by placing casualty markers under the unit. These are drawn randomly from a container. If there is 1 hit, the light brown Light Casualty side is used. If there is more than 1 hit, the counter is placed on its red Heavy Casualty side, and if there is more than two another marker is drawn, and so on.
The German unit has a Light marker; the Russian a Heavy and a Light marker, indicating 3 hits (don’t ask me where the fourth went – Fog of War). The markers have different factors on them, so you never know what will hit you.
The Russians have suffered more hits (against their strength) so they must retreat. They have to avoid ZoCs, unless friendly units occupy them, so they have two options, but they chose the eastern hex because it gives them a route to the south; the northern hex would back them into an already crowded corner.
GS SR 002f – German I Corps attack – the Russian XX Corps retreats
/pic5477866.jpg)
R1: IV Corps moves north to cover XX Corps’ flank
G3: 1st Cavalry – Assault Combat – against 2/3 Russian Cavalry:
GS SR 003 – German 1st Cavalry assaults Russian 2-3 Cavalry
/pic5477867.jpg)
German cavalry – no hits; Russian cavalry – 1 hit on the Germans, unit eliminated. Oops.
R2: 5th Rifle Brigade moved north to join IV Corps.
G4: 2nd Landwehr moves from Insterburg to block 2/3 Cavalry.
Remove ‘Activated’ Markers.
Action Round 4: Bid Initiative Card Phase – Russians 3 – Germans 2 = Action Round sequence of R, G, R, G, R.
R1: IV Corps – Firepower Combat – against German 2/1 Corps.
GS SR 004 – Russian IV Corps attacks German I Corps
/pic5477868.jpg)
A firepower attack is against a selected target – in this case the already damaged half of the Corps (existing hit marker on right).
Where there are multiple units involved, the ATTACKER pairs up one attacker with one defending unit; if there is an odd number, the attacker doubles up against a defending unit; then again until all attackers and or defenders are allocated.GS SR 005a – German 1-1 Corps Assaults the Russian IV Corps & 5th Rifle Brigade
/pic5477870.jpg) The Activated marker indicates the hex where the attack originated.Where there is more than one unit facing an attacker or a defender, a series of single-combats are fought until only an attacker or defender is left standing.
The Activated marker indicates the hex where the attack originated.Where there is more than one unit facing an attacker or a defender, a series of single-combats are fought until only an attacker or defender is left standing.
Once all the pairings have been fought to a resolution, the surviving attackers and defenders are re-matched, and you continue until only attacking or defending units are left in the hex.
In this instance, the Attacking corps chooses to fight the IV Corps first. They both draw Combat Cards and the cards produce an Event – card numbers 6 and 1 giving Event #7.
GS SR 005b – German 1-1 Corps vs. the Russian IV Corps – Combat Cards
/pic5477872.jpg)
The Russian Corps is carrying a Light Casualty marker.
[Fog of War again: I misread the rule where it says the event is activated AFTER the current combat is resolved and thought that the combat was interrupted, whereas the combat should have been completed BEFORE actioning the event.]
Whichever side drew the highest numbered card gets to play the event, in this case, the Germans.
[QUERY: what if the events have the same number? I would assume the side with the highest morale gets it, but then what if they have equal morale?]
EVENT #7: This gives you a choice of three options –
1. Take possession of the Planned Operations chit.
2. Seize the Initiative – flip the Game Turn marker to give you the Strategic Momentum (unless Ludendorff & Hindenburg are in play).
3. Inspirational Leadership – activate one unit, and perform three actions – Regroup, Move and Combat, in that order.
I chose number 3, and activated 36R/1 Reserve Corps, moved it adjacent to the ongoing battle, and assaulted the 5th Rifle Brigade across the River Rominte, which will count as Heavy Cover for the Russian unit.
Still operating in a Fog of War, I then resolved this event-driven combat –
GS SR 005c – the German 36R-1 Reserve Corps vs. the 5th Rifle Brigade – Combat Cards
/pic5479505.jpg)
Germans – 1 hit for Larger Size (2 to 1); Russians – 1 hit for Heavy Cover (the river), -1 to the Germans for Heavy Cover: net 1 hit against the German unit, which retires back over the river with a Light Casualty marker (-1 strength point).
We then return to the original combat, 1/1 Corps vs. Russian IV Corps:
Germans – 1 hit for MET = A or B, 1 hit for Machine Guns = 2 -4; Russians – 1 hit for Larger Size (4 to 2), 1 hit for Machine Guns = 2-3: German unit eliminated, Russians hold their position with a Light and a Heavy Casualty marker.
GS SR 005d – after the Battle on the Rominte River
/pic5477875.jpg)
The German Reserve Corps is back over the river with an Activated marker; the IVth Corps has an Activated marker from an earlier activation, the 5th Rifle Brigade hasn’t yet been activated this round.
R2: Regroup – XX Corps removes 2 casualty levels.
G2: Move – Konigsberg Field unit to Stalluponen
R3: Move 1st Cavalry forward to Goldap.
GS SR 006 – Situation at the end of Turn One – Round Four
/pic5477876.jpg)
Remove ‘Activated’ Markers.
Action Round 5: Bid Initiative Card Phase – Russians 4 – Germans 3 = Action Round sequence of R, G, R, G, R, G, R.
R1: Move – IV Corps retreats to Suvolki.
G1: Assault – 35/17 Corps advances & attacks 2/3rd Cavalry – cards #12 vs. #9 = 2 hits vs. 0; cavalry eliminated.
R2: Move – III Corps advances two hexes to recent battle-site in front of Stalluponen.
G2: Move – 35/17 Corps to Stalluponen.
R3: 56th Division advances to join III Corps.
G3: Move – 2 Landwehr to join 35/17 Corps.
R4: Move – 1st Heavy Artillery advances to join III Corps.
GS SR 007 – Situation at the end of Turn One – Round Five
/pic5477877.jpg)
Remove ‘Activated’ Markers.
The End of Turn Phase
a. Special Reinforcements Step –
Germans Request Western Front Reinforcements (at a VP cost!)
Russians Request Reserve Divisions
[I’ve seen the low-numbered cards go by, so no point trying on Turn One]
b. The H-L Team takes Command Step – check if Hindenburg & Ludendorff arrive [Ditto]
c. Forced March Movement Step – draw a card for a number & check table:
Germans – #9 – 2 units: 1 from Gumbinnen forward, 1 from Allenstein forward.
Russians – #3 – no movement.
d. Fog of War step –
Flip all units not in ZoCs to hidden side; redeploy any/all False Report counters; unstuck over-stacked hexes.
e. Planned Operation Deployment Step – if the German is holding the marker, he can now deploy it (If it is already deployed, it stays there until an event or enemy action removes it).
f. Advance Game Turn Marker Step – Brunhilde sings…
So, how was the play, Mrs. Lincoln?
Well, the play itself went very well, thank you.
The continuing battle that broke out on the border, with fresh units joining in to keep it going as units became exhausted worked/felt very atmospheric, with the powerful but short-lives German ones coming up against weaker Russians who were able to sustain more damage.
The larger ‘eliminated’ units are not actually eliminated, but have been pulled back behind the front to reform – the recovery process means that one of the German ½ Corps can be back on the map at the start of the next turn at 1 strength-point with its first activation recover the second point on its second, move with its third, be fighting with its fourth, and be exploiting or recovering with its fifth.
The Russians can recover one strength-point in place with an activation, or fall back and recover two points.
The Russians might seem to be weak, but once you realise the above, they can go on the offensive because they are Russians and they can take it!
The ‘bitty’ nature of the fighting is well portrayed, and the Planned Operation chit should give the Germans the chance of a big battle, but it is not a free gift, and the Russians have offensive options that might make it difficult to plan for.
We’ll see how the rest of the campaign plays out, but there is nothing to complain about here that I can see, and plenty to praise.


/pic3905243.jpg)
 BGG review


