There was a time when we knew what a wargame was supposed to look like – cardboard units, hex grid map, and the whole thing seasoned with other bits of wholesome familiarity.
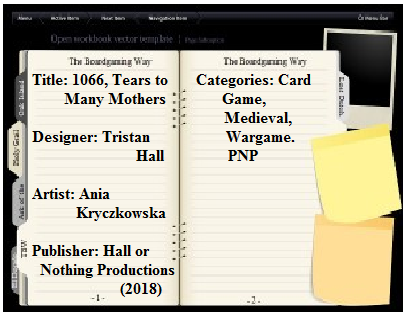
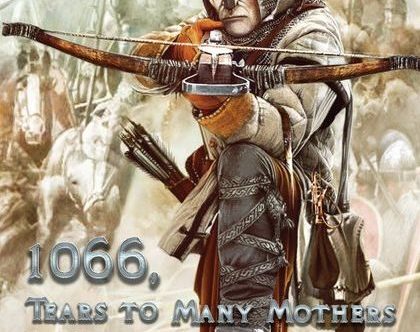
Well, that was the past, and at least to a certain extent, remains true in the present. But today, this is not the only way things are done. 1066 Tears To Many Mothers may be regarded more as a game themed around aspects of war than a wargame true and proper, but with its beautiful presentation and different way of telling an historical story, it undoubtedly blurs the lines between what is an historical wargame and what is not. And I for one find that very exciting.
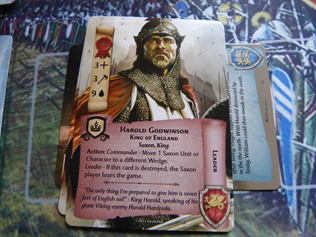
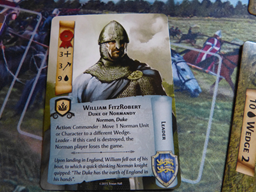
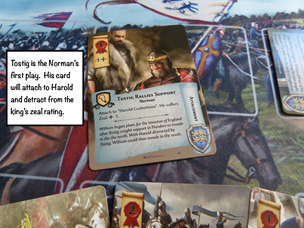
This card-based design is themed around the most famous date in English history. Two decks, one for the Saxons and one for the Norman invaders, contain specific cards for the protagonists, King Harold and Duke William, along with other major and minor players in the unfolding drama, the events they will interact with along the way, and the forces they will rely on to win the day at Hastings.
Also key to the game are two sets of objective cards that help set a time pulse for unfolding game events, with each objective having to be overcome (i.e. defeated – with the Saxons and Normans each possessing their own series of objectives), before the owing side can move on to the next setting. Note, as an option you can play with the objectives randomly shuffled simply to ring the changes, but the Battle of Hastings is always the last objective, and that is where events will come to their climax in the majority of cases.
And yes, given the nature of game play, it is perfectly possible that one or other side will “arrive” at Hastings ahead of the other. If this happens the side with such priority will be in a position to begin harming his/her opponent’s battle array (“wedges” in the game), before that opponent can do very much about it. If you want some historical rationale to make sense of this, you could think of it as one side having moved that bit quicker and taken the other by surprise – or something akin to that – but strict issues of time progression are not what this game is about. And besides, the chances are you will be far too engrossed in the design’s challenges to be bothered about who is abstractly on a hill in Sussex and who is still donning their armour.

Both decks (each side has close to 80 cards, plus objectives), contain a serious number and variety of cards, all honed to that side’s story, and with very few “doubles.” The tasks facing the players fall into two abstract time phases – progress through the objectives while seeking to put a credible host together for the final battle; and then fighting that battle with, hopefully, sufficient forces and assets to hand in order to win it.
The cards themselves present a considerable amount of game and historical information, but their play will become second nature (at least in terms of understanding the form of things) pretty quickly. What is far more complicated is trying to work out when precisely is the right moment to play anything, and there it is my opinion that unless you are rather fortunate, there is seldom going to be the irrefutably perfect time to play a card because circumstances beyond your control can totally undermine you – as other cards appear and as your opponent puts his own spanner in your works.
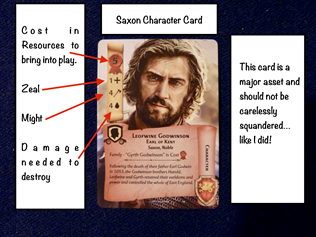
Some cards (the very good/powerful ones) are expensive to bring into play, as a fundamental aspect of the design is that very little comes for nothing. In order to get the best of your hand into action you will often have to sacrifice great chunks of your current hand (to cover the played card’s cost), or possibly (and note, neither side has many cards that can do this), “tire” cards (rotating them to signify their being out of action until the next turn). This will enable you to use their available resource provision to help pay for the card you want to enter play.
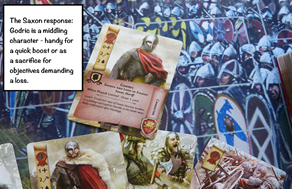
So, let us now look at a few representative Saxon cards:
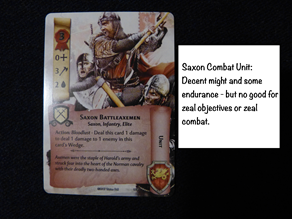
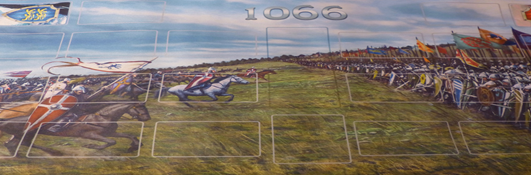
As I said a little earlier, preparing the perfect plan is impossible because there are just too many variables that can affect any combination of cards you may currently have in your hand or on the playing surface. This will be evident from the process of setting up the game, let alone getting into the actual to and fro of playing cards. Preliminary tasks include placing first Duke William and then Harold in a “front rank” position on your table or on the optional/separately available game mat. Both players can choose which of the three battle wedges their leader will go in, and potentially there is going to be a different flavour to proceedings depending on whether the Saxon player opts to place Harold opposite William (i.e. offering contention for the same wedge), or in a different wedge. If placed opposite each other they will essentially cancel each other out in terms of holding sway on that part of the future battlefield; but if placed in any other combination, they will initially dominate that wedge (i.e. the wing of the battlefield they are in) because of their powerful combat ratings – in this design, represented by values for might and for zeal. The consequences of either a mirroring or asymmetrical leader deployment may endure right into the Hastings objective depending on how the many subsequent card plays work out.
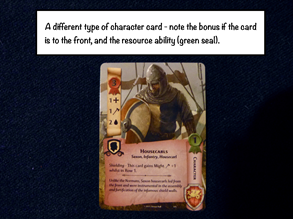
Indeed, random factors will play havoc with the plans of both sides, so rather than aiming for some ideal play in terms of amassing an irresistible host, it is probably better to work within an understanding of the game’s realities, keeping a careful eye as to objectives to be overcome and resisting the urge to play a powerful card (such as a major character) the moment it arrives in your hand. You can keep a total of six cards in that hand, with a draw of two cards at the beginning of a new turn. The best characters can be very valuable owing to their combat ability (representing both themselves and probably such retainers as are with them) and the ability of at least some of them to move cards from one wedge to another. Early in the game, it can appear very handy to get such quality characters active and into a wedge in order to start hastening towards that hill in Sussex. Many of them can offer might or zeal values towards the overcoming of the present objective, but you have to be careful. Both sides face objectives that either have a combat (might) aspect to them, or a moral/psychological aspect (zeal). It is of dubious benefit to place leaders who are entirely unsuited to the nature of the objective currently in play – no good facing an early battle with nothing but relics, and equally no good looking for affirmation of your divine favour by having some armoured hulk waving an axe around and shouting.
A cursory study of both sets of objectives will soon reveal what else can go awry if you seek to outpace key considerations. For example, early in my very first game, I foolishly placed one of Harold’s brothers in a wedge, being impressed by his ratings and too impatient to fill in spaces in my battle, and as a result, the brother succumbed as the required collateral to killing off the Fulford battle objective. This was a dire waste of a card, as it would surely have been better to keep a modest flow of cards going and thus wait for some expendable non-entity or fairly average combat units to help oust Fulford or Stamford Bridge from the Saxon objective pool. In other words, if at all possible, you hold on to at least one card of such quality as the game progresses, and only play and pay for it once its moment has truly come.
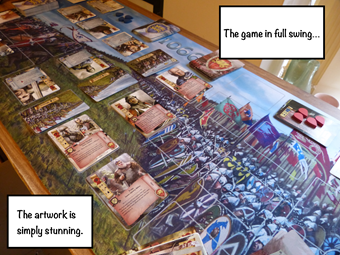
All told the play area is going to be a busy place, and the players will need to get used to plenty of coming and going among the various rows of cards. Long before Hastings both sides can snipe at each other’s muster by various card events and abilities, and it is not only the Saxons who face the reality of losing units or characters as they seek their way through the succession of objectives. The main difference between the two objective decks is when card losses are called for. The Saxons face this challenge immediately after the passing of the portentous comet (first objective), both at Fulford and Stamford Bridge. For the Normans, their objectives begin with compacts and blessings, but then, as they cross the Whale-road and then begin to ravage southern England, it is their turn to face the prospect of inconvenient loss – best then to make sure that whatever loss you might need to make is not via the one and only eligible card, which cost you a small fortune in deployment costs and upon which you have also lavished whatever modifiers events and attachments came your way.
Victory comes one of three ways – if one of the players runs out of deck they lose immediately; if their leader falls, again the loss is immediate; or when spear and axe and shield clash at Hastings and one or other side inflicts sufficient damage over rounds to eliminate (capture) two enemy wedges, that side prevails. Both the cards in the battle arrays and the wedge positions (designated by three cards showing a shield wall) can receive damage. Both sides vie to inflict ten damage points on a wedge (both sides having their own wooden “tear” markers for this purpose), while individual cards in the battle arrays have a greater or lesser ability to endure damage prior to elimination – this both during the term of earlier objectives and then during the course of the Hastings objective.
This might throw some players, especially if they overthink what they are involved with – like I did to begin with. The way the game works, wedges (think of them as the left, centre, and right battle of each army) can only be harmed once Taillefer[i] is singing his song and twirling his sword about. However, the cards that are aligned behind any of the wedges can be hit before Hastings, and by player actions during Hastings prior to progressing to the wedge phase. A good example of the “before” is the employment of archer units, who can help degrade enemy units seeking to sustain their side of a wedge. The choice is left to players, but as a “trad” wargamer I adopted the advanced option of only allowing archer units to practice their ranged arts once Hastings was underway, and not before as the base rules permit.
Wedge combat itself is a simple comparison of respective might totals for all active cards linked to that wedge position – the difference in totals being the damage wrought by the stronger side. Ties inflict one damage to either side of the wedge. Might combat is then followed by zeal combat (the shouting and showing off bit) – same process, but the winner can only inflict one point of damage to the wedge.
[i] According to some perhaps fanciful accounts of the day, a Norman minstrel of this name rode out between the lines before the battle commenced, and in a show of bravado sang a popular continental ditty before charging into the Saxon ranks. The Saxons awarded him nil points and made a lot of holes in him.
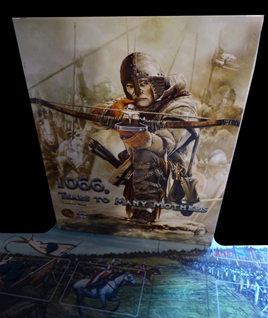
So, how much Hastings do you get in a game of cards? In one sense, plenty, as every card is replete with historical context. This applies not only to how well chosen the content of the different card types is, but to quality extras such as the added pieces of historical information beyond what is strictly necessary for the game. In short, there is plenty to read and become immersed in – once you are able to stop admiring the sheer beauty of the card art. Without any fear of exaggeration, any number of the illustrations would make a superb print for the study or games room, and the artist has my wholesale admiration.
So, never mind about issues of who gets to Hastings first, there is a real story to evolve from out of the play of cards, though it will be up to players to work their imaginations around the materials presented – and believe me, they are being presented with a great deal to help them along the way. In fact, the only real negative I can think of is hardly the fault of the game at all. It is that I have wondered just how much players will seek to engage with their 1066 story? Will they instead just look for the numbers on the cards, and the more so if they just do not know the actual story of those fateful days in the first place? Yes, you can enjoy the game at that level, but it is so much better if you know at least a little more than who won and who allegedly received an arrow in the eye.
I like to think I can identify a game that has been put together with real love, and I believe that this is one such case. In addition to the glories of the artwork and narrative content, I consider such quality also shows in the design coming with a fully-fledged solitaire system that is far more than an afterthought and works equally well for both sides. I have not used the solo mode myself, but have watched it being played on YouTube, where it appears to work just as well as the two-player version. And speaking of YouTube, I found the rules introduction on Ready Steady Play’s channel to be very helpful in terms of easing into the game.
In all, this is a very impressive design. Whatever abstractions are present in the way cards interact and time passes, this is all very minor compared to watching your game story evolve and hoping against hope that one last decent unit or leader card remains to be drawn from the deck in order to shore up a battered wedge. Next to nothing by way of the card content is remotely generic; on the contrary, nearly everything is totally relevant and integral to the history of 1066. I understand that the same model will be used to portray events surrounding the siege of Malta a few hundred years later. And I hope there will be yet more projects to follow on after that.
Excellent game.
Paul Comben
—————————————————————————————————————–[1] According to some perhaps fanciful accounts of the day, a Norman minstrel of this name rode out between the lines before the battle commenced, and in a show of bravado sang a popular continental ditty before charging into the Saxon ranks. The Saxons awarded him nil points and made a lot of holes in him.
Game Resources:
1066, Tears to Many Mothers BGG page:
Publisher Hall or Nothing Home Page
Facebook Page
The Hall or Nothing Blog Page
Box version of “1066, Tears to Many Mothers” found here
/pic4200779.jpg)