


Hammerin’ Sickles Player’s Aid
 This is not a substitute for reading the rules to Hammerin’ Sickles: Longstreet Attacks at Gettysburg, but simply an aid intended to help those unfamiliar with the system understand its intricacies.
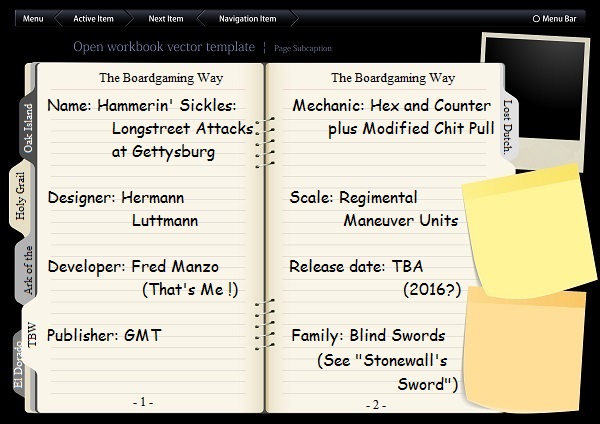
Basically, Hammerin’ Sickles (HS) is a hex-and-counter wargame covering the southern portion of the Gettysburg battlefield on the second day of fighting. It focuses on Longstreet’s attack on Uncle Dan Sickles’ Union III corps.
Each hex in the game is 150 yards across and each turn represents 20 minutes of real time. The game’s basic mechanic is a modified chit pull system, known as the Blind Swords system, and its maneuver elements are regiments and batteries.
Each regiment is represented by a counter with two printed number: the first indicates the size of the regiment and is measured in Strength Points (SPs) and the second indicates how well the regiment was trained – and its overall morale – and is measured by its Cohesion Rating (CR). The default weapon for each regiment is the rifled musket and for each battery the rifled canon (Parrot, 3-inch rifled canon and the like).
The army hierarchy in Hammerin’ Sickles runs from the Corps Commanders to the Division commanders, through the Brigade commanders and finally ends with the individual regimental counters, which appear on the map.
Consequently, once a CIC chit or a Division Activation chit is drawn, the controlling player may activate any one eligible Brigade and give its regiments one of 4 types of direct orders: Attack, Defend, Re-Group or Maneuver, each of which allows its regiments to perform certain activities and prohibits them from performing certain other activities.
Each Division commander, however, is rated on how likely it is that one of his orders will be following within a 20 minute time span (the length of a player-turn). When he passes the test (by die roll) he may order a brigade to fully activate by issuing it any order he wishes, when he fails the test one brigade will only partially activate (that is, fire on adjacent enemy units). each division commander may activate each of his brigades only once, while certain Event chits may activate them a second or even a third time.
As we are covering one day of battle, supply is simulated by the appearance of Ammo Problem counters as a scenario progresses.
HS is played in turns and is based on the following Sequence of Play:
A) Command Decision Phase, in which the various chits that will be used in any particular turn are placed in a single container. Once the container is empty the turn ends.
B) Artillery Phase – Groups of independent artillery batteries now alternate activations.
i. Union Artillery Step – in which groups of Union batteries either fire or move.
ii. Confederate Artillery Step – in which groups of Confederate batteries either fire or move.
iii. Both Sides alternate Artillery Steps until every battery has had a chance to move or fire.
C) Chit Draw Phase, in which the four types of activation chits used in this game are drawn one at a time from a single container. Some of these chits must be used immediately and some may be held through the end of a turn.
The possible types of activation chit are:
Event chits (each with two possibilities: operational and tactical, called in this game “Command” and “Unique” events). Event chits could be used operationally to send yet another courier to hurry along those promised reinforcements (for the Union) or to light a fire under a division commander in order to get his laggard brigades into action (for the Confederates) or tactically to move, for example, a reserve brigade closer to the front or possibly to harass on-coming attackers with one last volley of defensive fire.
But there are an awful lot of options open to a corps commander and there is just never enough time (or chits) to see them all through to completion.
Wild chits, which cover the more strategic types of random events such as general officer casualties, lost orders, a lull in the fighting or unauthorized unit withdrawals or advances etc. Wild chits include the “Fog of War,” the “Fortune of War” and the “Lull in the Battle” chit.
CIC chits, in which the Commanders-in-Chief (Longstreet and Sickles) directly intervene in the chain of command.
Division Activation chits, which allows a player to activate an eligible brigade (see step “D” below) of that division and allow it to issue one specific order to all of its regiments, if an activation test is passed. The four types of orders a Brigade may issue to its regiments when it is activated are Attack, Defend, Maneuver and Regroup.
For example, regiments activated under a brigade’s Maneuver order are given 6 Movement Points each, but they may not fire, close assault or rally stragglers. Units under Defend orders generate 1 MP, may fire and/or rally their stragglers and may move adjacent to enemy units (engage them), but they may not Close Assault enemy forces. Units that Regroup, on the other hand, may not move or take part in any type of combat, while regiments that Attack are given 4 MP, may move, fire and Close Assault enemy units, but they may not rally their stragglers.
Although the regiments in a brigade are not restricted as to where or when they move or fight (if allowed by their orders), due to subtle encouragements built into the rules it is always a good idea to keep the regiments of a brigade together.
The heart of the game, however, involves the “Brigade Activation Phase” when the various involved regiments are allowed to conduct operations:
D. Brigade Activation Phase. After a particular Division Activation chit is drawn from the chit container a player may activate any one of its eligible brigades if allowed by the activation die roll and then conduct operations with its subordinate regiments as follows:
i. Orders Step – The brigade commander (that is, the controlling player) assigns all the regiments in the one activated brigade either an Attack, Defend, Maneuver or Regroup order.
ii. Fire Combat Step – If Attack or Defend orders are issued the regiments within the brigade with a Line-of-Sight (LOS) and with a target within range may volley fire. Convergent fire is possible.
iii. Movement Step – Units allowed to expend MP (those under Attack, Defend or Maneuver orders) may expend a various number of MPs (depending on the order.)
iv. Close Combat Step – Those units given Attack orders may now Close Combat enemy forces in an occupied adjacent hex.
v. Rally Step – Those units under a Defend or Regroup order may attempt to collect their stragglers.
Once a division chit is pulled, and one of its brigades activated, the division chit, itself, is either returned to the container in order for the other brigades in that division to be activate later in the turn or it is discarded for the turn. In any case, the brigades in that division may use various other chits (such as Firefight, Reserve Brigade Movement or the CIC chit) to conduct operations when allowed.
Of course, those divisions commanded by superior generals will have a better chance of having all their brigades become involved each turn and those divisions with inferior leaders may find that only one or two of their brigades fully contribute during a turn.
E. End Turn Phase – is the clean up phase in which all the chits are collected etc. In addition, any off-board broken units are re-organized and possibly returned to the field of battle. If the last Game Turn of the scenario has been completed the level of victory is determined
There are no Zones of Control, as such, in Hammerin’ Sickles.
Combat is generated by rolling four differently colored dice: black, white, red and blue. The first two dice (the black and white ones) generate the severity of the hit, if any, and, if doubles are rolled, produce ammo problems for the attacker. The third and fourth dice, the red and blue ones, usually effect the defender to various degrees with such results as depletion, retreat, or morale problems and, when doubles are rolled, may spread panic throughout nearby defending forces.
The Combat Results Table is firepower based, with various modifiers for odds, morale, terrain, the types of troops involved and the type of engagement conducted (Volley Fire or Close Assaults). I particularly like the fact that the tougher the target, the harder it is to damage. That is, well-trained and highly motivated units simply know their trade, while it’s always a bad idea to be with a green unit in combat.
So a typical attack might go something like this: a Confederate infantry brigade is activated after the draw of its division chit. The brigade commander (there are no leader counters as such on the board) issues an order, say, for it to attack. This allows each of the regiments in that brigade to volley fire offensively, use 4 movement points to engage the enemy (move adjacent to them) and conduct a Close Assault.
As all this is going on, the defenders, however, may play chits in order to disrupt these plans, generating such problems as “misunderstood orders” or “rebel fatigue” etc. If the defender does not have such chits or does not wish to use them he may also issue defensive fire when the enemy moves adjacent to his troops during a Close Assault. If the attacker is not driven off a Close Assaults may result in melee combat or routine, tough or severe combat results, plus they may generate depletions, retreats, morale hits or various forms of panic either to the attacker or the defender or both. But the Close Assault table does tend to favor the attacker in most situations as the Defensive Fire step has already taken place.
Once all the regiments in this brigade complete the order given them the controlling player then determines if the Division Activation chit used to conduct this operation is discarded or returned to the container in order to activate any remaining brigades in the division later in the turn. Then a new chit is drawn, which may involved the same or a different division, or some other type of chit.
But the Blind Swords system is so organized that while it isn’t likely the same brigade will be activated twice in a turn, it is not impossible. After all, the “CIC ” chit may be drawn or the “Reserve Brigade Movement” chit may allow the brigade to change position or the “Firefight” chit may allow it to volley fire. So brigades in the Blind Swords system can never be completely counted on or counted out of any situation.
Victory in Hammerin’ Sickles is judged against the historical outcome of the Confederate attack, with each significant landmark captured generating one Confederate Victory Point and each Union brigade withheld from the map for a turn causing one VP to be deducted from the Confederate total (draws are possible).
Presently there are 5+ scenarios planned ranging in size from short tutorial scenarios of only 2 or 3 hours covering the fighting for the Round Tops, through medium length scenarios involving the Wheatfield, to full length campaign treatments involving various “what if” situations (E.G. Sickles Stays Put or Longstreet Goes Right etc) in addition to the grand historical scenario. Game times should therefore run from 2 or 3 hours to somewhere between 8 or 10, depending on the scenario chosen.
As of today there are 541 pre-orders for Hammerin’ Sickles so it is now in the final art and development stage of production by GMT. It is our hope HS will be published sometime in the summer of 2016.
Game Resources:
 GMT’s P500 page
Hammerin Sickles Playtest rules


Will it be possible to simulate the en echelon attack that was used by the rebels on the second day? Because with random division chit pulls it doesn’t seem like it would be.
Hi, Chris.
.
Thanks for posting.
.
As to coordinated en echelon attacks, while difficult to pull off (just like in real life) are absolutely possible. I can think of two ways they can happen. One much more abstract then the other.
.
First, the abstract way. Say you have three Confederate brigades, labelled “A”, “B” and “C” in a line ready to assault the Union position in the Wheatfield. Now, if the first chit pulled happens to activate brigade “B,” as you point out the chances of the very next chit pulled activating brigades “A” or “C” is slight. But a turn is a 20 minute block of real-time. If the second, third and fourth chits pulled activate, say, Union brigades on Little Round Top, or at the Emmittsburg Crossroads or in deep reserve positions, that doesn’t really effect the situation at the Wheatfield at all. If the fifth chit pulled, say, activates Confederate brigade “A” and it goes in next to Confederate brigade “B,” well they are both attacking the Wheatfield position in the same 20 minute block of time. What happens on other parts of the battlefield really didn’t concern them. Of course, if chits # 2 through # 4 happened to activate a Union brigade in the Wheatfield, itself, and it was able to react to the coordinated Confederate attack coming in, that too sometimes happened in real life.
.
As for the more concrete way of simulating a coordinated attack there is also the “Momentum” chit, which says “The owning player may hold this chit and play it immediately before making the die roll to determine if a Division Activation chit is placed back in the cup or discarded. First, temporarily increase the Command Rating of the Division Activation chit by “+1”. Then make the normal die roll to determine its status. If the Division Activation chit is discarded, then this Event chit is also discarded with no effect. However, if the Division Activation chit passes its die roll, then this Event chit allows the Division Activation chit to remain in play (do not place it back in the cup). Instead, it is treated as if it was just drawn again and can therefore activate another Brigade immediately. The chit is then discarded.” So a player can hold this chit an use it when all the other elements of his coordinated assault are ready to go.
.
Therefore, you can have two adjacent brigade launch a coordinated attack at one point in the enemy line either by looking at what happens throughout the whole 20 minute block of time in a turn or you can see them go in together when the Momentum chit is pulled and used successfully.
.
I hope this answers your question.
.
Update, From Hermann. He takes a more strategic look at the possibilities:
.
Great question, Chris! In the historical setup, the Confederate player only gets Hood’s Division chit to start the game. He also gets to start the scenario by moving any one Brigade freely. Most of the time, but not always, the player will select Law’s Brigade to get it moving forward (it has the farthest to go to hit the Union lines). McLaws chit is available next but not until a few turns into the scenario and then last is Anderson’s chit later on.
.
Now, the Rebel player is not restricted to the historical echelon if he wants to mess around with it. By playing Command Event chits on the Division Availability Track, he can attempt to move up the timing of either McLaws or Anderson and try to get them to jump off earlier. But by doing so, those chits can’t be used for their tactical Events, thus foregoing some possible advantage on the battlefield for an operational advantage. Decision, decisions …..