By Robert DeMaio
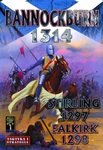
Bannockburn 1314 – Blades & Axes
Hear ye! Hear ye all commoners! Behold the finding of Bannockburn 1314 and three other medieval games designed by Wojciech Zalewsk and published by Taktyka I Strategia in Poland. Quench your thirst and feast on any finger food you can find whilst the battle rages!
I’ve played all kinds of historical games for a number of years, but these Taktyka I Strategia versions have brought me some renewed excitement. They are fun to play, hex-and-counter, games that simply call for replaying.
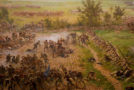
 On September 11, 1297, The Battle of Stirling took place as Scottish forces occupying Ochill Hills attacked English forces regrouping on the northern bank of the Forth River. The English Army could use only one bridge and a ford, which hampered their maneuverability, and allowed the Scots to fight them in detail.
In this game the English player faces a huge logistic problem. He has to decide what forces and in what order they will cross the river and engage the Scottish Highlanders. Though it does help that the Scots are entering the battle piecemeal and cannot crush the English immediately. The battle is, therefore, not easy for either player, just as it wasn’t in 1297. There are victory conditions for both sides but victory is decided over the game board.
As the game is designed and published in Poland, naturally enough the rules and charts are in Polish, but the games are sold with easy to read English translations. The English rules are printed with wide margins and large fonts so the rule book of 28 pages is really about ten pages worth of information, which also includes the designer’s comments and notes. Mixed in the rules themselves are the designer explanations on how the game developed.
But there are some minor problems. For example, the word ‘shoot’ is at times spelled ‘shot,’ which can cause hic-ups while reading. Plus, a partial unit loss, where a unit is flipped for a ‘step reduction’ to its lower strength, is translated as a ‘cell’.
THE COUNTERS
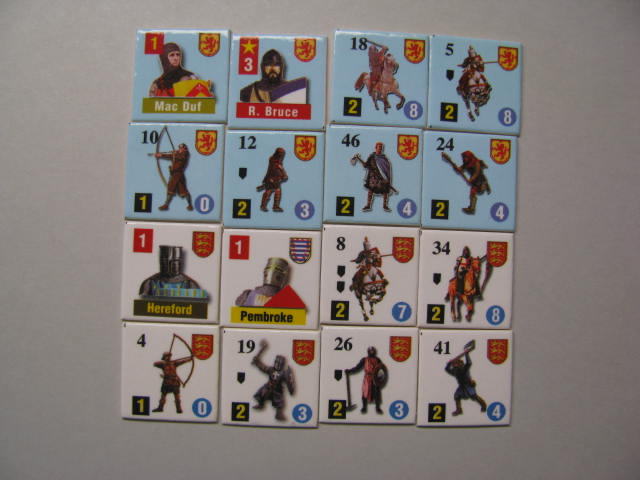
Some sample counters
There are 286 die-cut counters (about half as thin as what is normal here in the states), which have a high gloss coating on both sides. Although, a good half of them just fell right off the frames. I even found some loose in the box when I opened it. But did I mention that the artwork on the counters is fantastic?
The battle, movement and ranged values, as well as a unit’s shield are in the corners of the counters. Units with light or heavy armor come with miniature black shields on their counter’s left side. Although, the artwork for light and heavy units is different, depending on whether they are infantry or cavalry. All the accessory counters are printed on one-sided card stock, with a high gloss topside finish, but these are not pre-cut. I took the time to mount these counters on another piece of card stock in order to strengthen them, as they will be used often.
However, you can’t tell how handsome your Leaders are as they’re all wearing armored head gear; but some of them do wield a sword! In addition, there are so-called banner counters that have to be stacked with units. Both leaders and banners have a positive impact on nearby friendly forces, so you will want to protect them in battle.
THE MAPS
There are five maps in the box, one singular and the other four come as paired halves. However, none of the maps were labeled, so it was difficult to know what scenario was used with what maps. They also lack a compass symbol to help understand the battle scenario’s directions during setup. But after some effort on my part, this problem was resolved. Although, the maps themselves are gorgeous: nice clear artwork and printed in a glossy finish. The tables on these maps are in Polish, but once you’ve read the English translated charts, either version is easy enough to use.
Bannockburn 1314 has four historical scenarios: Stirling 1297, Falkirk 1298, Prelude to Bannockburn, and Bannockburn 1314. But this is not a tactical game as each counter represents a rather large group of fighters. The game play, itself, is fantastic and plays easily enough for the most part. Though, as with any game, questions will arise, though they can be settled with some logic.
COMBAT
Zones of Control extend only into the three frontal hexes of a combat unit. When crossing hex sides, these units must move into their forward hex, plus it costs a movement point to turn one hex side while in motion.
Though cavalry has a unique charging procedure. All their counter’s combat values start as “zero,” but for every hex they charge forward into (without making a turn) they may add one to their combat strength. If they do turn during a charge, the combat value is re-set to zero, and must again be rebuild as the unit moves forward. The designer explained his reasoning for using such an unusual procedure in his comments as during a turn horses would have to slow down considerably because of the weight of the rider, equipment and armor they were carrying, then build up speed again. (Cavalry can also charge through an enemy ZOC by spending movement points.) But, beware of enemy cavalry within range of your charge as they can stop you at anytime by counter charging!
As for tactical procedures, when the enemy retreats, there isn’t any of those “moon walking” withdrawals so beloved by wargamers. That is, in this game, units turn tail and flee, exposing there rear to the enemy, who can advance right behind them. (That is, you can’t throw your horse into reverse when backing up). But then again, a 1d6 die roll will determine if the attacker’s advance is mandatory, which in some cases could be hazardous to their health. ) Combat is determined by an odds ratio table after rolling 2d6. (It’s a large table that could produce casualties on both sides, whatever odds.)

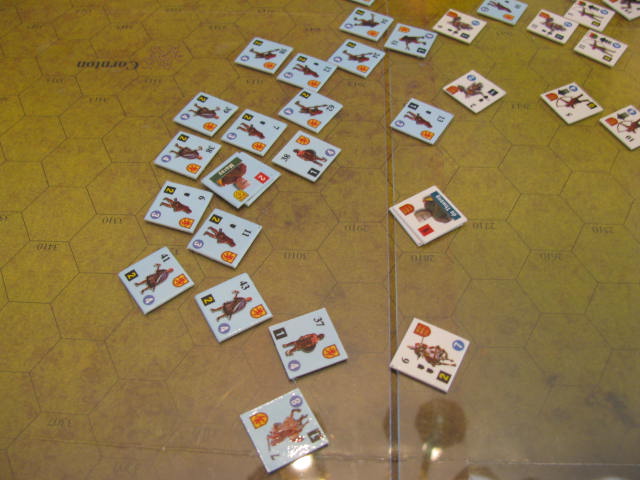
A typical mid-game position
Plus, units may scatter in battle using a 1D6 die roll for each unit involved. With scattered units being placed in a holding box on the map until they are able to rally themselves back into play with a die roll of four or more per unit during a player’s movement phase.
There is also a Morale Track on the map which is adjusted for every unit, banner or leader lost during battle, which will affect your combat modifiers during future turns.
On a more strategic level, its important to maneuver your forces using some type of a battle plan before you attack. Also, as units mingle very quickly once they make contact with the enemy, having a reserve close behind them is absolutely necessary.
SEQUENCE OF PLAY
Each game indicates player “A” (the player with the initiative) moves first and player “B” moves second.
Here are the condensed phases in a turn:
Phase 1: Player “A” cavalry movement. If ranged horsemen, they may fire on player “B’s” units.
Player “B’s” ranged units can shoot at player “A’s” units.
Player “B’s” cavalry can counter-charge player “A’s” cavalry.
Phase 2: Player “A’s” cavalry attacks.
Phase 3: Player “A’s” infantry moves.
Phase 4: Player “A’s” infantry attacks.
Phase 5: Player “B’s” cavalry now moves. If they are ranged horsemen, they may fire on player “B’s” units.
Player “A’s” ranged units can now shoot at player “B’s” units.
Player “A’s” cavalry can counter-charge player “B’s” cavalry.
Phase 6: Player “B’s” cavalry attack.
Phase 7: Player “B’s” infantry moves.
Phase 8: Player “B’s” infantry attacks.
Phase 9: Morale check. The new morale value produced by actions in Phases 1 through 8 go into effect next turn.
GAME PLAY ISSUES
“Shiltrons” (a wall of shields) were very effective defensive formations used by the Scottish infantry, which gave their infantry an edge over English cavalry. However, an infantry unit has to use all its movement points to build them. Although, neither the rules nor the scenarios set a limitation as to how many may be built, I’d guess the maximum allowed is what is given in the game.
“Wolfpits” were another defensive tactic used against cavalry. Unfortunately, the rules on Wolfpits also need to be expanded. The rules themselves indicate wolfpits are hidden until an any enemy unit enters their hex, after which the pit is revealed. Unfortunately, they do not specify how or when wolfpits are created, whether its permissible to create them in a ZOC or what happens to an infantry unit once they pass through a “wolfpit” hex. So I assumed infantry units just passes through them unharmed (while revealing the pits location) and the pits are created prior to play.
As is obvious, there is a lot of interpretation needed on their use that really should have been included in the rules. And as I did not see any English errata on a number of well-known gaming websites, I even went to the trouble of looking up their Polish website. After which I used the Google translation option and found an errata file. But unfortunately, I couldn’t translate it, which is too bad, as it could have settled some issues. (By the way, none of the other games in the series have any files associated with them.)
But, in conclusion, if you are in want of a medieval battle game and can deal with a bit of ambiguity, then have some fun and try these!