


By Fred Manzo
Hi, all.
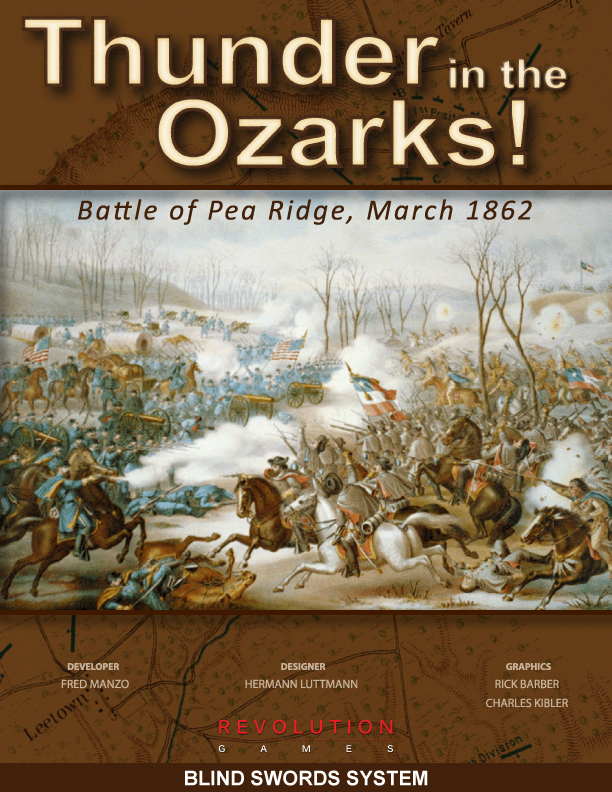
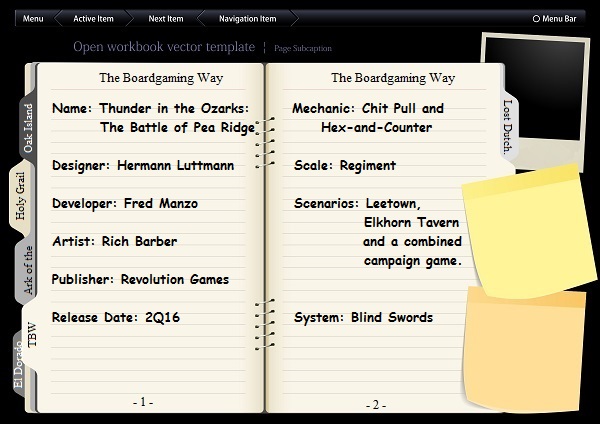 Hermann and I are working on his new “Blind Swords” civil war game, “Thunder in the Ozarks: the Battle of Pea Ridge” for Revolution Games and I thought I’d post a few photos of our last playtests. The game will come with 2 battle scenarios and a campaign scenario. The first scenario covers “Leetown” and the second “Elkhorn Tavern.” Hermann Luttmann is the designer, Rich Barber is the artist and I’m its developer, although Roger Miller, its publisher, has put in a ton of uncredited work.

The situation at the end of turn 1 of the “Leetown” scenario. Morgan’s Woods are on the Union right. Leetown, itself, is just seen in the lower right of the photo. The map and the counters here are the playtest version only. Now, no matter how many times we repeat this there are always a few people who comment that these are awfully poor quality counters for a professionally produced game. Folks, these are playtest counters. Apparently, we’ll either have to start using better playtest counters or worse playtest counters.
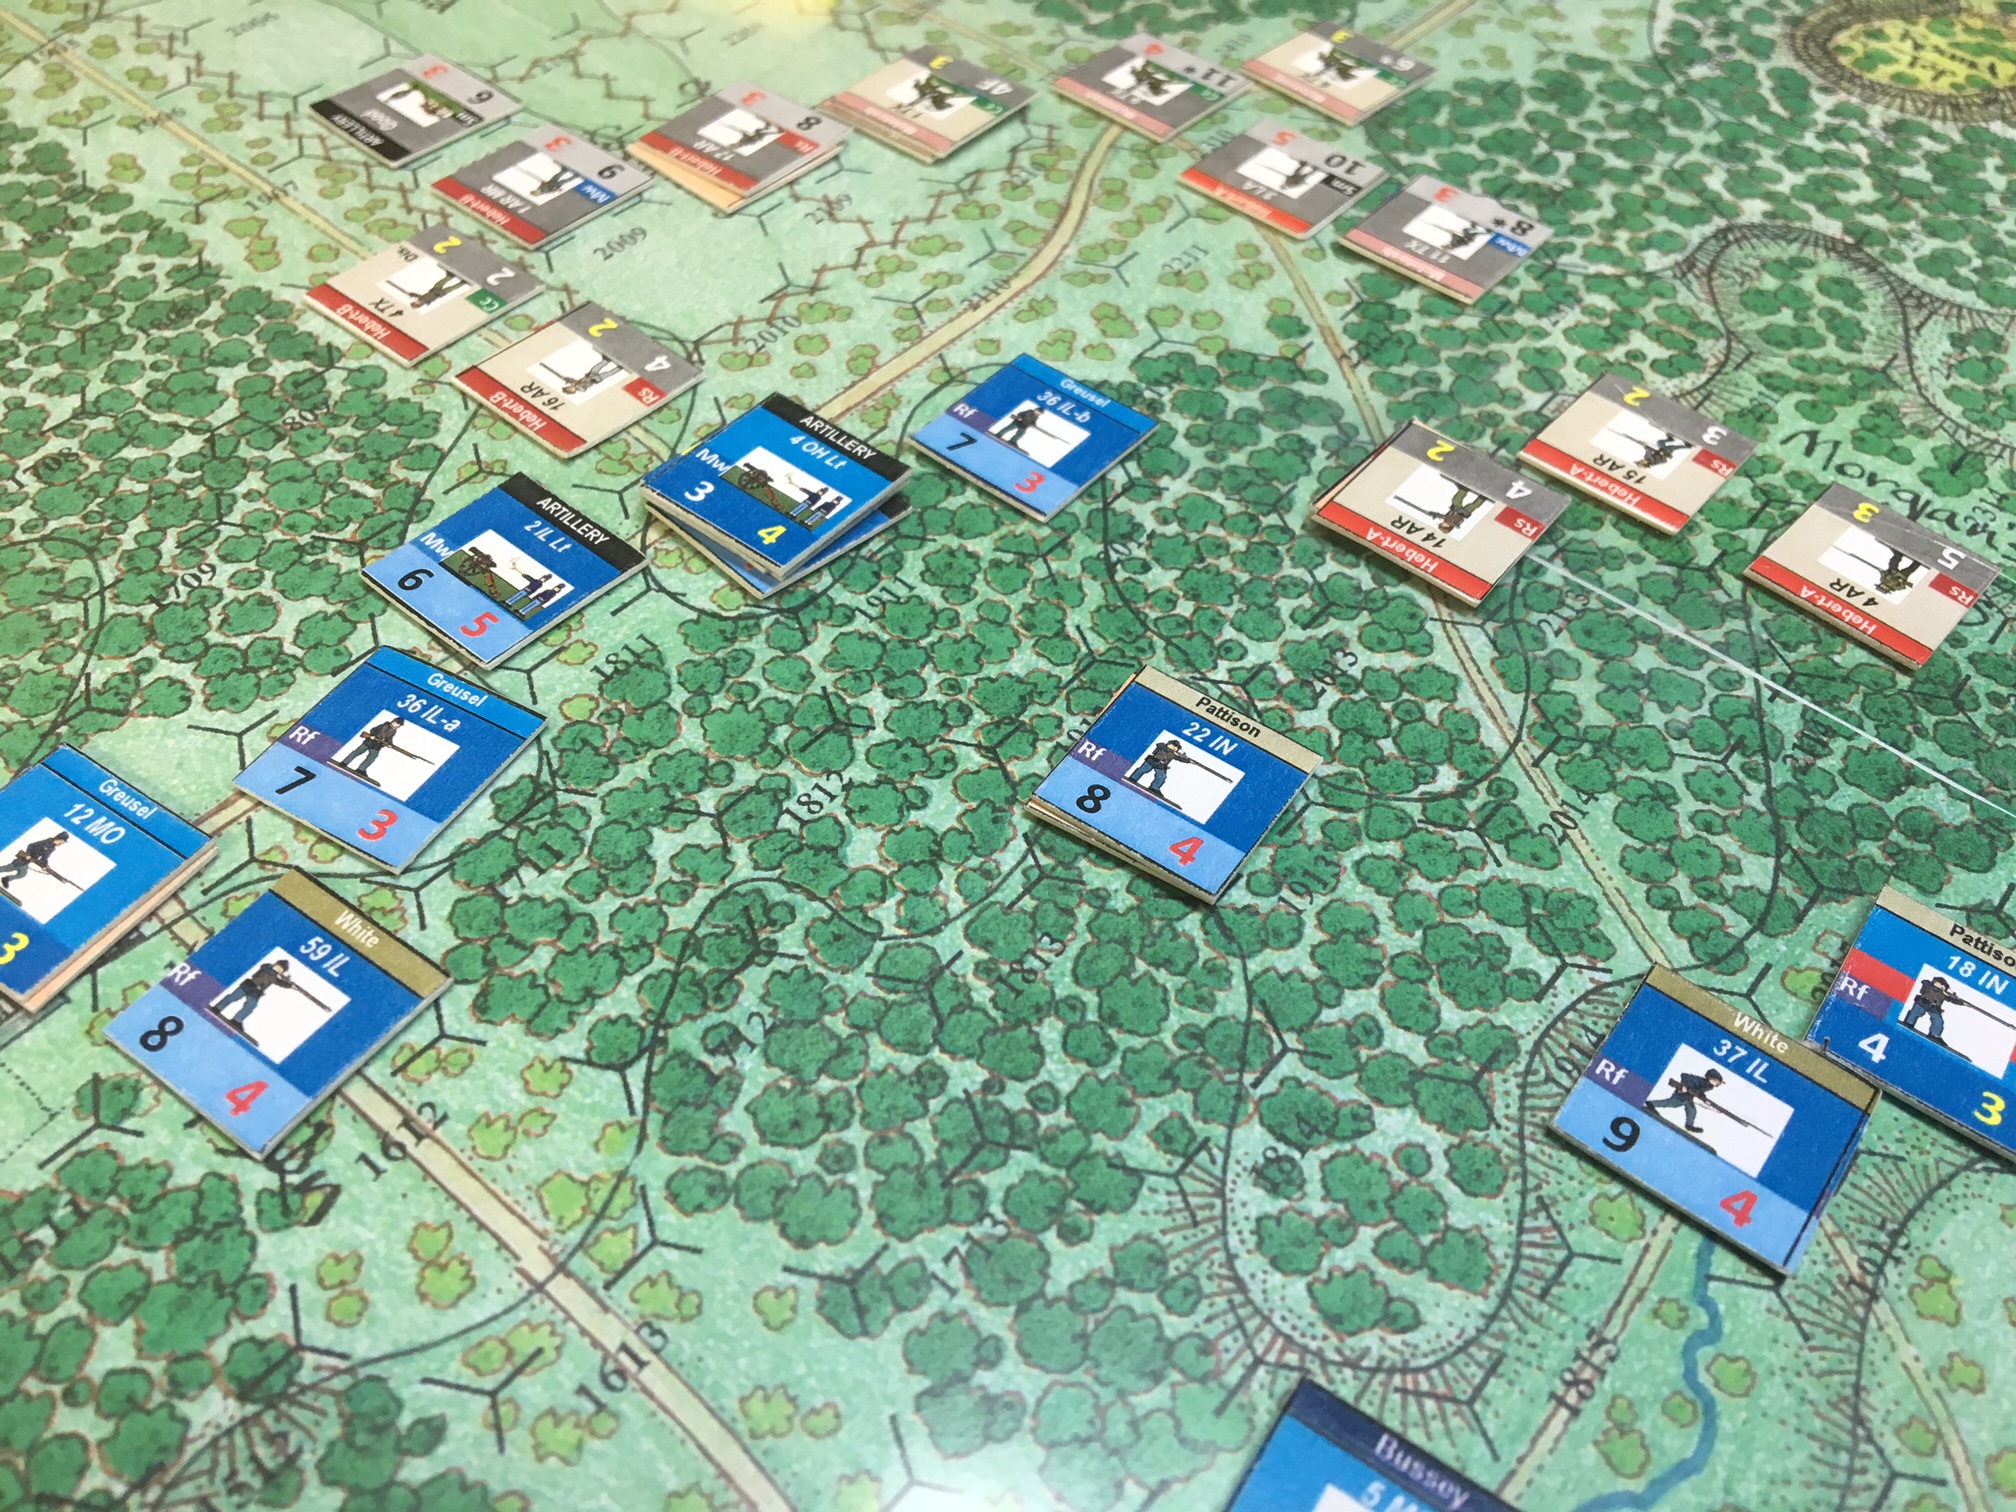
The Confederates are seen here working their way through Morgan’s Woods on the right and assaulting the “Leetown gap” in the center left. 3 Union batteries are holding them off for now. A turn or two later they tried infiltrating a lone infantry regiment through the woods on the Union left. But a reserve regiment or two stopped them short of Leetown.

The end of turn 9. The Union right flank has been turned, but most of the VP hexes there are still under northern control. Leetown and its VP hexes are in the lower left.
The game is just about done. The OOB is complete, as are the counters, its map, by Rich Barber, is about finished and the system has been thoroughly tested. Actually, it’s Hermann Luttmann’s “Blind Swords” system and has been previously used in his “Stonewall’s Sword” game, also by Revolution.
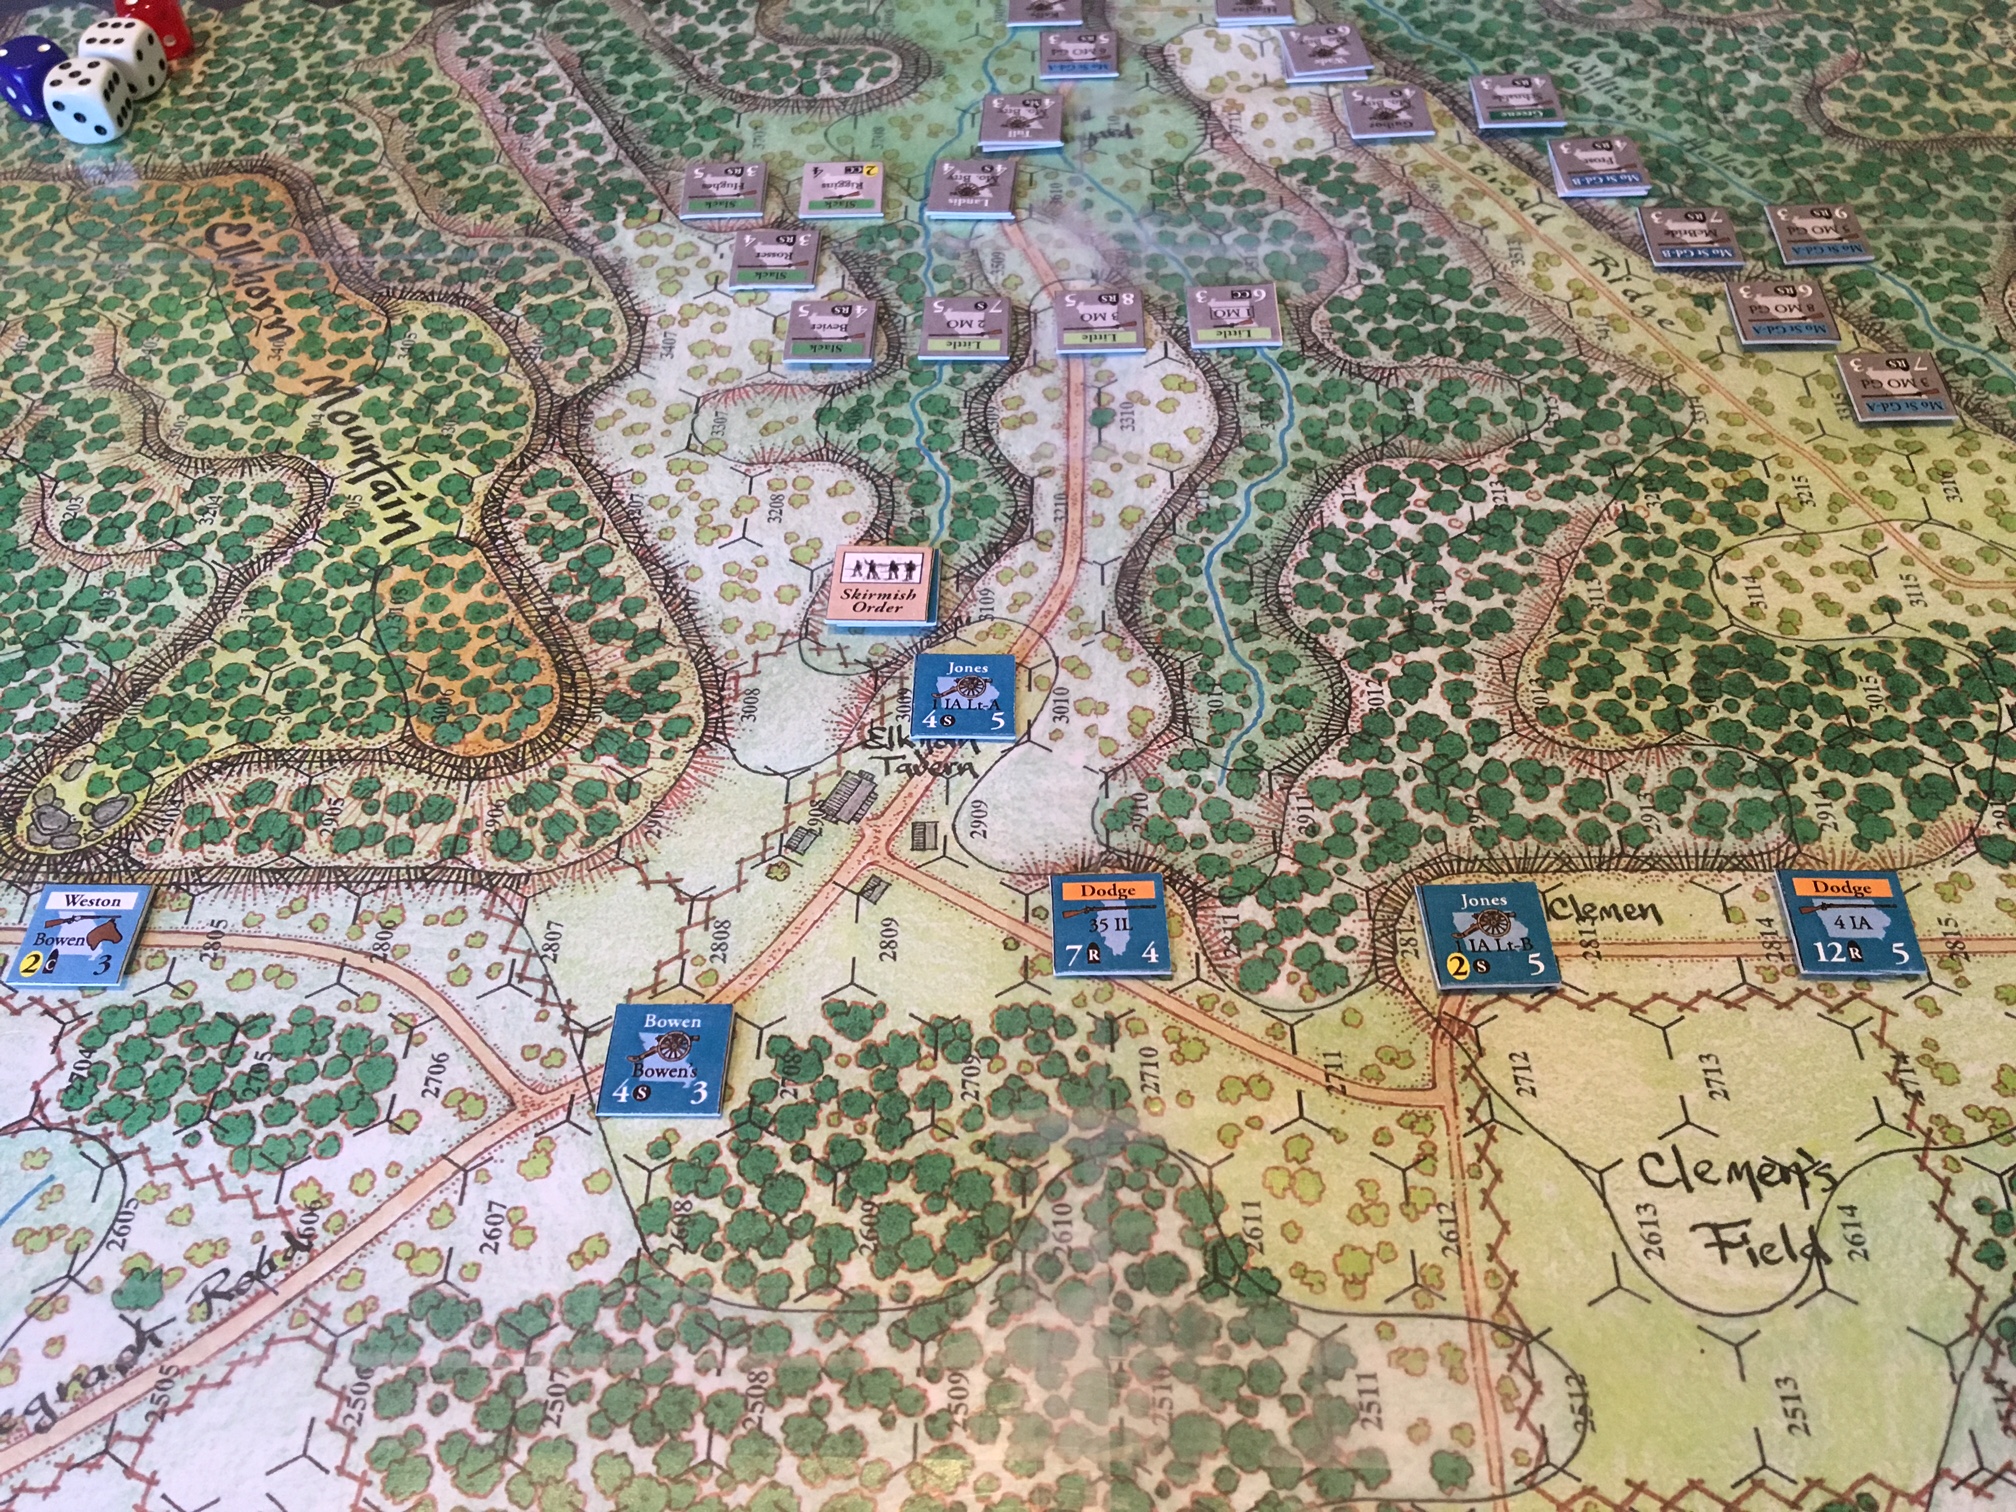
A view of the “Elkhorn Tavern” scenario. Union reinforcements are coming in from the lower left and Elkhorn Tavern is almost dead center. The Confederates advanced along 2 main lines: directly towards Elkhorn Tavern and against the Union right. The counters in this scenario are the real thing.

Later in the game the Confederates broke off a few regiments from their drive toward the Union right and redirected them at the center. You can just make out this push along the right-hand edge of this photo.
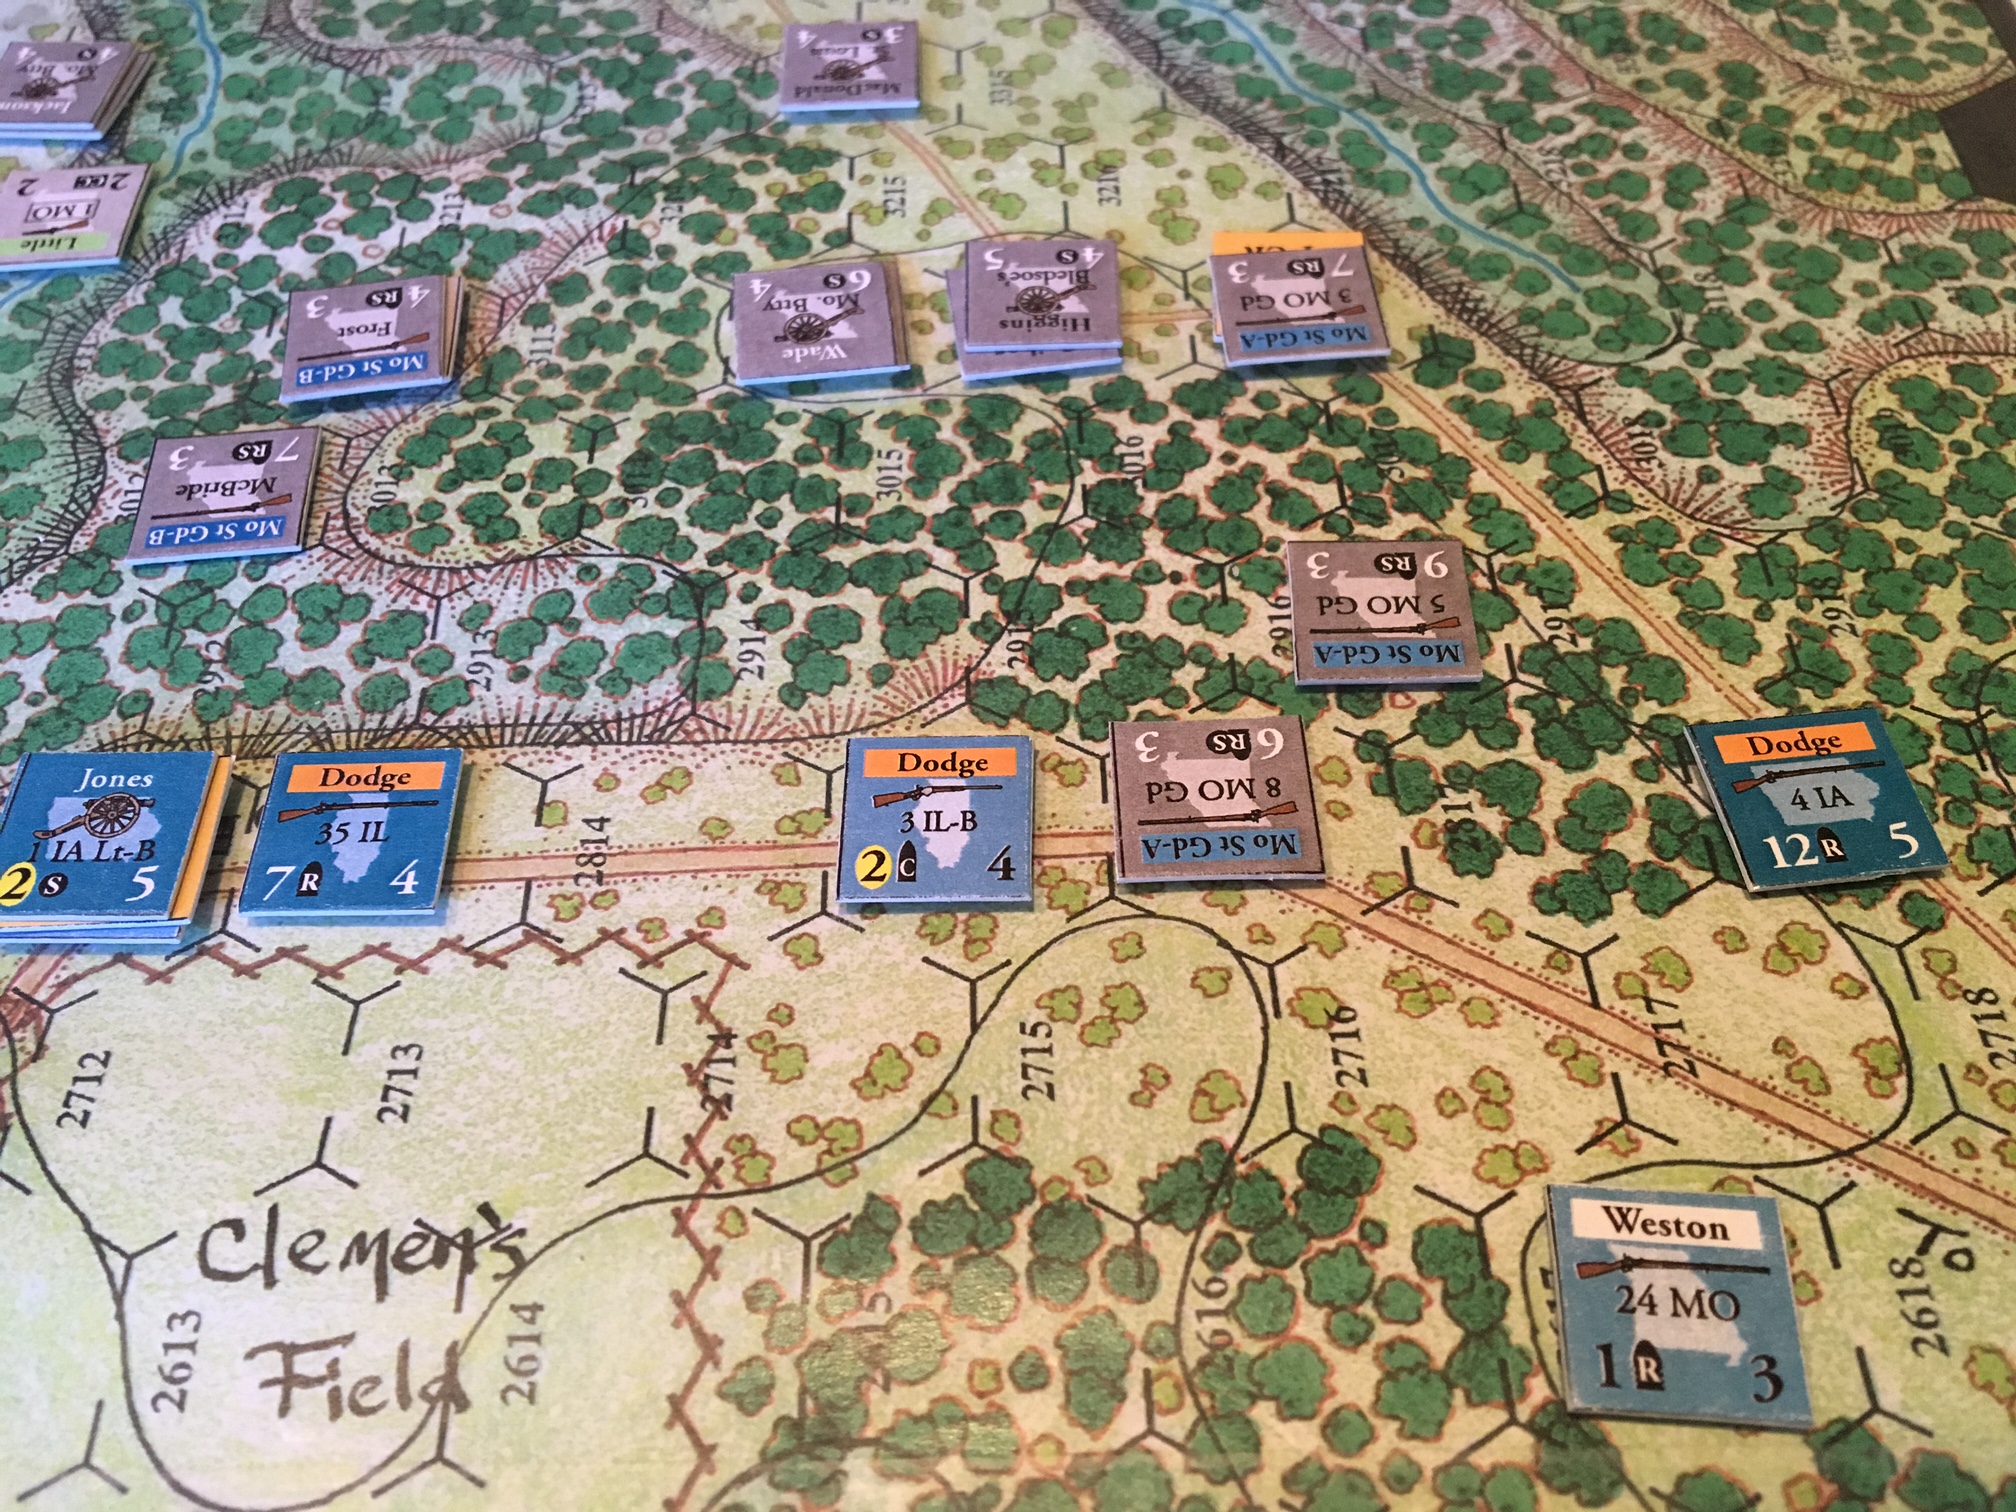
A view of the Union right flank at mid-game. The Confederates have temporarily pierce the Union line.

An overview of the same situation. The Confederates are approaching Elkhorn Tavern, itself, on the left and have tried to pierce the Union right. They made a minor breakthrough but were later driven off by a fortunate combination of counter-attacks, reinforcements and battlefield events. Elkhorn Tavern remained contested, but technically was still under Union control when this playtest was broken off.
We are hoping to make the game available to the public by Consimworld Expo in late June. Right now all we have left to do is check the campaign game, playtest the Elkhorn Tavern scenario a few more times and Rick Barber has to finish up his final version of the map.