By Hermann Luttmann:
Hammerin’ Sickles Rules
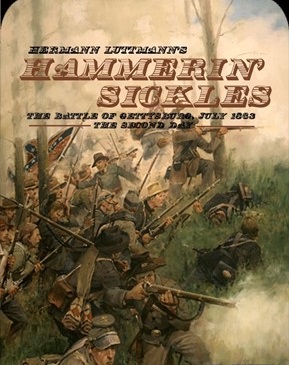
Second Proposed Cover for “Hammerin’ Sickles: Longstreet Attacks at Gettysburg”
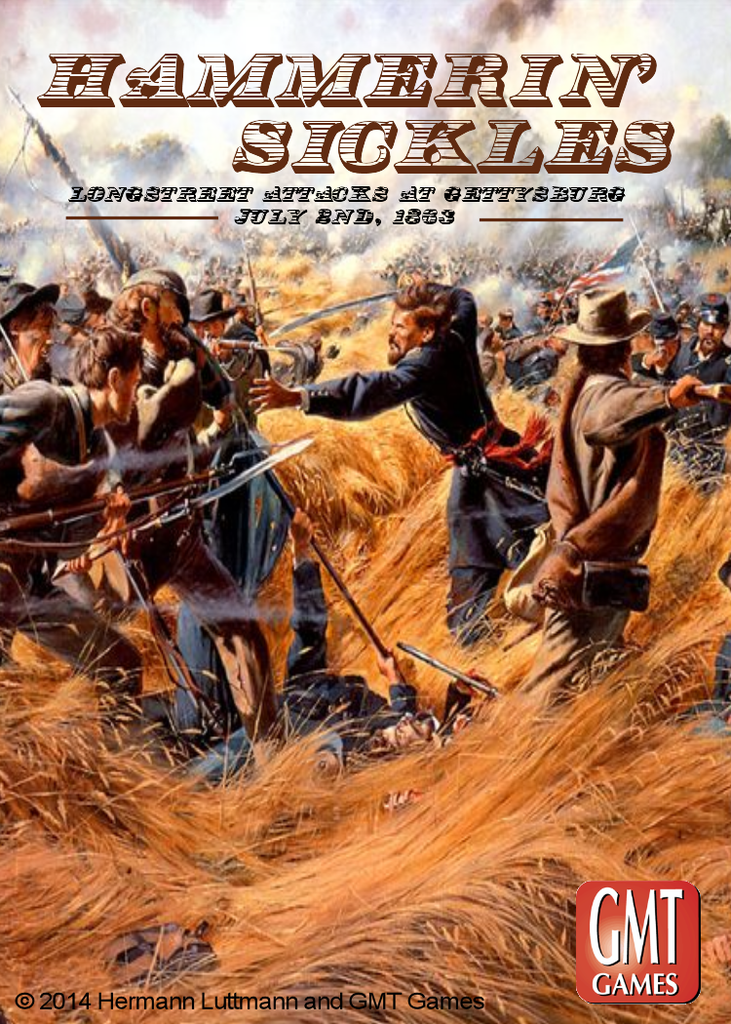
First Proposed Cover for “Hammerin’ Sickles: Longstreet Attacks at Gettysburg”
(The following are the near-beta rules for Hermann Luttmann’s new Civil War game: Hammerin’ Sickles: Longstreet Attacks at Gettysburg. They lack an index, a table of contents, illustrations and a proper numbering system. Plus there are no Combat Results Tables, Cohesion Test Tables or Scenario Instructions either. But if you find any other errors we would greatly appreciate it if you would drop us a note in the comment section.
HS is on sale now as a pre-order. Hopefully, it will be published in the summer of 2015.
But feel free to read and comment on these proposals as you see fit – after all the work we’ve put into Hammerin’ Sickles we want to produce a perfect set of rules, but we’ll settle simply for an excellent set if that’s all we can get. ED.)
————————————————————————————————————————————————————————————————–
“When asked why there was no memorial to him at Gettysburg, Daniel Sickles replied, “The entire battlefield is a memorial to Dan Sickles.”
John Brown’s Body by Stephen Vincent Benet
So ends, this lesser battle of the first day,
starkly disputed and piecemeal won and lost
By corps-commanders who carried no magic plans
Stowed in their sleeves, but fought and held as they
could.
It is past. The board is staked for the greater game
Which is to follow – The beaten Union brigades
recoil from the cross-roads town that they tried to hold.
And so recoiling, rest on a destined ground…..
Who chose that ground?
There are claimants enough in the books
Howard thanked by Congress for choosing it
As doubtless, they would have thanked him as well had he
Chosen another, once the battle was won,
And there are a dozen ifs on the Southern side,
How, in the first day’s evening, if one had known,
If Lee had been there in time, if Jackson had lived,
The heights that cost so much blood in the vain attempt
To take days later, could have been taken then.
And the ifs and thanks and the rest are all true enough
But we can only say, when we look at the board,
“There it happened. There is the way of the land.
There was fate, and there the blind swords were crossed.”
1.0 Introduction
On the afternoon of July 2nd, 1863 at the Battle of Gettysburg, Union General Daniel Sickles, commanding III Corps of the Army of the Potomac, made a decision that historians have vehemently debated to this day. He elected to advance his entire corps to what he deemed to be “that higher ground” around the Peach Orchard crossroads on Emmitsburg Road. By doing so, Sickles’ judgment set in motion events that would directly lead to some of the most iconic engagements of the American Civil War – the Peach Orchard, the Wheatfield, Devil’s Den, the Slaughter Pen and, of course, Little Round Top. During the subsequent vicious fighting, Sickles’ corps not only received a battlefield “hammering” from Hood’s and McLaws’ Confederate Divisions, but long after the battle ended Sickles himself had to endure a political “hammering” from various critics regarding his conduct. Nonetheless, some observers feel his actions that day in fact saved the Army of the Potomac and perhaps the Union itself. Now YOU command the valiant troops on both sides of this critical battle and determine for yourself whether this singular maneuver was one of the most brilliant, one of the most arrogant or one of the most ill-advised risks taken during the American Civil War.
Hammerin’ Sickles: Longstreet Attacks at Gettysburg is a game simulating the fighting on July 2nd, 1863 during the second day of the Battle of Gettysburg and focuses on the southern portion of the battlefield. This engagement involved General Longstreet’s attack against General Sickles’ “salient”. This game is specifically designed to be a playable regimental-scale simulation of this attack that can be completed in a long evening. It allows the players the immersive experience of tactical combat without the heavy rules overhead normally found in such games, while also delivering a comprehensive experience of limited intelligence and unexpected events. The game features the Blind Swords chit-pull system, which emphasizes the three “FOW’s” of military conflict: fog-of-war, friction-of-war and fortunes-of-war. With each chit pull, players will be challenged to make tough decisions based on their assessment of the situation at that moment. Unlike traditional chit-pull systems, the Blind Swords system ensures that no combat units can be counted on, or conversely, counted out. This yields an environment of tense action and constant surprises – an environment that will challenge each player.
2.0 How to Win
Players vie for control of key terrain features in order to accumulate the highest total of Victory Points by the end of the given scenario. There are seven distinct scenarios available and each is of a different duration and models a different phase of the battle.
3.0 Game Scale and Map
3.1 Game Scale
Each map hex is approximately 150 yards across. Infantry units represent regiments and Artillery units represent individual batteries. One Strength Point (SP) equals about 50 men or a single artillery gun. Each Game Turn represents roughly 20 minutes of elapsed time.
3.2 Map Features
Various types of terrain are depicted on the game map. Certain types require further explanation regarding their effects on game play.
- Terrain Levels: Every hex is at one particular Level. Hexes are color-shaded to indicate their height, with the darkest green being the lowest elevation up to yellow (Big Round Top) as the highest. A hex’s Level is important for Line of Sight purposes (12.1a).
- Roads: There are two types of Road hexes: Lanes and Pikes. Units traveling from one Lane/Pike hex to an adjacent Lane/Pike hex with a connecting “Road” graphic pay only 1 Movement Point, regardless of the other terrain in the hex or the hexside. There are three major roads on the map that are termed Pikes – Emmitsburg Road, Taneytown Road and Wheatfield Road. Units moving along these Pike hexes may use the March Column movement rate (13.5) and thus pay only ½ Movement Point per hex when under Maneuver Orders or using a Brigade Reserve Move Event Chit.
- Sloping Terrain: Hexes that contain a Sloping terrain graphic are exceptionally steep and irregular, which causes marching there to be very difficult (in all directions). Units must pay one or two extra Movement Points to enter a Sloping hex, in addition to the other terrain costs of the hex. In addition, Artillery units may not issue Fire Combat from Sloping hexes.
- Slope and Steep Slope Hexsides: Slope hexsides represent a discernable one-Level change in elevation from one hex to the adjacent hex. Steep Slope hexsides represent changes of two or more elevation Levels from hex to adjacent hex. Note that some hexsides change Level elevation but do not have a Slope hexside (these are very gentle slopes). Throughout the game, for movement and combat purposes, Slope and Steep Slope hexsides may affect play.
4.0 Game Equipment
4.1 Unit Counters
Unit counters represent the fighting troops of each side. The grayish-colored units are the Confederate Player’s units (also called “Rebels” in these rules) and the bluish-colored (and some green) units are the Union Player’s forces. On the top of each counter is the unit’s organizational band, with its Brigade name listed first (bordered in its distinctive coloring) and then the parent Division’s name (also with unique coloring) – see 5.0 for more details. Other unit information is listed in the following order on the bottom of the counter (from left to right):
FRESH INFANTRY BATTLEWORN INFANTRY
Unit ID (Brigade / Division) Unit ID (Brigade / Division)
Regiment Name Regiment Name
SPs + Weapon Cohesion Rating SPs + Weapon Cohesion Rating
FRESH ARTILLERY BATTLEWORN ARTILLERY
The front of the counter shows the unit at full effectiveness and is referred to as its Fresh (FR) side. The back of the counter shows the unit at reduced effectiveness (with lower values) and is referred to as its Battleworn (BW) side. Units that are Broken are deemed to be Ineffective and are removed entirely from the map board and placed on the Broken Track.
- Strength Points (SPs): SPs indicate the relative size of the unit. This number is used throughout the game for combat, stacking and deployment purposes. The reverse side of the counter (the BW side) shows a reduced SP value. An SP value of “C” represents cadre-strength (meaning the unit is down to a core of 25 or fewer fighting men) and counts as ½ SP when being added together with other unit’s SPs. Therefore, two “C” units would be needed to make 1 SP. In all situations in which a unit’s SPs are being altered (halved, etc.), always drop any fraction after each step of a calculation.
- Weapon/Unit Type: Each unit carries a specific type of weapon. This is important for Fire Combat Range determination and in Close Combat. The default weapon type for Infantry units is the Rifled Musket (Springfield, Enfield, etc.) and for the artillery is the Rifled Canon (Parrot, 3-inch rifled canon and the like). These units have no weapon type code indicated on their counters. Units otherwise equipped or rated are coded as follows:
sm = an Infantry unit armed with older smoothbore muskets or an Artillery battery equipped with “Napoleon” guns (or an equivalent type of smoothbore piece).
sr = an Infantry unit armed with Sharps rifles.
ss = special Infantry regiments rated as “sharpshooters” who can fire more accurately and with greater efficiency.
mx = some Confederate Artillery units who are fitted out with a mixture of rifled, smoothbore and other miscellaneous pieces.
Important Note: Infantry units armed with smoothbore-muskets (“sm”) have some special considerations. Such units cannot issue Fire Combat at Extreme Range (see the Weapon Ranges Table). This is due to their exceptionally short firing ranges. By the same token, these weapons were deadly at very close range (historically, troops often loaded their smoothbore muskets with “buck n’ ball” shot) and are thus given a bonus column shift in Close Combat.
- Cohesion Rating (CR): this reflects the unit’s training, discipline, experience and morale. Each unit’s FR side shows its full CR, while the BW side has a reduced CR of at least one value less. The higher the CR number, the better the unit generally performs. A unit’s CR can never be modified below “0” or above “6”. The CR is referenced often during combat and is an important element in the unit’s ability to fight and survive.
A unit’s BW-side values are formulated as follows: a unit’s SP value will be reduced by 50% and its CR is reduced by one. However, a unit is required to take a minimum reduction of three SP (in order to minimize the anomaly that occurs with smaller units taking fewer casualties when 50% is deducted). If the unit is too small to take the full three-SP loss, the unit is reduced to an SP value of “C” and the remaining balance of the minimum three-SP loss is instead deducted from the unit’s CR.
4.2 Gameplay Markers
The need for gameplay markers has been intentionally kept to a minimum. However, the use of some markers is unavoidable. The available markers are:
- Morale Hit: this marker tracks any Morale Hits (MH) inflicted on the unit. The front side reflects one Morale Hit (“Shaken”) and reduces both the unit’s listed values (SP and CR) by one (-1). The back side of the marker indicates two Morale Hits (“Disrupted”) and reduces the same values by two (-2). This counter is placed under the affected unit and modifies the relevant printed value on the unit counter.
- Ammo Problems: this marker tracks Ammo Problems results (12.6) and designates units that are suffering a shortage of ammunition or a related logistical issue. The front of the marker reflects the first Ammo Problems result and is “Low Ammo”, which reduces a unit’s SPs for Fire Combat (only) by ½. The back side of the marker indicates two Ammo Problems results and is “Out of Ammo”, which disallows any Fire Combat by the unit.
- Skirmish Order: this marker is used to indicate units that are in Skirmish Order formation and thus are subject to the Skirmish Order rules (18.0). The counter is placed on top of the affected unit. When this marker is not in use as a “Skirmish Order” marker, the back side has additional “Low Ammo” markers for use as necessary.
- Confederate VP Marker: this is placed on the Game Turn Track and is used to track accumulated Confederate Victory Points. The Game Turn Number of the square the marker resides in represents the total number of VPs. The marker is increased for captured VP hexes and decreased for withheld Union Brigades.
- Game Turn: the marker is placed on the Game Turn Track to advise players as to the current Game Turn.
4.3 Brigade Activation Status Markers
Every Brigade in the game has an Activation Status Marker. These are used as a player aid to keep track of which Brigades have been activated already this turn and those that have yet to activate. Each player should arrange his markers in front of himself so that the “Available” side faces up (the side with the flag) until the Brigade is selected to be activated with its associated Division Activation Chit. Upon declaration of activation by the owning player, that Brigade’s Activation Status Marker is flipped over to its “Activated” side.
4.4 Chits
Chits are the counters drawn from an opaque container. They are used to tell the players the formation to be activated next or the event that can be enacted. There are four types of chits: Division Activation (each showing the name of a Division General and his Command Rating), CIC (either Longstreet for the Confederates or Sickles for the Union), Event (displaying an Event title on each side) and Wild (the Fog of War, Fortunes of War or A Lull in the Battle chits). See 10.0 for full details on each type of chit. Note that there is a second set of “Casualty” Division Activation and CIC chits with red numbered values. These are the substitute chits used when the corresponding general is a casualty due to the Fog of War Wild Event chit (see 10.4).
4.5 Charts and Tables
Included in the game are two Player Aid cards (one for each player) which include various charts, tables and Event Descriptions. Each player should keep his corresponding Player Aid handy as he will need to refer to it quite often during gameplay. Also, the Game Aid card displays the Orders Display and the Broken Track. This should be placed in a position where both players can read it and manipulate the tracks. The Game Turn Track and the Command Event Boxes are located on game map itself.
4.6 The Draw Cup
Players will need to find an opaque container to hold all the chits currently in the game and from which the chits are drawn. This can be a coffee cup, bowl, etc.
4.7 Six-Sided Dice
Eight six-sided dice (D6’s) are included with the game and each player receives one black, one white, one red and one blue die. Here’s a good place to remind players not to pick up the dice after rolling them. In many cases, the dice roll must be referred to again for further game play resolution.
5.0 Unit ID & Organization
Every infantry unit (regiment) belongs to a particular Brigade and each Brigade belongs to a particular Division. This organizational hierarchy is printed at the top of each unit’s counter with its parent Brigade listed first (with a distinctively colored background) and its affiliated Division listed to the right (also with a distinctively colored background). Artillery units are independent and do not belong to any Brigade or Division (they activate in their own phase or by an Event).
Brigade Color Coding
1st Brigade 2nd Brigade 3rd Brigade
4th Brigade 5th Brigade
Confederate Division Color Coding
Hood McLaws Anderson
Union Division Color Coding
Birney Humphreys Barnes
Caldwell Ayres Crawford
Wheaton Gibbon Hays Wright
6.0 Stacking
6.1 Stacking Limits
Stacking refers to the placement of more than one unit counter in the same hex. The maximum number of unit counters that can physically occupy a hex at the end of a given phase is determined by the combined units’ total unmodified Strength Points. For stacking purposes only, use just the SPs as printed on the unit counter – do not adjust the SPs for the effects of any markers with the unit. Some terrain types have an additional limit for how many of those SPs can be Artillery unit SPs. The SP limits are as follows:
- Woods and Rocky Woods hexes = 8 SPs, of which only 4 SPs can be Artillery units
- Any Road hex in which the moving units wishes to use the Road or March Column movement cost = 8 SPs*
- Orchard hexes = 12 SPs of any type
- Rocky = 12 SPs, of which only 6 SPs can be Artillery units
- Devil’s Den hex (#2719) = 12 SPs, of which only 4 SPs can be Artillery units.
- All other hexes = 16SPs of any type
*In the case of Roads, the maximum stacking limit is 8 SPs in those hexes at any one time. The moving player may opt to use the Movement Cost of the other terrain in such hexes in order to allow the greater stacking limit of the other terrain, but cannot also then move at the faster “Road” and “March Column” movement rates.
Players should envision a unit using the Road or March Column Movement Rates as being stretched out along the road in long narrow marching columns, thus occupying more space in the hex. Therefore, using the benefit of the roads would leave much less deployment room along those roads.
6.2 Singular Units
A single unit of any type can always be in a hex, regardless of its SP size (for example, a 12 SP unit may be in a Woods hex). Note that this rule does not allow one unit of each type – only one unit total! However, the number of SPs that can be used in a combat is still limited by the total stacking restrictions of that hex type. Any “overage” of SPs is ignored (so that same 12 SP unit in the Woods can only use 8 SPs for Fire Combat and Close Combat purposes). This rule also applies to the “Road” and “March Column” movement bonuses – a single unit, regardless of SP size, can use those better movement rates.
7.0 Sequence of Play
Hammerin’ Sickles is played in a series of Game Turns, the actual number of turns depending on the scenario selected. Every Game Turn is played in a predetermined sequence of Phases and Steps. Each Phase or Step must be completed in its entirety before proceeding to the next Phase or Step. The Sequence of Play is summarized as follows:
A) COMMAND DECISION PHASE
B) ARTILLERY PHASE
- Union Artillery Step
- Confederate Artillery Step
- Both sides alternate Artillery Steps
C) CHIT DRAW PHASE
D) BRIGADE ACTIVATION PHASE
- Orders Step
- Fire Combat Step
- Movement Step
- Close Combat Step
- Rally Step
If any chits remain, return to Phase C. Otherwise, go to Phase E.
E) END TURN PHASE
If the last Game Turn of the scenario has been completed, the game is over. Consult the Victory Determination section to see who wins the game.
Important: note that Fire Combat is conducted before Movement. A unit issuing Fire Combat in the Fire Combat Step does not prevent it from moving in the subsequent Movement Step. Also note that this means players must have their units in position to firefight at least one turn in advance.
8.0 Command Decision Phase
During this opening phase of a turn, each player must decide which of his eleven available Event chits will go into the draw cup and which will be excluded from this Game Turn.
8.1 The Key Chit
Each player first secretly chooses any one of his eleven Event chits and places the chosen chit directly into the draw cup. Obviously, this can be an important decision for the player as this chit is now guaranteed to be in the cup. Therefore, it should represent an Event which the player really needs to occur during the turn. Note, however, that placing the chit into the cup does not assure that it will be played this turn – the ever-present Fortunes of War chit may knock it out!
8.2 The Excluded Chits
Each player then flips his remaining ten Event chits over to their common “Command Event” side and mixes them up. Then the opposing player randomly selects five of these chits and places them off to the side out of play – these chits will not be used this Game Turn! Players may not look at these Excluded chits now or during the course of the Game Turn.
8.3 Finishing the Draw Cup Setup
The five non-excluded Event chits (from section 8.2) are now placed into the draw cup (no looking at them either!) joining each player’s Key Chit in the cup. Finally, place both players’ eligible Division Activation chits (for any Divisions that are in the game at the time per the scenario being played), both CIC chits and both Wild chits (or all three Wild chits if the A Lull in the Battle chit is being used in the scenario being played) into the draw cup with the Event chits. Shake up the cup and place it within reach of the drawing player (determined in the Chit Draw Phase).
9.0 Artillery Phase
Artillery units do not organizationally belong to any Brigade or Division. They are independent units and conduct their activities during the Artillery Phase. Artillery units are not subject to the restrictions of any Brigade Orders (11.0) and have a Movement Allowance of 5 MPs. Artillery units may always use the March Column movement rate along Roads (see 13.5) within stacking limits.
9.1 Union Artillery Step
The Union player will conduct Fire Combat (12.0) or Movement (13.0) with all Artillery units in any one designated hex along with all Artillery units located in any one adjacent hex (thus a maximum of two adjacent hexes may activate at the same time). Each eligible Artillery unit may then either conduct Fire Combat or Movement (not both!) in any order during this step. Resolve all such Fire Combat or Movement normally and to completion. Artillery units that either Move or Fire in this step will be finished for this entire phase – players should bow a unit’s counter or otherwise indicate each unit that has already activated this step.
9.2 Confederate Artillery Step
After the Union player completes activating his chosen hex(s) Artillery fire and/or movement, the Confederate player conducts Fire Combat or Movement with all Artillery units in any one or two hexes in the same manner as the Union player.
9.3 Alternating Steps
After the Confederate player completes actions for his chosen hex(s), the Union player selects another hex(s) containing an Artillery unit(s) that has not already Fired or Moved this step and conducts another Artillery Step in the same manner. The Confederate player then does the same. Players alternate Artillery Steps until all Artillery units have either Fired or Moved (or did nothing). If a player runs out of eligible hexes or does not wish to fire/move his Artillery, he must end his step.
9.4 Special Artillery Fire Considerations
- Artillery units may fire over friendly and enemy units but such fire is normally considered to be Obscured.
- Artillery units located on a Sloping hex may not issue Fire Combat.
- If an Artillery unit that has not yet activated this phase is forced to conduct Retreat movement due to enemy Artillery fire, it is indicated as having activated this step. Thus, it may not subsequently act this phase (the retreat move is its activation).
- If an Artillery unit’s Line of Sight (see 12.1a) passes down a Steep Slope hexside (from a higher elevation hex to a lower elevation hex), there is a one hex “blind zone” created. The LOS will not enter the lower elevation hex abutting the Steep Slope hexside and therefore the Artillery unit may not fire at a target in that hex. This occurs with each qualifying hexside terrain encounter.
This rule simulates the fact that artillery guns can’t traverse downwards very well and thus cannot effectively fire down a steep slope. The fire would actually carry over the slope edge for a distance, creating a safe, or blind, zone. This is a simplified application of this situation but works within the context of the game’s scale.
10.0 Chit Draw Phase
The central mechanic that drives the action in Hammerin’ Sickles is the Blind Swords chit-pull system. This system directs players as to who is allowed to move and fight and who conducts certain actions. The chits for both sides reside in the same draw cup and are drawn by one of the players each phase.
10.1 Held Chits
Before a new chit is pulled from the cup, both players may play one or more of any Event or CIC chits they are currently holding. Either or both players announce their intent to do so. If both announce simultaneously, the Confederate player decides who goes first. The player going first plays any eligible chit(s) he wishes, following the prescribed procedure for each such chit. When finished, the opposing player may play his eligible chit(s).
10.2 The Designated Chit Puller
Though it doesn’t really matter which player draws a chit from the cup, in order to establish some semblance of order in the process (after all, we can’t be having fisticuffs break out before the game even starts!), this rule designates the Confederate player as the chit-puller on “odd” numbered Game Turns and the Union player on “even” Game Turns. Of course, if you decide otherwise amongst yourselves, you can ignore this rule.
10.3 Applying the Drawn Chits
The designated chit-puller will now randomly draw one chit from the draw cup. He will look at the chit and then depending on the type of chit drawn proceed as follows:
- Event Chit: The Event chit is handed to the owning player (blue for the Union player; gray for the Confederate player). He may look at it and even play it immediately, if applicable. Normally, he will simply place the chit in front of himself (face down so his opponent can’t reference it) saving it for later use or apply it immediately as a Command Event. The chit-puller then draws another chit.
- Wild Chit: If a Wild chit is drawn, its effect is immediately enacted with any necessary die roll being made by the non-chit-pulling player. Any effects of the chit are completely resolved, the Wild chit is discarded for the turn and then another chit is drawn.
- Division Activation Chit: If any Division Activation chit is drawn, the owning player will immediately select any one of his eligible Brigades to activate. Play then proceeds to Phase D (Brigade Activation Phase) which is resolved normally. At the end of the phase (after the Rally Step) the owning player then rolls to find out if the Division Activation chit is discarded for the turn or placed back into the cup. Another chit is then drawn.
- CIC Chit: If either CIC chit is drawn, the owning player can play it immediately or he may hold it aside and play it before any future chit pull at the start of the Chit Draw Phase. When played, the player selects any one of his Brigades on the map, or entering the map this turn, to activate (even if it has already activated this turn). Play then proceeds to Phase D (Brigade Activation Phase) which is resolved normally. The CIC chit is then discarded for the turn and another is drawn.
10.4 Event Chits
Each player has his own set of ten Event chits. Union Event chits are colored blueand Confederate chits gray. Each chit has a Unique Event listed on its front side and Command Event on its back side. When drawn, the owning player takes the Event chit and uses it as allowed by the event listed on the chit.
- Unique Events: Players should consult the Event Descriptions section on each player’s Player Aid (and in the Play Book) for a full explanation of each Event and how it is applied to play. Every event can be played at an eligible time during the game and it’s up to the player when best to play the chit. Drawn Event chits are placed face down in front of the owning player and played as instructed when the player announces its use. The event is then resolved per the event’s instructions. After the event’s resolution, the Event chit is discarded for the turn and normal play resumes.
Players should study the detailed Event Descriptions section in the Play Book before play as the timely use of these chits can provide singular opportunities to affect the game.
- Command Events: The back side of every Event chit is a Command Event. If the owning player chooses to use the Command Event, he must elect to do so at the moment the Event Chit is drawn. He cannot hold the chit and then later use it for the Unique Event. Those that are used for the Command Event are placed in the appropriate boxes located on the game map. These chits so placed are then out of play until the End Turn Phase. The Confederate player has the Attack CoordinationCommand Event and the Union player has the Army of the Potomac ReinforcementsCommand Event.
- Confederate Command Event – Attack Coordination: During the course of play, the Confederate player may opt to use any Event chit, when it’s drawn, for its Command Event side. He may immediately place this chit on either of the two Attack Coordination Boxes.
The first area contains the Command Ratings Boxes and lists each of the three Confederate Division Generals. By placing the chit in the next available box on any one track, he increases the corresponding Confederate General’s Division Action Chit’s Command Rating to the indicated number for the remainder of that Game Turn (only).A maximum of two chits can be placed on each track.
The second area is the Division Availability Box and by placing one chit in the indicated box, a die roll is allowed during the End Turn Phase. For each additional chit placed, the player increases that die roll by “+1”. During the End Turn Phase, the Confederate player chooses one Confederate Division Activation chit located on the Game Turn Track (i.e., it is not in the game yet) and rolls the die, modifying it if applicable. If the result is “Pushed Back One Turn”, the Division Activation Chit is moved to the next higher-numbered Game Turn box. If the result is “Advanced One Turn”, the Division Activation Chit is moved to the next lower-numbered Game Turn box. A result of “No Effect” has no effect on the chit.
ii. Union Command Event – Army of the Potomac Reinforcements: During the course of play, the Union player may opt to use any Event chit, when it’s drawn, for its Command Event side. He may immediately place this chit on the Army of the Potomac Reinforcements Box. Up to a maximum of three chits can be placed here. By placing one chit in the indicated box, a die roll is allowed during the End Turn Phase. For each additional chit placed, the player increases that die roll by “+1”. During the End Turn Phase, the Union player chooses one Union Division Activation chit located on the Game Turn Track (i.e., it is not in the game yet) and rolls the die, modifying it if applicable. If the result is “Pushed Back One Turn”, the Division Activation Chit is moved to the next higher-numbered Game Turn box. If the result is “Advanced One Turn”, the Division Activation Chit is moved to the next lower-numbered Game Turn box. A result of “No Effect” has no effect on the chit.
10.5 Wild Chits
There are three Wild chits that represent the unusual events that can occur in warfare and may affect both players equally.
- The Fortunes of War: This chit means that the very next chit pulled will be discarded. When the Fortunes of War chit is pulled, discard it immediately. Then the next chit is drawn. If the chit is an Event, CIC or another Wild chit, it is immediately discarded with no effect. If it is a Division Activation Chit, the owning player must select an eligible Brigade from that Division and mark it as “Activated” (without allowing it to actually do anything). The owning player then rolls for the Division Activation chit normally to see if it is discarded or placed back into the cup (see 10.5).
This chit represents everything from misunderstood orders to an injured courier to missed opportunities to … well, just about anything!
- The Fog of War: When drawn, the non-chit-pulling player rolls one die and applies it as follows:
1 = a Union unit makes an Uncontrolled Advance;
2 = a Union unit makes an Uncontrolled Withdrawal;
3 = a Rebel unit makes an Uncontrolled Advance;
4 = a Rebel unit makes an Uncontrolled Withdrawal;
5 or 6 = a General is hit by enemy fire and becomes a casualty.
- Uncontrolled Advance: The opposing player of the affected unit selects any one enemy Infantry unit (only) – or – any two enemy Infantry units if stacked in the same Woods, Rocky Woods or Orchard hex. He may then move this enemy unit(s) one hex closer to the nearest friendly unit (i.e., one of his own units). Normal movement and stacking rules must be adhered to and any eligible Defensive Fire triggered by this move is issued immediately.
- Uncontrolled Withdrawal: The opposing player of the affected unit selects any one enemy unit – or – any two enemy units if stacked in the same Woods, Rocky Woods or Orchard hex. He may then move this enemy unit(s) one hex farther away from the nearest friendly unit (i.e., one of his own units), but not adjacent to another friendly unit. Normal movement and stacking rules must be adhered to.
- General Casualties: Whenever a General is hit by enemy fire both players select any one enemy Division Action or CIC chit of their choice that has already been used and discarded at this point in the turn(if there is none available, then this event has no effect on that player). After selecting the chit, another die is rolled and applied as follows:
1 = the Union General is Killed;
2 – 3 = the Union General is Wounded;
4 – 5 = the Rebel General is Wounded;
6 = the Rebel General is Killed.
- Killed = the General represented by the selected chit is killed in action or otherwise incapacitated. Remove that chit from the game and replace it with its corresponding “Casualty” chit (the one with the red Command Rating). Place the “Casualty” chit on the Turn Record Track in the next turn’s box. At the end of that turn, during the End Turn Phase, the chit can re-enter play.
- Wounded = the General represented by the selected chit is wounded in action or has his ability to command otherwise impaired. Remove that chit from the game and replace it with its corresponding “Casualty” version (the one with the red Command Rating). Place the “Casualty” chit with the turn’s discarded chits. It is now used for the remainder of the game as the Division Activation or CIC chit.
After all such effects are resolved, the Fog of War chit is discarded and the next chit is drawn.
The Fog of War chit allows for the occurrence of those rather unusual or unexplained troop movements and attacks that happened throughout military history. How does one recreate those instances of misidentified friendly and enemy formations or those seemingly suicidal charges? This chit allows some of those amazing events of history to occur. In addition, this chit puts generals of both sides at risk and reflects the high probability of the wounding or death of Civil War generals in action.
- A Lull in the Battle: This Wild chit is fed into the game after the halfway point during the longer scenarios. It represents the general battle fatigue of a long day’s fight. When it becomes available per the scenario instructions, it is immediately placed into the cup each turn. Upon the Lull chit being drawn, it is placed next to the cup and a number of special effects are now in force for the remainder of this Game Turn:
- When a Division Activation is drawn, a special limited activation takes place. The owning player may select any one eligible Brigade but may conduct only a Defend or Regroup Order with it. At the conclusion of the Brigade’s activation, the Division Activation is automatically discarded for the turn – no Command Rating roll for the Division Activation chit is made to place it back into the cup.
- When an Event chit is drawn, it is automatically discarded with no effect. Note that this condition has no effect on chits that have already been played or are currently being held by players.
- When the Fog of War or Fortunes of War Wild chit is drawn, it is enacted normally.
- When either CIC is drawn, it is enacted normally. Note that any Order can be selected in this case and that the activated Brigade is not restricted as in “i” above.
The A Lull in the Battle chit accomplishes two purposes. It realistically reflects the weariness and fatigue of a few hours fighting (even for units not actively engaged, as they are still always at the ready and/or marching to and fro) and it speeds up play in the second half of the game. Players will find that they will be hard-pressed to make meaningful decisions as the opportunities to do so become fewer.
10.6 Division Activation Chit
Every Division in the game has a Division Activation Chit representing it. When this chit is drawn, the owning player selects any one Brigade belonging to that Division (only) that has not yet been activated this Game Turn (using the Brigade Activation Status markers as an indicator). The player announces the name of the now activated Brigade, flips its Brigade Activation Status marker to its “Activated” side and proceeds to the Brigade Activation Phase. After the Brigade is finished moving, fighting and/or rallying, and there are still Brigades belonging to this Division that have not yet been activated, the owning player rolls one die and compares it to the Division Command Rating shown on the chit. If the die roll is less than or equal to the Division Command Rating, the Division Activation chit is placed back into the Draw Cup. If the roll is greater than the Division Command Rating, or if there are no un-activated Brigades remaining in the Division, the chit is discarded. The next chit is then drawn from the cup.
Special OOB Note: Two Union Divisions – Wheaton and Wright – have only one Brigade each in this game. Therefore, they do not have a Command Rating indicated on their Division Activation chit as there is no need for it (if drawn, their one Brigade will activate and then the chit is discarded in any case). By the same token, these Divisions do not have a “Casualty” chit (see 10.4b) for the same reason. Both these Divisions will have their other Brigades represented in the next game in the series and new chits will be provided that will have Command Ratings.
10.7 CIC Chits
Each player receives one CIC chit, the Confederate player has Longstreet and the Union player has Sickles (these chits are identified with each general’s portrait). When a CIC chit is drawn the owning player may play it immediately or hold it to be played later in the turn during any Chit Pull Phase. In either case, when the chit is played, the player selects any one of his Brigades in the game to activate – even if it has already been activated this turn. He may then conduct a normal Brigade Activation Phase with that selected Brigade. When finished, the Brigade Activation Status marker is not flippedto it “Activated” side (unless it was already “Activated” before this CIC activation, in which case it remains on its “Activated” side). The CIC chit is then discarded and a new chit is drawn.
If the “Casualty” version of the CIC chit is drawn, a special die roll is needed to enact the chit. The owning player must roll one die (of any color) and compares it to the range of numbers listed on the “Casualty” chit. If the roll falls within the indicated range, he may use the chit as a normal CIC chit. If the die roll is outside the range, he must discard the chit for the turn with no effect.
Note that this means that a Brigade can be fully activated twice in a Game Turn – once by being selected with a Division Activation Chit and again with a CIC activation. Technically, it could be moved up to three times each turn if a Brigade Reserve Move Event chit is also played on it!
10.8 Discarding Chits
In all cases listed above where a chit needs to be “discarded”, simply find a spot on the table near the Draw Cup where discarded chits are placed. These chits are no longer involved in this Game Turn. At the end of the Game Turn, during the End Turn Phase, these chits will become eligible to be used again next turn.
11.0 Brigade Orders
When a Brigade is selected to be activated, either by Division Activation Chit or CIC Chit, it must proceed in order through the Steps of the Brigade Activation Phase. The first such step is the Orders Step.
11.1 Types of Brigade Orders
There are four possible Orders that a player can assign an activated Brigade during the Orders Step, each with its own gameplay parameters simulating the order’s strengths and weaknesses. The four Orders are Attack, Defend, Maneuver and Regroup and the player simply announces the Order he is assigning the Brigade.
11.2 Attack
This is the most aggressive Order and allows the Brigade’s units to assault the enemy. The Movement Allowance for units is 4 MPs. The Brigade’s units may Engage enemy units (i.e. move next to an enemy unit – see 13.7) and conduct any kind of combat they wish. However, the units may not conduct a Rally.
11.3 Defend
This Order is used for the Brigade to hold its position and be ready to fight as well. The Movement Allowance for all units is 2 MPs and they may Engage enemy units. They may only conduct Fire Combat (no Close Combat can be initiated). A Brigade under this Order may conduct a Rally (but with less efficiency than a Regroup Order).
11.4 Maneuver
This Order is used to move units around the map as quickly as possible. The Movement Allowance is 6 MPs but units cannot Engage the enemy nor conduct any kind of combat. In addition, these units may not Rally. This is the only Order under which units may use the March Column movement rate (see 13.5).
11.5 Regroup
When the Brigade is in bad shape, this is the Order that allows units to Rally with greater effect. However, units under this Order may not Move, may not Engage the enemy and may not conduct any kind of combat.
12.0 Fire Combat
The second step of the Brigade Activation Phase is the Fire Combat Step. All of the active Brigade’s units (only) may now issue Fire Combat, if allowed by their selected Order. Fire Combat is announced and resolved to conclusion for each eligible unit in any order desired by the owning player. Note that Artillery units do not fire in this step!
12.1 Firing Eligibility
Fire Combat is voluntary and can only be issued by active units during the Fire Combat Step under Attack and Defend Orders. Units issue fire by unit or by eligible group of units and each fire is resolved completely before moving to the next one. A unit can only fire once in the phase and can only fire at one enemy target hex, but an enemy hex can be targeted a multiple number of times by different units. Firing units may only target enemy units to which they have a Line of Sight and that are within Range of their weapons.
- Line of Sight (LOS): When a unit issues Fire Combat at a target two or more hexes away, it must be able to “see” the target unit. To determine LOS, draw an imaginary line from the center of the firing unit’s hex to the center of the target unit’s hex. The LOS stops in any hex containing Blocking terrain and will not extend beyond this hex (but does extend into it). Units can fire out of hexes containing Blocking terrain. The LOS can also be Obscured, which means the LOS penetrates to the intended target hex but the visibility is degraded. This will allow the unit to issue fire but a detrimental column shift will apply to this fire. LOS cases are:
- If the highest level of all intervening hexes is lower than both the firing and targeted hex levels, the LOS cannot be Blocked, but it can be Obscured. The LOS can be Obscured if the intervening lower terrain is a Woods hex, or contains any units (enemy or friendly). However, note that only Artillery units may fire over friendly units. Infantry units may never fire over other friendly units under any circumstances.
- If the highest level of any intervening hex is the same level as either or both the firing and targeted hex levels, the LOS can be either Blocked or Obscured by that intervening terrain. The LOS is Blocked upon entering the first encountered Woods or Rocky Woods hex, a second Orchard hex or a hex containing any unit (enemy or friendly) which is at that same elevation as the firing or targeted hex. The LOS may be traced through one Orchard hex without being Blocked, but it is then Obscured.
Note that case “ii” means that, for example, a firer can fire up at a target on a higher elevation even if all the lower intervening hexes are Woods hexes. The same is true of a firer on a higher elevation than the target. In these cases, it is assumed that the firer is elevating its fire over the intervening Woods (up or down). This fire would be considered to be Obstructed.
- An LOS is always Obscured if the target unit is in a Woods, Rocky Woods, or Orchard hex.
- If the highest level of any intervening hex is a higher level than both the firing and targeted hex, the LOS is Blocked upon entering the first such hex.
- If an LOS passes exactly along a hexside, the LOS is affected adversely if either adjoining hex would cause a blockage or obscuring of the LOS. If one of the two hexes has no Blocking/Obscuring terrain and the other has either Blocking or Obscuring terrain, the LOS is Obscured. If both hexes contain either Obscuring or Blocking terrain, the LOS is Blocked. Otherwise, the LOS is unaffected.
Note that each type of obscuring that applies to a given LOS will provide a two-column shift left when resolving the Fire Combat (see 12.3a). For example, if a unit is firing over intervening units at a target in a Woods hex, it will apply a four-column shift left.
- Weapon Ranges:Every unit has a Weapon Type listed and each Weapon Type has assigned Ranges (see the Weapon Ranges Table). Range is measured from the firing unit to the target unit in hexes, not including the firing hex. A unit’s Range is divided into three categories: Effective, Long and Extreme. Artillery units have an additional Range category called Canister.
- Effective Range is the normal engagement range for the unit and has no additional effect on its fire.
- Long Range is the range to which a weapon can physically fire in combat conditions, but not optimally so. Units firing at more than Effective Range, and up to the listed Long Range, use only 50% of their SPs for issuing fire.
- Extreme Range is the range at which a unit’s skirmish screen would normally fire or possibly the absolute outer limit for its weapon type under ideal circumstances. Units firing at greater than Long Range and up to the listed Extreme Range use only 25% of their SPs for issuing fire. Note that we’ve added a convenient table to calculate the modified SPs.
- Canister Range is used only by Artillery units and increases their SP strength by 50% .
- Mixed Type Rebel Artillery Units: Some Confederate Artillery units have an “mx” Weapon Type. These units fire using the “Rifled Artillery” value but when issuing such fire at Long and Extreme ranges, suffer a column shift penalty.
- Multiple Firing Units: Firing is normally resolved by individual units. However, firing units stacked in the same hex and any eligible firing units in one adjacent hex may add their SP’s together into one Fire Combat total. In order to be eligible to be added together, all Infantry units must be from the same Brigade. Artillery units from two adjacent hexes may always add their SP’s together. Any halving due to range is figured from the grand total of the fire – not from each unit. If units contributing to a combined fire have various ranges and/or modifiers that apply, the entire fire uses the worst shifts and modifiers!
12.2 Target Eligibility and the Lead Unit
All enemy units in a given hex that has an LOS traced to it by a firing friendly unit(s) and is within range of that unit (s) can be fired upon and could be subject to the results of that Fire Combat. Players must determine which unit in the targeted hex is the Lead Unit. The Lead Unit uses its CR in resolving any Cohesion Test and most of the time is the only affected unit.
* If there is only one unit in the targeted hex, it will be the only unit affected and it will be the Lead Unit;
* If there are multiple units in the targeted hex, the affected unit will be the one with the largest modified SP value in the hex. If there are multiple units in the hex of the same modified SP value, the owning player can then select any one of those units as the Lead Unit.
The Lead Unit’s CR value is used in resolving the Fire Combat against the hex. When taking a Cohesion Test, normally only the Lead Unit is affected by any Depletion Test (red die) or Skedaddle Test (blue die) result. However, see the Panic (15.2b) results along with the Crisis Result (15.3) for important exceptions.
12.3 Fire Combat Procedure
The owning player of the firing unit(s) declares an eligible enemy target hex. The player finds the column on the Combat Results Table (CRT) that includes the total number of SPs firing at the target hex (drop any fractions). An eligible firer will always end up at least on the “C” column. The maximum total SPs that can fire from a hex is restricted by the hex terrain’s Stacking Limit (6.0).
- CRT Column Shifts: The player then consults the list of possible Fire Combat Column Shifts that would apply to this combat. Shifts can move to the left (<-) and to the right (->) of the initial SPs firing column, moving a number of columns in the indicated direction. Figure out all the applicable column shifts first and then apply the net shift to get the final SP column to use. Column shifts are never made to the left of column “C” or to the right of column “23+”. The column shifts are explained in detail as follows:
Each Type of Obscured LOS = shift to the left if the LOS to the target hex is Obscured (see 12.1a). Shift two columns for each type of three Obscuring situations. The first type is when firing over Blocking terrain or other units; the second type is when the target is in Blocking/Obscuring terrain; the third type is when tracing through Obscuring terrain on the same level as the firer and target.
Sharp Rifle-armed Infantry Firing = shift two columns to the right if the firing unit is an Infantry unit with a “sr” weapon type.
Sharpshooter-rated Infantry Firing = shift one column to the right if the firing unit is an Infantry unit with an “ss” rating.
Each additional Defensive Fire Issued = shift two columns to the left for each time a unit issues Defensive Fire (12.4) after the first one in a given Brigade Activation Phase. For example, the first Defensive Fire is issued normally, the second with a two shift left, the third with a four column shift left, etc. This accumulation resets at the start of the next phase.
Firer in Skirmish Order = shift one column to the right if the firing unit is in Skirmish Order (see 18.0)
Target in Skirmish Order = shift two columns to the left if the target unit is in Skirmish Order (see 18.0)
Firing Artillery is “mx” Weapon Type at Long or Extreme Ranges = shift one column to the left if the firing unit is an “mx” weapon type Artillery unit issuing fire at Long or Extreme Ranges.
Converging Fire = shift two columns to the right if the firing unit(s) qualify for Converging Fire (see 12.5)
- Resolving Fire Combat: When the final adjusted SP column is found the active player will roll all four dice simultaneously. He will read the black die first and the white die second to form a two-digit number that will range anywhere from 11 to 66. The player then looks down the SP column to find the row that contains the rolled black/white number and checks the result contained in that box. If the result is a dash (-), the fire has had no effect and Fire Combat resolution for this firing unit(s) is over. If the result is any colored box, a Cohesion Test may be required by the targeted unit(s).
- Cohesion Test Determination: Check the CR value of the Lead Unit (12.2) in the targeted hex. If the Lead Unit’s Cohesion Rating appears in a colored box, that unit is subject to a Fire Combat Cohesion Test. The color of the corresponding box dictates which Cohesion Test is required – green is Routine, yellow is Tough and deep red is Severe. If the Lead Unit’s CR does not appear in a colored box, the result is treated as a dash (-) result and thus no effect.
For example, a firing unit has 10 SPs and no column shifts and thus the firing player will refer to the “10-11” column of the CRT. He rolls the dice and gets a black/white result of “52”, which gives a result of 0| 1-3 | 4-6. Let’s say the targeted hex has a Lead Unit in it with a CR of 4. That unit will therefore have to take a Routine Fire Combat Cohesion Test.
- The player refers next to the red and blue die rolls (the same ones rolled as part of the original four-dice die roll) and consults the Cohesion Test procedures (see 15.0).
12.4 Defensive Fire
During the course of an enemy unit’s movement, each and every time such an enemy unit or stack moves (for any reason other than Advance After Close Combat) or retreats into any hex adjacent to a friendly unit’s hex, that friendly unit(s) may issue Defensive Fire immediately.
- Procedure: Defensive Fire is resolved as each separateenemy unit or stack moves adjacent. Note that this fire can take place a number of times during each enemy movement. Defensive Fire is resolved similarly to normal Fire Combat, with some exceptions. Each time after the first that a friendly unit issues Defensive Fire in the same enemy Movement Step, a two-column shift to the left applies (so even though friendly units can issue Defensive Fire without limit, their fire deteriorates with each additional fire in the same step). In addition, only units that are actually moving can be targets. An enemy unit that is forced to Retreat (only)due to its Defensive Fire Cohesion Test (if any) cannot move any further that step.
- Defensive Fire Exceptions: Units that Advance After Close Combat (see 15.8) or that are moving into an adjacent hex that already contains a friendly unit are not subject to Defensive Fire effects.
In these two cases, it is assumed that the enemy defensive fire is blocked by either the retreating enemy units or screened by the presence of the other friendly unit.
- Multiple Hex Defensive Fire: If afriendlyunit or stack moves adjacent to more than one enemy-occupied hex, each such enemy stack fires individually at the moving enemy unit(s). Such stacks may only issue fire by individual hex – they may not add their SPs together with another normally eligible hex into a larger SP total as with regular Fire Combat (see 12.1c).
12.5 Converging Fire
If a friendly hex receives enemy Fire Combat through more than one hexside, and if this fire originated from units during the same Fire Combat Step, then this fire is considered to be converging. The targeted player selects any one hexside in the targeted hex as the “primary” hexside. All firing units whose LOS pass through that hexside (or through one of its vertices) do not receive the Converging Fire beneficial column shift. All other firing enemy units whose LOS’s do not pass through that hexside receive a two-column shift to the right for each separate Fire Combat during this same activation. Resolve the benefited firing units first. If the targeted unit is retreated or Broken, the remaining firing units may change to different targets.
Picture this as the targeted enemy unit choosing its alignment in the hex. The unit determines which threat to face and thus gives up its flank to the other shooters.
12.6 Ammo Problems
If the firing player rolls “doubles” with the black and white dice (for example, a 3 3 result), the firing unit receives a “Low Ammo” marker at the conclusion of the Fire Combat resolution. If there are multiple firing units, any one unit (owning player’s choice) receives the marker. The “doubles” result is applied normally and then the marker is placed under the unit. Units that are carrying a “Low Ammo” marker have their SPs for Fire Combat (only) halved (drop fractions). Note that the marker has no effect when resolving Close Combat. A “Low Ammo” marker can be removed during Rally (16.0).
Should a unit with a “Low Ammo” marker roll another qualifying “doubles” result, the “Low Ammo” marker is flipped over to its “No Ammo” side. The unit is considered to be totally out of ammunition at this point and cannot issue any Fire Combat at all until the marker is flipped back to “Low Ammo” or removed entirely through the Rally process.
The Ammo Problems result simulates the constant challenge faced by regiments and batteries of keeping themselves well supplied with ammunition on the field of battle.
13.0 Movement
Movement is conducted during the Artillery Phase (by Artillery units only) and the Movement Step (by activated Infantry units only). However, certain Event chits also allow limited movement to be conducted at different times.
13.1 Movement Procedure
Artillery units can move during the Artillery Phase. Only currently activated Infantry units under Attack, Defend or Maneuver Orders can conduct movement during the Movement Step. Units granted movement by an Event do so when that Event chit is played. Units are moved one at a time (or one stack at a time, see 13.4) to completion and cannot end their move in an over-stacked situation (see 6.0). Units move from hex to adjacent hex and expend Movement Points (MPs) as they enter a hex. Expended MPs are deducted from the unit’s Movement Allowance. Most hexes cost 1 MP to enter, but hexes containing certain terrain features may cost more or, in the case of Road March, less.
13.2 Movement Allowance
The distance an Infantry unit can move in a given step is predicated on the Order that was issued for the Brigade during the preceding Orders Step. Units under Maneuver orders get 6 MPs, Attack Orders get 4 MPs and Defend Orders get 2 MPs. Units under a Regroup Order cannot move and thus have 0 MPs. Artillery units receive 5 MPs. Some Event chits can change a unit’s normal Movement Allowance before it conducts any movement. Consult those sections for exact effects.
13.3 Terrain Movement Costs
Each hex has a dominant terrain feature and costs one or more MPs to enter. These costs differ for Infantry and Artillery units. Refer to the Terrain Effects Chart for these terrain costs. The indicated cost is deducted from the Movement Allowance of the unit. Terrain costs are cumulative with one another. If a unit does not have sufficient MPs left over to enter a hex, it must halt its movement in its current hex. However, a unit may always move at least one hex during its Movement Step, regardless of terrain costs, unless under a Regroup Order or in violation of stacking rules.
13.4 Stack Movement
A stack of units may be moved as one entity or each individual unit can be moved separately, at the owning player’s choice. Care should be taken to watch the Stacking Limits of each new hex entered when moving a stack of units.
Note that a player may decide to move units in a stack one at a time adjacent to an enemy unit in order to screen the remainder of the units as they move up or at least degrade the enemy’s Defensive Fire with each successive move if previously moving units are retreated.
13.5 Roads
Units moving along any Road-type hexmay move at a faster rate than cross country. A unit moving from any one Road hex to a connected Road hex (i.e., the road graphic itself runs from one hex directly to the next hex) pays only 1 MP for each hex entered, regardless of the other terrain in the hex or of any hexside crossed by the unit.
- March Column Rate: A unit that is moving under Maneuver Orders or due to an Reserve Brigade Move Event chit (only) and moves along Emmitsburg Road, Taneytown Road and/or Wheatfield Road connected Pike hexes pays only ½ MP per hex entered, regardless of the other terrain in the hex or of any hexside crossed by the unit.
- Road Stacking Limit: The stacking limit when a unit is using the Road movement rate is only 8 SPs at all times – meaning that units cannot even pass through hexes with other units that would cause the total SPs in the hex to exceed 8 SPs. The moving player must use the Movement Cost of the other terrain in the hex if the stacking limit is exceeded in that hex. Singular units greater than 8 SPs may use the advantageous rates.
13.6 Defensive Fire Effects on Movement
At the instant a friendly unit moves into an unoccupied hex adjacent to an enemy unit or stack, that enemy unit or stack may immediately issue Defensive Fire Combat (12.4) at the moving unit. Temporarily halt the friendly unit’s movement and resolve the fire normally. If any result other than a Retreat is achieved (see 15.4), the friendly unit may continue to move.
Note that there are no “Zones of Control” as found in most other wargames. The Defensive Fire mechanics acts as a “living” Zone of Control.
13.7 Engagement
A unit is said to Engage an enemy unit anytime it moves adjacent to that unit. This is important under some Brigade Orders as Engagement movement could be disallowed by that Order (see 11.0).
Note that Engagement is not the same as Close Combat! Just because a unit may Engage an enemy unit – move next to it – does not necessarily mean it can also conduct a Close Combat.
13.8 Reinforcements Arrival
When a scenario calls for the arrival of reinforcements at a certain hex, place all the arriving units into that hex when the units are activated (even over stacking them if necessary). The units move normally from that initial location and if over stacked must move to create legal stacks. If the assigned hex is enemy occupied or adjacent to an enemy unit(s), the reinforcements are delayed one turn and come in on the next closest eligible hex to the originally assigned arrival hex.
14.0 Close Combat
Close Combat represents that in-close fighting which includes short-range firefights, intimidation and in rare instances, actual bayonet and hand-to-hand melee combat. This type of combat is resolved in the same manner as Fire Combat with a few exceptions:
- Cohesion Tests are resolved on the Close Combat Cohesion Test Table instead of the Fire Combat Cohesion Test Table.
- A Close Combat Cohesion Test is always required, regardless of the result achieved on the Combat Results Table. Even if a dashed result (-) is achieved, this is termed a Melee Cohesion Test (not “no effect”) and requires a reference to the Close Combat Cohesion Test Table under the “Melee” column (and may affect the attacker as well as the defender).
- There is no Ammo Problems die roll (12.6). A “doubles” black/white die roll during Close Combat has no additional effect.
14.1 Close Combat Eligibility
Only active Infantry units under an Attack Order or as allowed by an Event that are adjacent to one or more enemy units may declare a Close Combat. These are deemed to be the “attacking units”. Such an attack is completely voluntary and can be declared by any eligible units in hexes adjacent to a single enemy target hex. Artillery units may never initiate a Close Combat.
14.2 Close Combat Attack Procedure
The active player announces each Close Combat as he wishes and in any order. He tells the opposing player which units are attacking a particular defending hex. Attacking units that are adjacent to the same enemy hex may all attack that hex if they wish. An attacking unit is not obligated to attack any or all adjacent occupied hexes. Each such combat is resolved individually and in its entirety before moving on to the next Close Combat.
- The attacking player finds the column on the Combat Results Table (CRT) that includes the total number of SPs attacking from a single hex (drop fractions) to a single defending hex.All eligible units stacked in the same attacking hex must add their SPs together into one large total.
- Multiple Attacking Hexes: Note that if there is more than one attacking hex against the same defending hex, each hex attacks individually andeach such attack is resolved to conclusion before moving to the next attack against that same defending hex. Thus a single defending hex may be attacked more than once in a single phase. Note that the defender in this case will get a detrimental column shift for each additional hex attacking it.
- CRT Column Shifts: The player then consults the list of possible Close Combat Column Shifts that would apply to this combat. Shifts can move to the left (<-) and to the right (->) of the initial SPs firing column moving a number of columns in the indicated direction. Figure out all the applicable column shifts first and then apply the net shift to get the final SP column to use. Column shifts are never made to the left of column “C” or to the right of column “23+”. The column shifts are explained in detail as follows:
Attacking Hex SPs are Triple or more the Defending Hex SPs = the attacking player counts all the modified attacking SPs from the same hex and compares that total to the total modified defending SPs. Shift three columns to the right if the total number of attacking SPs outnumbers the total number of defending SPs located in the defending hex by three times or more.
Attacking Hex SPs are Double the Defending Hex SPs = as above but shift two columns to the right if the attacker SPs is two times the defender SPs.
Attacking Hex SPs are More Than the Defending Hex SPs = as above but shift one column to the right if the attacker has more SPs than the defender.
Defending Hex SPs are More Than the Attacking Hex SPs = the attacking player counts all the modified attacking SPs from the same hex and compares that total to the total modified defending SPs. Shift one column to the left if the total number of defending SPs outnumbers the total number of attacking SPs.
Defending Hex SPs are Double the Attacking Hex SPs = as above but shift two columns to the left if the defending SPs is two times the attacking SPs.
Defending Hex SPs are Triple or more the Attacking Hex SPs = as above but shift three columns to the left if the defending SPs is three times or more the attacking SPs.
Only one of the above six “odds” column shifts can be used in a given combat
Half or more Defending SPs are Artillery = shift four columns to the right for the attacker if half or more of the defending SPs are made up of Artillery units.
The best Attacking unit’s CR is higher than the best Defending unit’s CR = shift one column to the right if any attacking unit (regardless of SP size) has a higher Cohesion rating than all defending units.
Defending unit is in Devil’s Den hex = shift two columns to the left if the defending hex is Devil’s Den (hex #2719). This is not cumulative with the Rocky shift below.
Defending unit is in a Rocky or Rocky Woods hex = shift one column to the left if the defending hex is Woods or Rocky Woods terrain.
Defending unit is on Higher-elevation side of Slope hexside than attacker = shift two columns to the left if the defender is on a higher Level hex than opponent and a Slope hexside is between them.
Defending unit is on Higher-elevation side of Steep Slope hexside than attacker = shift three columns to the left if the defender is on a higher Level hex than opponent and a Steep Slope hexside is between them.
Half or more of attacking SPs are Smoothbore-musket armed = shift one column to the right if half or more of the attacking units’ SPs are made up of “sm” weapon type Infantry units.
Half or more of defending SPs are Smoothbore-musket armed = shift two columns to the left if half or more of the defending units’ SPs are made up of “sm” weapon type Infantry units.
Each additional Attacking hex = shift two columns to the right for each additional hex attacking the same defending hex after the first. For example, if a defending hex is being attacked from three hexes, the first attacking hex is unmodified (for this modifier), the second attacking hex gets a two column shift right and the third attacking hex gets a four column shift right.
Confederate “Rebel Yell!” attack = shift two columns to the right if Confederate Infantry units are attacking using the “Rebel Yell” Event chit.
- Resolving Close Combat Attacks: The method used to resolve Close Combat Attacks is identical to resolving Fire Combat (12.3b) except that the Ammo Problems rules do not apply to Close Combat Attack die rolls.
- Cohesion Test Determination: Close Combats use the same procedure as Fire Combat for determining which Cohesion Test is required, but use the Close Combat Cohesion Test portion of the table. However, it is very important to note that all Close Combat results (even a “-” result) require reference to the Close Combat Cohesion Test Table!
Note that the “flow” of the Close Combat sequencing is that an attacking unit(s) will have to move adjacent to an enemy unit during the Movement Step, thus suffering Defensive Fire. If the unit survives that fire, its tenaciousness puts the onus on the defender to now stand his ground or possibly be intimidated out of his position. So the Close Combat Cohesion Test Table is slightly weighted in favor of the attacker, though both sides can suffer Depletion and Morale Hits. Therefore, Close Combat will normally result in a more dynamic effect than Fire Combat.
15.0 Cohesion Tests
During the course of Fire Combat and Close Combat, some results will require affected units to take a Cohesion Test. Players will refer to the appropriate Cohesion Test Table – the Fire Combat Cohesion Test Table during Fire Combat and the Close Combat Cohesion Test Table during Close Combat – and cross reference both the red die and the blue die roll (separately) with the type of test being taken (Melee, Routine, Tough or Severe).
Note that this means that no further dice are rolled – you use the red and blue dice as they were rolled from the original four dice die roll!
15.1 Fire Combat Cohesion Test Procedure
The player owning the unit(s) subject to a Fire Combat Cohesion Test refer to the Fire Combat Cohesion Test Table and finds the column that corresponds with the type of Cohesion Test result achieved on the CRT for that unit (Routine, Tough or Severe). The red die is used to resolve the Depletion Test and is resolved and applied first. Then the blue die is used to resolve the Skedaddle Test and that test is resolved last.
a. Depletion Test: The first Cohesion Test is the Depletion Test, which determines the physical effect on the unit, and is determined by referring to the red die roll. Find the row that matches the die roll and reference the column that corresponds with the type of Cohesion Test required. This is the result of the Depletion Cohesion Test and is normally applied only to the targeted Lead Unit,unless otherwise indicated by the result details or due to a Crisis Result (15.3). There are a number of possible results, in order of severity:
- No Effect (-) = the test is passed and there is no physical effect on the Lead unit.
- Deplete (D) = the Lead unit suffers casualties and loses cohesion. A unit on its FR side is immediately flipped over to its BW side. A unit already on its BW side must take an immediate Break Test (see 15.7).
- Double Deplete (D D) = the Lead unit plus the next largest SP unit in the target hex each suffer a “Deplete” result as above.
b. Skedaddle Test: The second Cohesion Test is the Skedaddle Test, which determines whether the unit holds its ground and if its morale is affected, and is resolved by referring to the blue die roll. Find the row that matches the die roll and reference the column that corresponds with the type of Cohesion Test required. This is the result of the Skedaddle Test and is normally applied only to the targeted Lead Unit,unless otherwise indicated by the result details or due to a Crisis Result (15.3). There are a number of possible results, in order of severity:
- No Effect (-) = the test is passed and the Lead unit is unaffected.
- 1 hex Retreat (R1) = the Lead unit must retreat one hex.
- 2 hex Retreat (R2) = the Lead unit must retreat two hexes.
- 2 hex Retreat + Morale Hit (R2M) = the Lead unit must retreat two hexes and receives a Morale Hit.
- 2 hex Retreat + 2 Morale Hits (R2M2) = the Lead unit must retreat two hexes and receives two Morale Hits.
- 3 hex Retreat + Break Test (R3BT) = the Lead unit must retreat three hexes and then makes a Break Test (see 15.7) at the conclusion of its Retreat move.
- Panic Result (*P*) = any result so indicated means that not only does the Lead Unit apply the result normally, but so do all other units stacked in the Lead Unit’s hex whose modified CR’s are equal to or less than the Leading Unit’s unmodified CR. Simply apply the same Steadfastness Test result to each such unit separately.
For example, a Lead Unit with a CR of 2 is on its BW side and has a “Shaken” marker. It is stacked with a unit who has a CR of 3 and a “Disrupted” marker. The stack is fired upon and a result is achieved that includes a Panic Result. Both the Lead unit and the other unit are affected by the result because the Lead Unit’s unmodified CR is 2 but the other unit’s modified CR is 1 (3 less 2 for the “Disrupted” marker).
15.2 Close Combat Cohesion Test Procedure
The players refer to the Close Combat Cohesion Test Table and find the column that corresponds with the type of Cohesion Test result achieved on the CRT for that unit (Melee, Routine, Tough or Severe). The red die is used to resolve the Depletion Test and is resolved and applied first. Then the blue die is used to resolve the Skedaddle Test and that test is resolved last.
- Depletion Test: The first Cohesion Test is the Depletion Test, which determines the physical effect on the unit, and is determined by referring to the red die roll. Find the row that matches the die roll and reference the column that corresponds with the type of Cohesion Test required. This is the result of the Depletion Cohesion Test and is normally applied only to the targeted Lead Unit,unless otherwise indicated by the result details or due to a Crisis Result (15.3). There are four possible results:
- No Effect (-)= the test is passed and there is no physical effect on the Lead unit.
- Deplete (D) = the defending Lead unit suffers casualties and loses cohesion. A unit on its FR side is immediately flipped over to its BW side. A unit already on its BW side must take an immediate Break Test (see 15.7).
- Double Deplete (D D) = the defending Lead unit plus the next largest SP unit in the target hex each suffer a “Deplete” result as above.
- Triple Deplete (D D D) = the defending Lead unit plus the next two largest SP units in the target hex each suffer a “Deplete” result as above.
- Attacker Deplete (AD) = one attacking unit with the largest current modified SP value in the hex (owning player’s choice if more than one such unit) suffers casualties and loses cohesion. A unit on its FR side is immediately flipped over to its BW side. A unit already on its BW side must take an immediate Break Test (see 15.7).
- Both Deplete (BD) = the defending Lead unit suffers a D result and one attacking unit (as above) suffers an AD result.
- Skedaddle Test: The second Cohesion Test is the Skedaddle Test, which determines whether the unit holds its ground and if its morale is affected, and is resolved by referring to the blue die roll. Find the row that matches the die roll and reference the column that corresponds with the type of Cohesion Test required. This is the result of the Skedaddle Test and is normally applied only to the targeted Lead Unit,unless otherwise indicated by the result details or due to a Crisis Result (15.3). There are a number of possible results, in order of severity:
- No Effect (-) = the test is passed and the Lead unit is unaffected.
- Attacker Morale Hit (AM) = one attacking unit with the largest current modified SP value (owning player’s choice if more than one such unit) receives a Morale Hit.
- Attacker 1 hex Retreat + Morale Hit (AR1M) = one attackingunit (as above) must retreat one hex and receives a Morale Hit.
- Attacker 2 hex Retreat + Morale Hit (AR2M) = one attackingunit (as above) must retreat two hexes and receives two Morale Hits.
- Defender 1 hex Retreat (DR1) = the Lead unit must retreat one hex.
- Defender 2 hex Retreat (DR2) = the Lead unit must retreat two hexes.
- Defender 2 hex Retreat + Morale Hit (DR2M) = the Lead unit must retreat two hexes and receives a Morale Hit.
- Defender 2 hex Retreat + 2 Morale Hits (DR2M2) = the Lead unit must retreat two hexes and receives two Morale Hits.
- Defender 3 hex Retreat + Break Test (DR3BT) = the Lead unit must retreat three hexes and then makes a Break Test (see 15.7) at the conclusion of its retreat move.
- Panic Result (*P*) = any result so indicated means that not only does the Lead Unit apply the result normally, but so do all other units stacked in the Lead Unit’s hex whose modified CR’s are equal to or less than the Leading Unit’s unmodified CR. Simply apply the same Steadfastness Test result to each such unit separately.
Depletion Cohesion measures the physical loss of effective manpower or fighting ability due to those killed-in-action, wounded, missing-in-action, skulking, or due to officer losses.
Skedaddle Cohesion is the unit’s psychological reaction to an enemy threat. It determines if the unit conducts retrograde movement in order to get away from the enemy threat and find a safer position. It also determines if the units suffers any morale degradation.
In both cases, a traumatic and critical loss of cohesion can cause the unit to break, removing it from the game for the time being as an effective fighting force.
15.3 Crisis Result
If the red and blue die roll is “doubles” (for example, 4 and 4) on any Cohesion Test (Fire Combat or Close Combat), this is termed a Crisis Result. When rolled, not only is the Lead Unit affected by theresult, but one adjacent friendly unit whose modified CR is less than or equal to the Lead Unit’s unmodified CR (i.e., as printed on the Lead Unit’s unit counter) suffers the same result. This is determined at the start of the combat, before any results are applied. Simply apply the rolled result separately to that adjacent unit after the Lead Unit. Adjacent units with a higher modified CR than the Lead Unit’s unmodified CR are unaffected by this result. If more than one adjacent unit qualifies, the opposing player selects the unit that will be affected.
Example: a stack of three defending units, containing a Lead Unit with a printed CR of 3, are in a Close Combat and subject to a Routine Cohesion Test. Adjacent to that stack is a friendly Disrupted unit with a CR of 4.
If 6 and 6 are rolled on the red and blue dice, this is a D D and a DR2M (*P*) result respectively. Because of the Panic Result, each of the three defending units is retreated two hexes and each receives one Morale Hit. Because of the Crisis Result (double 6’s), the adjacent friendly unit would be Depleted and also have to retreat two hexes and receive a Morale Hit, then taking a Break Test because it is already Disrupted. Note that the adjacent friendly unit’s modified CR is 2, which is less than the Lead Units unmodified CR of 3.
15.4 Retreat Movement
If the Cohesion test result dictates a Retreat, the affected unit must be immediately retreated. Retreat movement is made in total hexes – not MP’s! The terrain MP cost of hexes retreated through is ignored. The unit must retreat the entire distance mandated by the test result. Retreats are conducted by the owning player, one unit at a time if a stack is affected, and follow this order of priority:
- The retreating unit must increase the distance between itself and the enemy unit(s) that caused the test;
- The unit should avoid moving through a friendly unit that would cause over stacking. If it must do so, it cannot end the retreat there – it will continue to retreat until it is not over stacked;
- The unit must decrease the distance to its side of the map. The Union player must retreat towards the North or East map edge and the Confederate player towards the West map edge. If it reaches the map edge and has not yet completed its retreat, place the unit in Broken Box 1.
- A retreating unit may not pass through an enemy-occupied hex. If it cannot retreat without doing so, it is placed in the “Broken 3” box on the Broken Track.
Note that if a retreating unit moves adjacent to any enemy units, those enemy units may issue eligible Defensive Fire (12.4). Any Depletion and/or Retreat result received is applied normally, with a Retreat result being added to the total current Retreat distance.
15.5 Unit Support
Units that have friendly units in the immediate vicinity can derive morale and physical support from those units, boosting their own ability to withstand enemy fire or assault. In all cases, Unit Support is judged at the time of the Cohesion Test.
a. Unit Support Qualification: the definition of what constitutes Support depends on the type of unit involved, as follows:
- Infantry Support: An Infantry unit is considered to be Supported if there is at least one friendly Infantry unit from the same Brigadeas the testing unit stacked with it or in an adjacent hex.
- Artillery Support: An Artillery unit is considered to be Supported only when stacked with any friendly Infantry unit.
b. Unit Support Effect: If a testing unit is deemed to be Supported, it will increase its CR by one (+1) for this Cohesion Test (only).
15.6 Morale Hits
If the Cohesion Test result indicates a Morale Hit (M) is inflicted, the testing unit applies this result as follows:
- Unit does not have a Morale Hit marker = the unit receives a “Shaken” marker and its SP and CR values are each reduced by one (-1).
- Unit already has a “Shaken” marker = the unit’s current marker is flipped over to its “Disrupted” side and the unit’s SP and CR values are each reduced by two (-2).
- Unit already has a “Disrupted” marker = the unit keeps its “Disrupted” marker and must make an immediate Break Test (15.7).
15.7 Break Test
Certain conditions call for units in extreme distress to make a Break Test. There are three such conditions that are generated from the Cohesion Test Table:
- Any unit receiving a “Break Test (BT)” result;
- A unit on its BW side receiving a “Deplete (D)” result;
- A unit with a “Disrupted” marker receiving a “Morale Hit (M)” result.
When resolving a Break Test, the owning player rolls one die (of any color) and compares it tothe testing unit’s unmodified CR (i.e., as printed on the unit counter). Compare the die roll to the unit’s CR and determine if the roll is 50% less than, just less than, equal to or greater than the unit’s CR. Find the column on the Break Test Table that corresponds to that comparison and apply the indicated result to the testing unit as follows:
- Die Roll < 50% CR: the testing unit is unaffected.
- Die Roll < CR: the testing unit is given a “Shaken” marker. If it is already Shaken, then flip the marker to its “Disrupted” side. If it’s already Disrupted, there is no additional effect.
- Die Roll = CR: place the unit into the “Broken 1” box on the Broken Track on its BW side. Artillery units are instead permanently eliminated from the game.
- Die Roll > CR: place the unit into the “Broken 2” box on the Broken Track on its BW side. Artillery units are instead permanently eliminated from the game.
- Die Roll > 2x CR: place the unit into the “Broken 3” box on the Broken Track on its BW side. Artillery units are instead permanently eliminated from the game. This result is also automatically applied to a testing unit with a CR of 0.
Example: If the testing unit has a CR of 3, a die roll of 1 is result “i”; a die roll of 2 is result “ii”; a die roll of 3 is result “iii”; die rolls of 4 and 5are result “iv” and a die roll of 6 is result “v”.
15.8 Advance After Close Combat
In all cases where an enemy unit(s) vacates its hex after taking a Cohesion Test (whether by Breaking or Retreating) caused by a Close Combat, the surviving friendly unit(s) may occupy the opponent’s previously-occupied empty hex if it wishes to, up to the new hex’s stacking limit. Only units that actually took part in the original combat may advance into the hex. This advance is allowed to both attacking and defending units. Advancing units are not subject to Defensive Fire when they make the advancing move. If the defeated enemy retreated two or more hexes or was Broken (for any reason), the victorious attacking units may advance two hexes. The first hex advanced must be the hex previously occupied by the defender. The second hex can be any legal hex adjacent to the defender’s former position. Again, no Defensive Fire is allowed against advancing units.
15.9 The Broken Track
Infantry units in Hammerin’ Sickles do not get permanently eliminated from the game. Units in the Civil War were not “wiped out”, killed to the last man. Instead, they would mentally and/or physically break and dissolve into ineffective mobs. These units are then deemed to be “ineffective” and thus have no role on the battlefield. They are placed on the Broken Track into one of several boxes, each of which corresponds to the unit’s level of rout.
Artillery units are never placed on the Broken Track and instead are eliminated from play.
It is assumed that an artillery battery that totally breaks its cohesion will lose too much of its equipment, horses or trained artillerists to be able to function again in the same day (if ever).
- The Broken Boxes: Each Broken Box is labeled with a number or “Available”. The highest Broken Box is “3” and represents the greatest degree of disorganization and demoralization. The lowest Broken Box is “Available”. Units are placed in the numbered box per the Cohesion Test result achieved. Units on the Broken Track are always on their BW side.
- Broken Track Adjustments: During the End Turn Phase, all units in a given Box are moved down the track to the next lower-numbered Box or to the “Available” Box (from the “1” Box). Units in the “Available” Box must remain in that Box for the remainder of the game unless Recovered (16.3b) back onto the map.
- Rally Eligibility: Units located in the “Available” Box are eligible to be Recovered back to the map using the Rally procedure (see 16.0). Recovered units are immediately removed from the “Available” Broken Box and placed on the map in an eligible location on their BW side. Note that units can remain on the Broken Track indefinitely.
Close Combat Example: The Union player has cobbled together a patchwork defense by stacking the 1st US Sharpshooters (3SP / CR4), 6th NJ (4SP / CR2) and the Battleworn 63rd PA (2SP / CR1) into one hex. Adjacent to this Union stack is a stack of Confederate units containing the Phillip’s Legion (5CP / CR3) and Cobb’s Legion (4SP / CR3). The Confederate player activates Wofford’s Brigade of McLaws Division with an Attack Order and declares a Close Combat attack during the Close Combat Step. There are 9 SPs attacking 9 SPs and no other column shifts apply. The Union player identifies his Lead Unit as the 6th NJ since it is the largest unit in the hex. The Rebel player rolls four dice and gets black “6”, white “2”, red “3” and blue “1”. Looking down the “8-9” column to the “62” row, the result is 0-1 | 2-4 | 5-6. This translates to a Tough Test for the 6th NJ (with a CR of 2).
First, the Depletion Test (red die) is applied with a die roll of “3”. This is a BD result, so the 6th NJ is flipped to its BW side, as is the attacking Confederate Phillip’s Legion unit, since it is the largest SP attacking Rebel unit.
Next, the Skedaddle Test (blue die) is applied with a die roll of “1”. This is an AM result, so the attacking Confederate Cobb’s Legion unit (now the largest SP unit in its hex) suffers a Morale Hit and is given a “Shaken” marker.
16.0 Rally
In order to restore order to your troops and get damaged units back into the fight, players must attempt to Rally those units. This activity may only be attempted during the active Brigade’s Rally Step for units under certain orders and in certain conditions.
16.1 Rally Eligibility
In order to attempt a Rally, units must be:
- Under Regroup or Defend Orders or acting under an Event that allows Rally;
- At least three hexes away from any enemy unit (not counting the enemy unit’s hex but counting the Rallying unit’s hex) in order to remove a Morale Hit or Recover. Unitsin the “Available” Box on the Broken Track automatically qualify;
- In any hex (regardless of enemy presence) if only removing one or more Ammo Problem results;
- On its BW side and/or have a “Shaken”, “Disrupted”, “Low Ammo” or “No Ammo” marker.
An Artillery unit may be Rallied by any Brigade as long as the Artillery unit is within two hexes of any unit of that Brigade. This may occur more than once in a Game Turn if the Artillery unit is within eligibility of multiple Brigades. However, once Broken an Artillery unit can no longer be Rallied and is out of the game.
16.2 Rally Procedure
Once eligible units have been identified, the owning player consults the Rally Table located on his Player Aid Card. He rolls two dice, adds them together and finds the table that corresponds to the Brigade’s Order. The results will indicate what the player is allowed to do with Rally-eligible units of that Brigade.
16.3 Applying Rally Results
The Rally Table result will allow a number of Morale Hits to be removed and, in some cases, allows units to be Recovered. These situations are handled as follows:
- Remove MH/AP: This resultallows the removal of one Morale Hit or Ammo Problem result. This means a unit can discard its “Shaken” or “Low Ammo” marker or flip its “Disrupted” or “No Ammo” marker over to its other side. The result has a number which indicates how many MH and/or AP results can be removed from one or more eligible units. A unit can even have multiple removals applied to it. For example, if granted two removals a unit with a “Disrupted” marker could remove the marker entirely. The value of the result can be used in any combination the player wishes. Note that a unit that wishes to remove an AP result can be any distance from an enemy unit; in order to remove an MH result the unit must be at least three hexes from an enemy unit.
- Recover Unit: This resultallows a BW unit on the map to flip back to its FR side or allows a unit in the “Available” Box to be placed back on the map on its BW side. A unit re-entering the map from the “Available” Box is placed on the map on its BW side on any hex that is at least three hexes from any enemy unit and within three hexes of any other unit from its Brigade. If there is no other unit from its Brigade on the map, then it must be within three hexes of another unit from its Division. If this is not possible, then any friendly unit will qualify. If no such hex exists on the map, then the unit may not Recover to the map and must wait until an eligible hex is available. It can then be placed during a future Brigade activation during the Rally Step. Unlike removing MH results, a single unit may not have multiple Recovery actions applied to it in the same phase. Therefore, a unit in the “Available” Box may not be placed onto the map and then also flipped to its FR side with a second Recovery.
A Recovering unit that then exceeds the stacking limit of the hex it’s in (by flipping over to a stronger SP value) must immediately displace to an adjacent hex that is further away from the nearest enemy unit and does not exceed the stacking limit in its new hex.
17.0 End Turn Procedures
When all the chits in the draw cup have been drawn (and acted upon, if eligible) and none remain, players proceed to the End Turn Phase to conduct housekeeping, check on special procedures and update the game’s progress.
17.1 Reset Brigade Activation Status Markers
Those Brigade Activation Status markers on the “Activated” side are flipped back over to their “Available” (flagged) side. In addition, any Brigades that will be entering play next Game Turn have their Brigade Activation Status markers added to the existing group of markers for use next turn.
17.2 Update Broken Track
Move all units on the Broken Track to the next lower-numbered box, except units located in the “Available” box, which remain there.
17.3 Army of the Potomac Reinforcements and Confederate Division Availability
If the Union player has committed any Command Event Chits to the Army of the Potomac Reinforcements Table during the turn, he may roll a die, possibly modified, and consults the table for any effect on the selected Division Activation Chit (10.3b-ii).
Then if the Confederate player has committed any Command Event Chits to the Confederate Division Availability Table during the turn, he may roll a die, possibly modified, and consults the table for any effect on the selected Division Activation Chit (10.3b-i).
17.4 Killed CIC and Division Activation Chits
Any chits that were “Killed” in previous turns and are now available to re-enter the game are placed back into the draw cup (make sure that you are using the “Casualty” version of the counter).
17.5 Prepare for Next Turn
Both players gather all ten of their Event chits together to get ready for next turn’s Command Decision Phase (including any assigned as Common Events to the Army of the Potomac Reinforcements and Confederate Attack Coordination Tracks). Then move the Game Turn marker up to the next space of the Game Turn Track. If this is the last turn of the scenario, count the number of Victory Points for each side (see 19.0) and determine the game’s winner.
18.0 Skirmish Order
Certain units begin some scenarios in Skirmish Order (SO), meaning that they are deployed in an open, spread out formation. This formation conveys certain benefits and penalties. These units are designated so by placing a “Skirmish Order” marker on them. Units may also enter SO during the course of the game. Only Infantry units may enter SO.
18.1 Skirmish Order Movement
Units in SO move normally but pay only 1 MP for each hex entered, regardless of the hex’s actual MP cost. SO units must withdraw one hex if an enemy unit enters an adjacent hex (see Skirmish Screen below). This is a free move and must be conducted with each separate incident of enemy movement of any kind and at any point in the turn. For a unit to deploy into SO, it must remain stationary, not be stacked with another unit and spend its entire Movement Allowance and then place a “Skirmish Order” marker on the unit. In order to leave Skirmish Order, an SO unit pays 2 MP during the Movement Step and removes the marker.
18.2 Skirmish Screen Effects
Enemy units that move adjacent to an SO unit must pay one extra MP (+1 MP) to enter that hex (this simulates the effects of harassing fire). After the move, the SO unit must then withdraw one hex away from the moving enemy unit. It cannot move adjacent to another enemy unit. If it cannot withdraw one hex and meet those conditions, then it must withdraw two or more hexes until it reaches a legal hex. This procedure is conducted with each individual adjacent movement by an enemy unit, even if the SO unit is stacked with other non-SO units and even due to enemy Advance After Combat or Retreat movement. In these later two cases, however, obviously no MP penalty is applied to the moving enemy.
18.3 Skirmish Order Fire Combat Effects
SO units may issue normal Fire Combat and be the targets of enemy Fire Combat. However, note the special column shifts that are applied in both instances.
18.3 Skirmish Order Close Combat
Units in SO never engage in Close Combat. They may not conduct a Close Combat attack and must always move away from an advancing enemy unit.
19.0 Victory Determination
Victory conditions are determined differently for each individual scenario. Normally, the Confederate player accumulates Victory Points (VPs) for controlling various hexes on the map (always either a farm, a dominant height or a road exit). VPs can be deducted from this total if the Union player elects not to activate eligible formations (to represent keeping the units fresh for the battle’s third day). Consult the Scenario instructions for full details on victory conditions.
20.0 Event Chit Descriptions
Each Event chit has specific instructions as to how and when it can be used. Players should study this section to familiarize themselves with these chits as their proper use can be an important ingredient to winning or losing the game.
CONFEDERATE EVENTS
Army of Northern Virginia (ANV) Veterans: The Confederate player may hold this chit and play it after any Cohesion Test result is determined. It will automatically produce a “No Effect” result for either the Depletion or Steadfastness Cohesion Test (just one, not both), regardless of the actual die roll.
Rebel Yell!: The Confederate player may play this chit upon being drawn or hold it to be played later, at the start of the Chit Draw Phase. The player may select any one Confederate-occupied hex and move every Confederate unit there up to one hex so as to be adjacent to a Union-occupied hex (only). The Confederate units are subject to normal Defensive Fire. The selected Confederate units (only), even if they did not actually move, must then conduct an immediate Close Combat against one adjacent enemy hex. This Close Combat attack receives a “2->” shift.
UNION EVENTS
Heroic Stand:The Union player may hold this chit and play it whenever at least one of his units is the target of an enemy Fire Combat or defending in a Close Combat. The chit is played after the combat is resolved and will automatically produce a “No Effect” result for the affected unit’s Skedaddle Cohesion Test (only).
Rebel Fatigue: The Union player may hold this chit and play it immediately after the Confederate player announces which Brigade is being activated and has been assigned its Order (and has played any “Quick March!” Event chit). Once the total Movement Allowance is determined, he may play this chit to halve the Movement Allowance (rounded up) for that Brigade. In addition, the Confederate player rolls one die for “stragglers”. A die roll of 1 or 2 means the Confederate player must Deplete any one unit in that Brigade (his choice) before movement is conducted. This is in addition to any “stragglers” die rolls required by a “Quick March!” Event chit also played.
Union Logistics: The Union player must play this chit immediately upon it being drawn. He may select any one Union unit on the map and then remove one Ammo Problem effect from the unit.
SHARED EVENT CHITS
Brigade Reserve Movement: This chit must be played immediately upon being drawn (if the owning player wishes to use it). Select any one friendly Brigade currently on the map. The player may move all units of that Brigade, which are adjacent to one another, up to 4 MPs (or one hex). They may use Road March rate but may not Engage an enemy unit. All units selected must be adjacent to another unit of the same Brigade before moving. They may move in any direction they wish (they do not have to stay together). This chit may be used to move just one unit.
Command Confusion:The owning player may hold this chit and play it immediately after his opponent selects a Brigade Order for his active Brigade (at any time). The chit-playing player then rolls two dice, adds them together and finds the total on the following table:
2 = Active Brigade is given any Order by the opposing player;
3 – 4 = Active Brigade must be given a Defend Order;
5 – 6 = Active Brigade must be given a Regroup Order;
7 = Active Brigade is given any Order by the opposing player;
8 – 9 = Active Brigade must be given a Maneuver Order;
10 – 11 = Active Brigade must be given an Attack Order;
12 = Active Brigade is given any Order by the opposing player.
The activated Brigade must abide by the rolled result for this phase.
Confident!: The owning player may hold this chit and play it on any one hex of friendly units that just retreated and/or broke at least one enemy unit during a Close Combat (and after it Advanced After Combat, if applicable). That friendly stack may immediately: a) Remove 1 Morale Hit (if it has any) and issue eligible Fire Combat or; b) Remove 1 Morale Hit and conduct another eligible Close Combat or; c) Recover any one unit in the stack and flip it from its BW side to its FR side.
Firefight: The owning player may play this chit upon being drawn or hold it to be played later, at the start of the Chit Draw Phase. Playing this chit allows all units in any one friendly-occupied hex to issue Fire Combat immediately. If an enemy unit(s) remains in the targeted hex, it may immediately issue return fire and resolves Fire Combat back at the firing hex (only).
Momentum: The owning player may hold this chit and play it immediately before making the die roll to determine if a Division Activation chit is placed back in the cup or discarded. First, temporarily increase the Command Rating of the Division Activation chit by “+1”. Then make the normal die roll to determine its status. If the Division Activation chit is discarded, then this Event chit is also discarded with no effect. However, if the Division Activation chit passes its die roll, then this Event chit allows the Division Activation chit to remain in play (do not place it back in the cup). Instead, it is treated as if it was just drawn again and can therefore activate another Brigade immediately. The chit is then discarded.
Quick March!: The owning player may hold this chit and play it immediately before any active Brigade’s Movement Step or the use of a Brigade Reserve Movement Event chit. The player has two choices: a) Increase the Brigade’s normal Movement Allowance by 50% (rounded up) and then roll one die for “stragglers” or; b) Double the Brigade’s normal Movement Allowance and then roll two dice for “stragglers”. At the start of the Brigade’s Movement Step, before any movement is conducted, the player rolls for “stragglers”, with each die roll of 1 or 2 resulting in the Depletion of any one unit in that Brigade (owning player’s choice).
Rally ‘Round the Flag: This chit must be played immediately upon being drawn (if the owning player wishes to use it). The owning player may immediately remove one Morale Hit from any friendly unit on the map, regardless of its location.
As Sickles’ III Corps troops marched on their way to the Peach Orchard and past the left flank of II Corps, General Hancock observed: “Gentlemen that is a splendid advance. But, those troops will be coming back very soon”.
REFERENCES
Battle Tactics of the Civil War – Paddy Griffith
A Field Guide to Gettysburg – Reardon & Vossler
The Maps of Gettysburg – Bradley Gottfried
Brigades of Gettysburg – Bradley Gottfried
Gettysburg’s Bloody Wheatfield – Jay Jorgensen
Gettysburg: The Second Day – Harry Pfanz
Order of Battle: Gettysburg July 2 1863 – James Arnold and Roberta Wiener
CREDITS
Game Research and Design: Hermann Luttmann
Game Development: Fred Manzo
Production:
Game Map:
Game Counters:
Play Testing: Paul Fish, Don Allen